REVIEW 006 // BARACUDA MANTA // GAMING MOUSE ON A BUDGET
//SEPTEMBER 2026
Gaming mice can get expensive very quickly. But what happens when you go completely in the opposite direction?
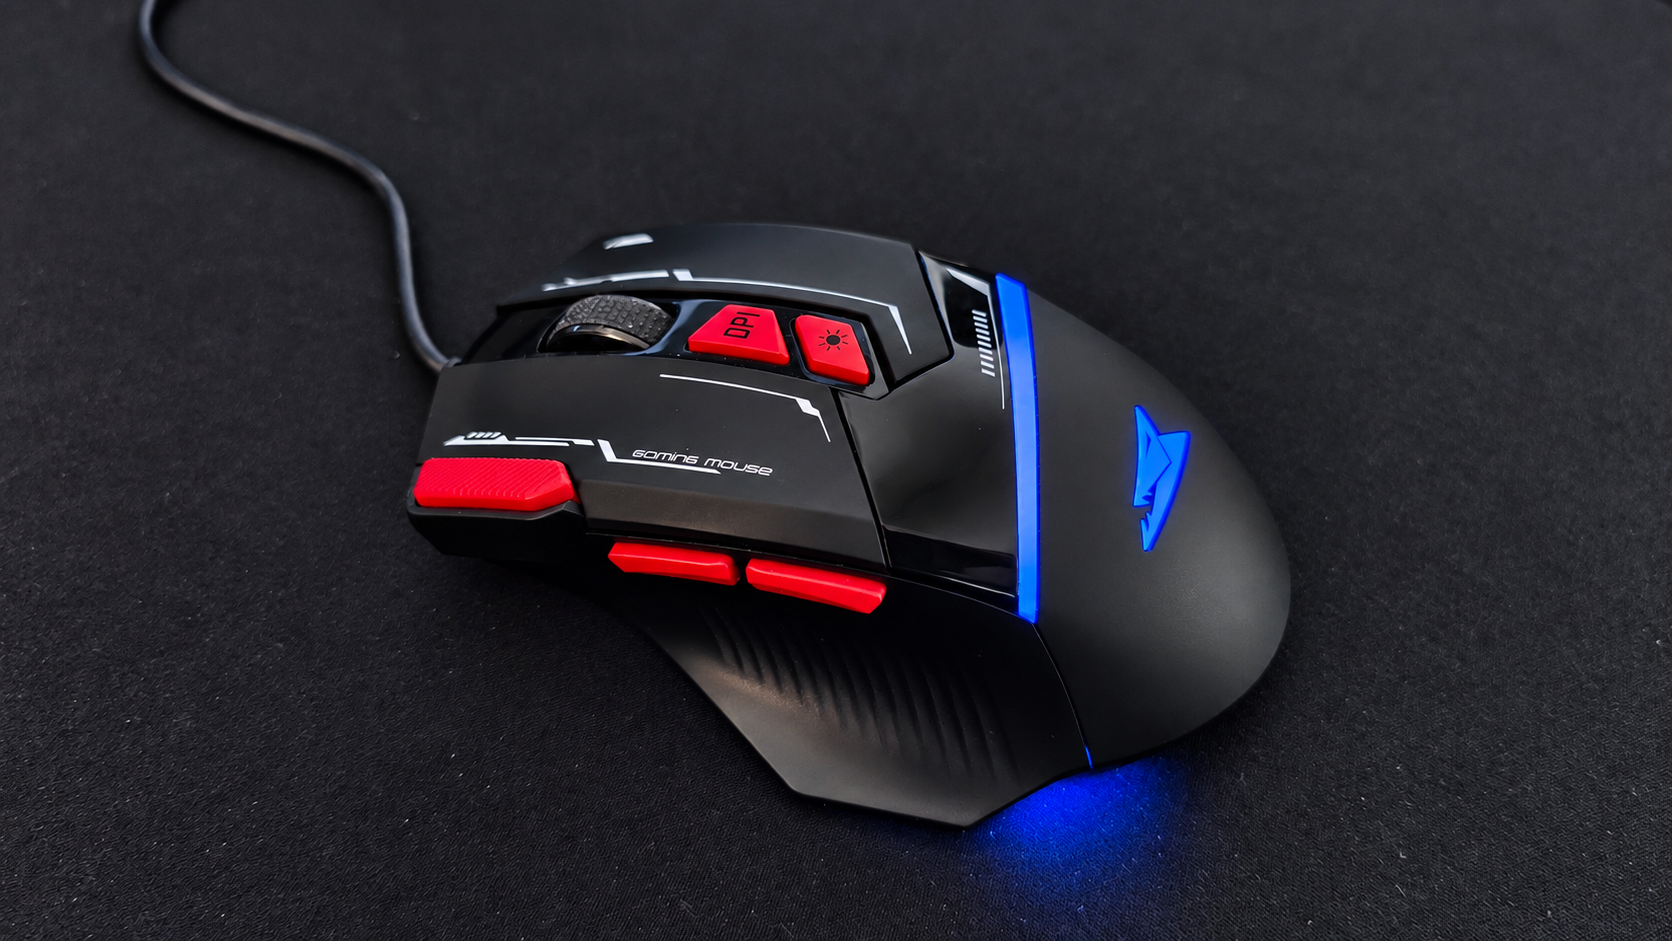
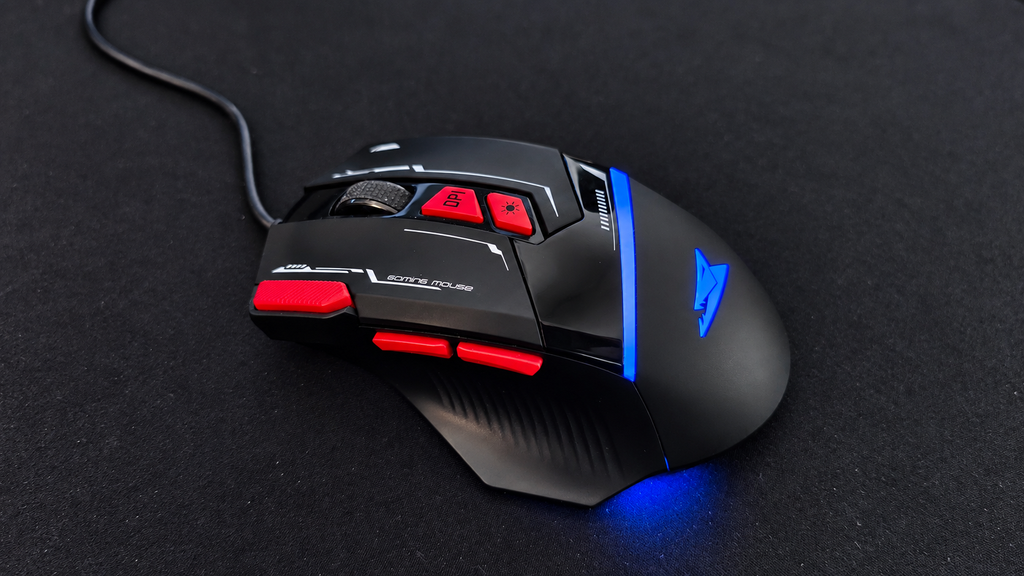
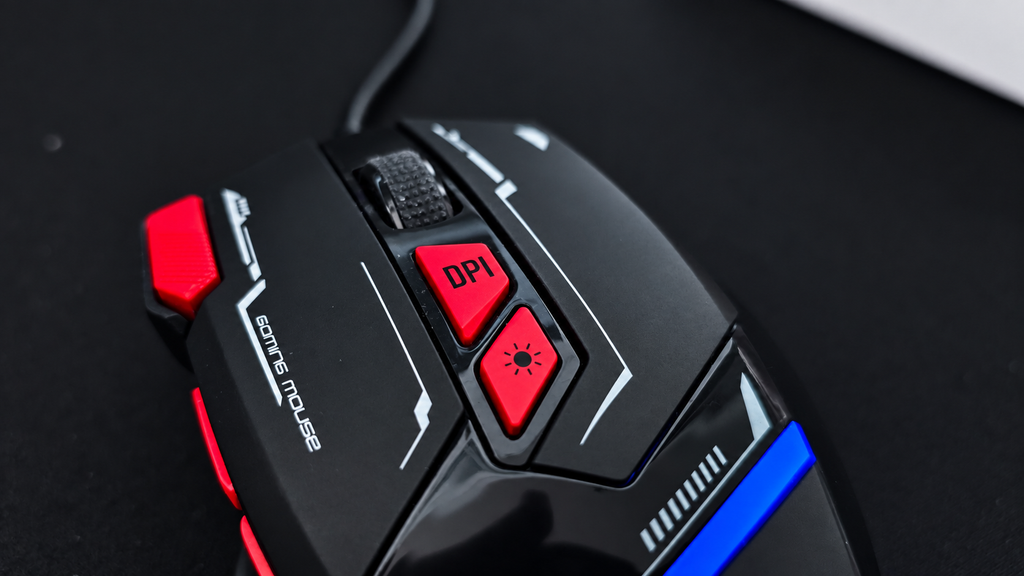
The Baracuda Manta is a wired RGB gaming mouse that sits firmly in the budget category, but on paper it comes with features normally associated with much more expensive gaming mice. You get an optical sensor capable of up to 12,800 DPI, 8 buttons, 1000 Hz polling, RGB lighting and software support, all packed into an 81 g mouse.
I’ve now been using the Manta for around three weeks, not only for gaming but also as my everyday mouse for work and writing. And surprisingly, I actually like it.
01 // THE MANTA
The Manta is very clearly trying to be a gaming mouse. It has the aggressive shape, plenty of buttons, adjustable DPI and, of course, a healthy amount of RGB lighting. But I’ve actually ended up using it much more as an everyday mouse than purely as a gaming peripheral.
That’s probably the more interesting test anyway.
It’s easy to make a cheap mouse look good on a specification sheet. The question is whether you still want to use it after a few weeks.
02 // SPECS
For something this inexpensive, the specification list is surprisingly long.
Optical Instant 825 sensor
Up to 12,800 DPI
8 buttons
1000 Hz polling rate
Up to 20 G acceleration
RGB lighting with 16.8 million colours
Software support
USB 2.0 wired connection
1.5 m cable
81 g
126 × 82 × 42 mm
Rated for more than 5 million clicks
Windows and macOS support
As always, numbers don’t tell you everything.
After three weeks, the shape and button placement have mattered much more to me than the maximum DPI number.
03 // UNBOXING
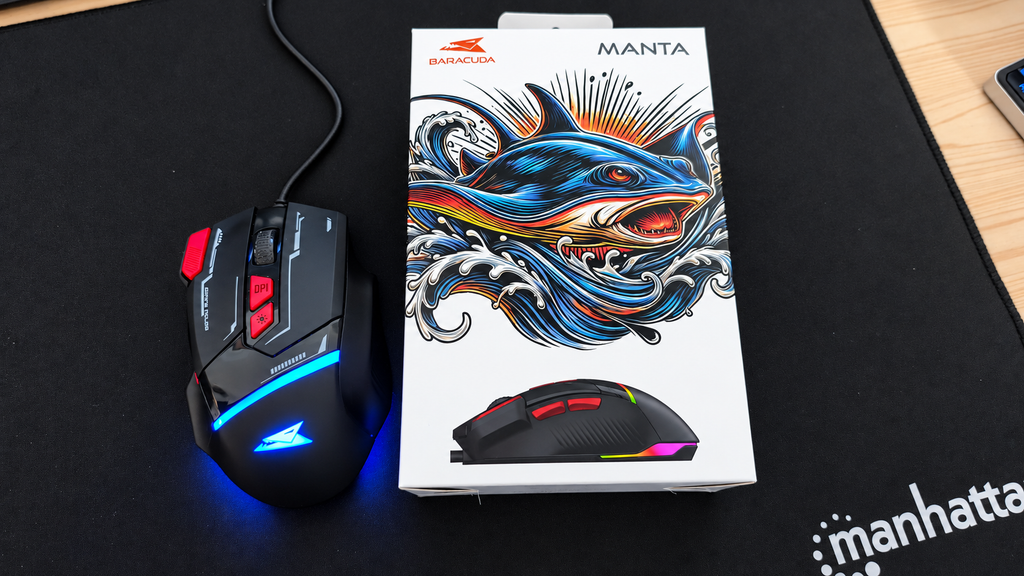
The packaging is straightforward. Take the mouse out, connect the USB cable and you’re basically ready to go. That’s still one thing I like about simple wired peripherals. There is no battery to charge. No Bluetooth pairing. No wireless receiver to lose.
Plug it in, the RGB comes alive, and start using it.
04 // DESIGN & COMFORT
This is probably one of the most important things to know about the Manta:
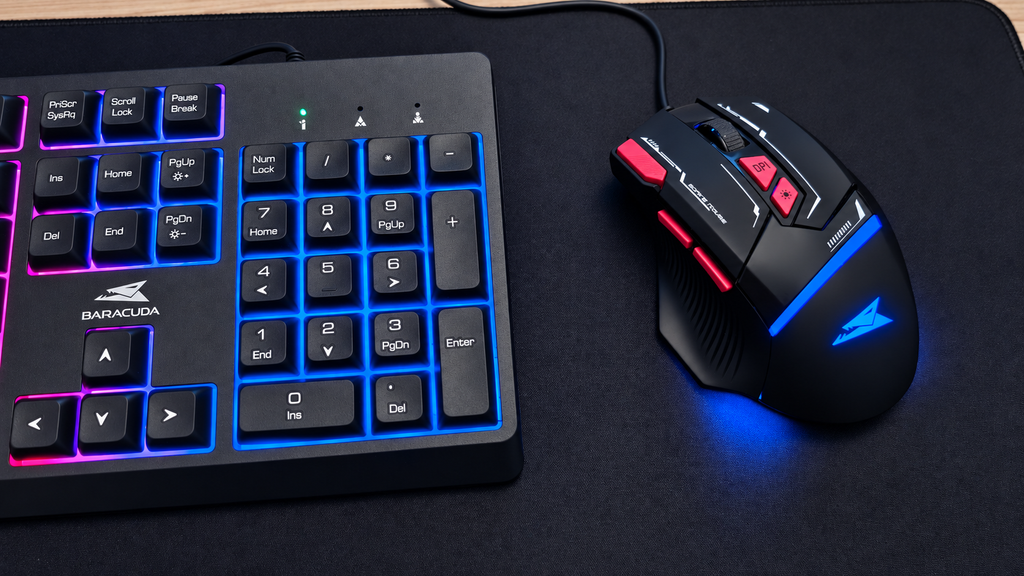
It’s quite a large mouse. For me, that works well. I find the shape comfortable and after several weeks of use I haven’t had any problems using it for longer periods. But if you have smaller hands, I could definitely see the Manta feeling too big.
So this isn’t necessarily a mouse I would recommend buying purely from the specification sheet without considering its size. The overall design is also something I genuinely like. It has that unmistakable gaming-mouse appearance without going completely overboard.
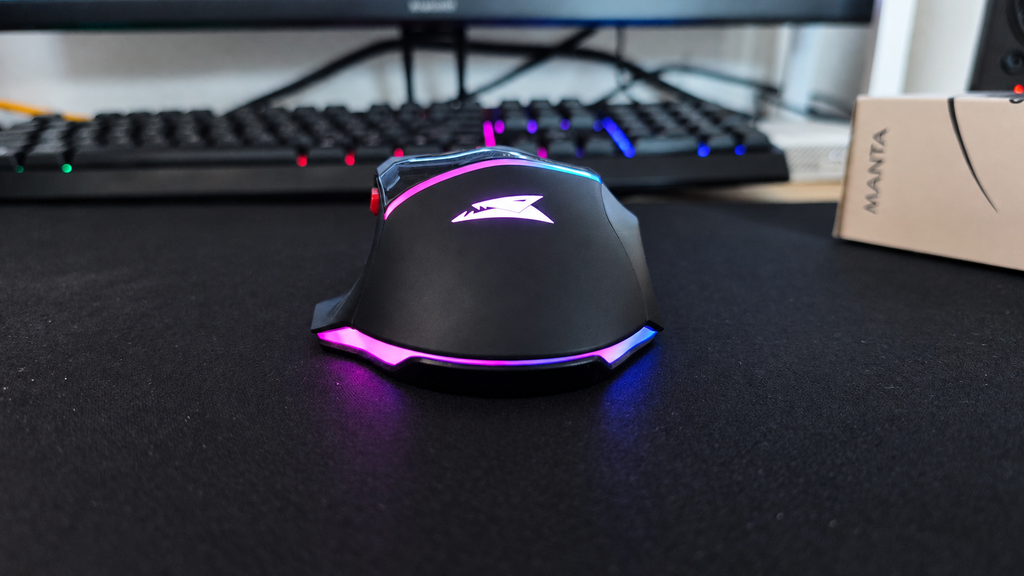
And then there is the RGB. The lighting is easily one of my favourite parts of the Manta. It looks much better in person than I expected from such an inexpensive mouse and gives it considerably more personality when sitting on the desk.
The cable is also perfectly acceptable for the price. It doesn’t feel especially premium and it isn’t something I would point to as a standout feature, but it also hasn’t given me any problems during normal use.
In other words: it’s fine, but nothing to brag about.
05 // WEIGHT
At around 81 grams, the Manta isn’t particularly heavy. At the same time, I wouldn’t describe it as an ultra-light gaming mouse either. It sits somewhere in the middle.For normal desktop use and the kind of games I play, that has been perfectly fine.
If you’re heavily into competitive multiplayer games and specifically want the lightest mouse possible, you’ll probably be looking at a completely different category of product anyway.
For my use, the weight hasn’t bothered me.
06 // BUTTONS
This is where the Manta has actually surprised me the most.
The two side buttons are positioned well and I’ve ended up using them a lot while working. They’re easy to reach without having to awkwardly change my grip, and after a few weeks they’ve become part of my normal workflow. There’s also an additional button next to the main left mouse button. I initially thought of it mostly as another gaming feature, but I’ve found it surprisingly useful when I’m doing a lot of text work and repeatedly working with copied text.
These extra buttons have probably been more useful to me while working than while gaming.
The DPI button is also conveniently positioned and lets you quickly switch sensitivity. If you play a lot of competitive or multiplayer games, being able to change DPI quickly could be genuinely useful. For me personally, it isn’t particularly important because I don’t really play multiplayer games.
Still, it’s nice to have.
07 // CLICKS & SCROLL WHEEL
The buttons themselves feel good enough for everyday use.
After several weeks I haven’t noticed anything that would make me want to stop using the mouse. The scroll wheel, on the other hand, is probably one of the least exciting parts of the Manta. It’s fine. It works. But that’s about it.
I would describe it as average rather than particularly good or bad.
Considering the price of the mouse, though, that’s not exactly a major complaint.
08 // SOFTWARE
Baracuda also provides software for the Manta, which should allow additional configuration of the mouse. Unfortunately, this is one part I haven’t been able to properly test yet. On most of my LAB computers I run Linux, but software is only supported for Windows.
So I’m not going to judge the software without any test,beacuse for this review, I’ve mainly been using the mouse as it works out of the box.
And honestly, even without touching the software, I’ve been perfectly happy using it.
09 // THREE WEEKS LATER
This is where the Manta has done better than I originally expected. I’ve been using it for roughly three weeks now for normal desktop work, writing and some gaming, and I haven’t felt the need to replace it. That’s probably one of the best things I can say about a cheap peripheral.
The large shape works well for my hands. The side buttons are genuinely useful. The extra button has found its place in my normal work routine. The RGB looks great. The cable is good enough for normal use. And despite clearly being a budget product, nothing about it has made me want to immediately go back to another mouse.
There are better mice. There are lighter mice. There are certainly more premium mice.
But the Manta has been completely usable as an everyday mouse.
10 // VERDICT
After around three weeks with the Baracuda Manta, I like it more than I expected to. Its biggest consideration is probably its size. If you have larger hands, the shape can be very comfortable. If your hands are smaller, I would be a little more careful because this is definitely not a compact mouse.
The RGB looks great, the button placement is genuinely useful and the mouse has worked just as well for everyday productivity as it has for casual gaming. The scroll wheel is average, the cable is nothing special and I haven’t been able to test the software yet.
But that’s also missing the point. This is a very inexpensive gaming mouse. And after three weeks, I’m still happily using it every day.
For a budget peripheral, that’s a pretty successful result.
REVIEW 006 // TP-LINK TL-WN725N // NANO USB WI-FI ADAPTER
SEPTEMBER 2026
A tiny and inexpensive USB Wi-Fi adapter turned out to be the simplest solution to the wireless problems on my ThinkPad SL510. Here is the unboxing, Linux setup, size comparison and real-world performance test.
01 // WHY I NEEDED A USB WI-FI DONGLE
While experimenting with Linux on my ThinkPad SL510, I encountered a frustrating problem with its internal Wi-Fi adapter.
The system could see the wireless hardware, but connecting to my network was unreliable. At one point, NetworkManager repeatedly reported that the Wi-Fi network could not be found, even when the laptop was close to the router and other devices were connected normally.
I experimented with different Linux installations and possible solutions, but I ultimately wanted something simple that would allow me to continue using the laptop instead of spending more time fighting its old internal wireless hardware.
The answer was a small USB Wi-Fi dongle.
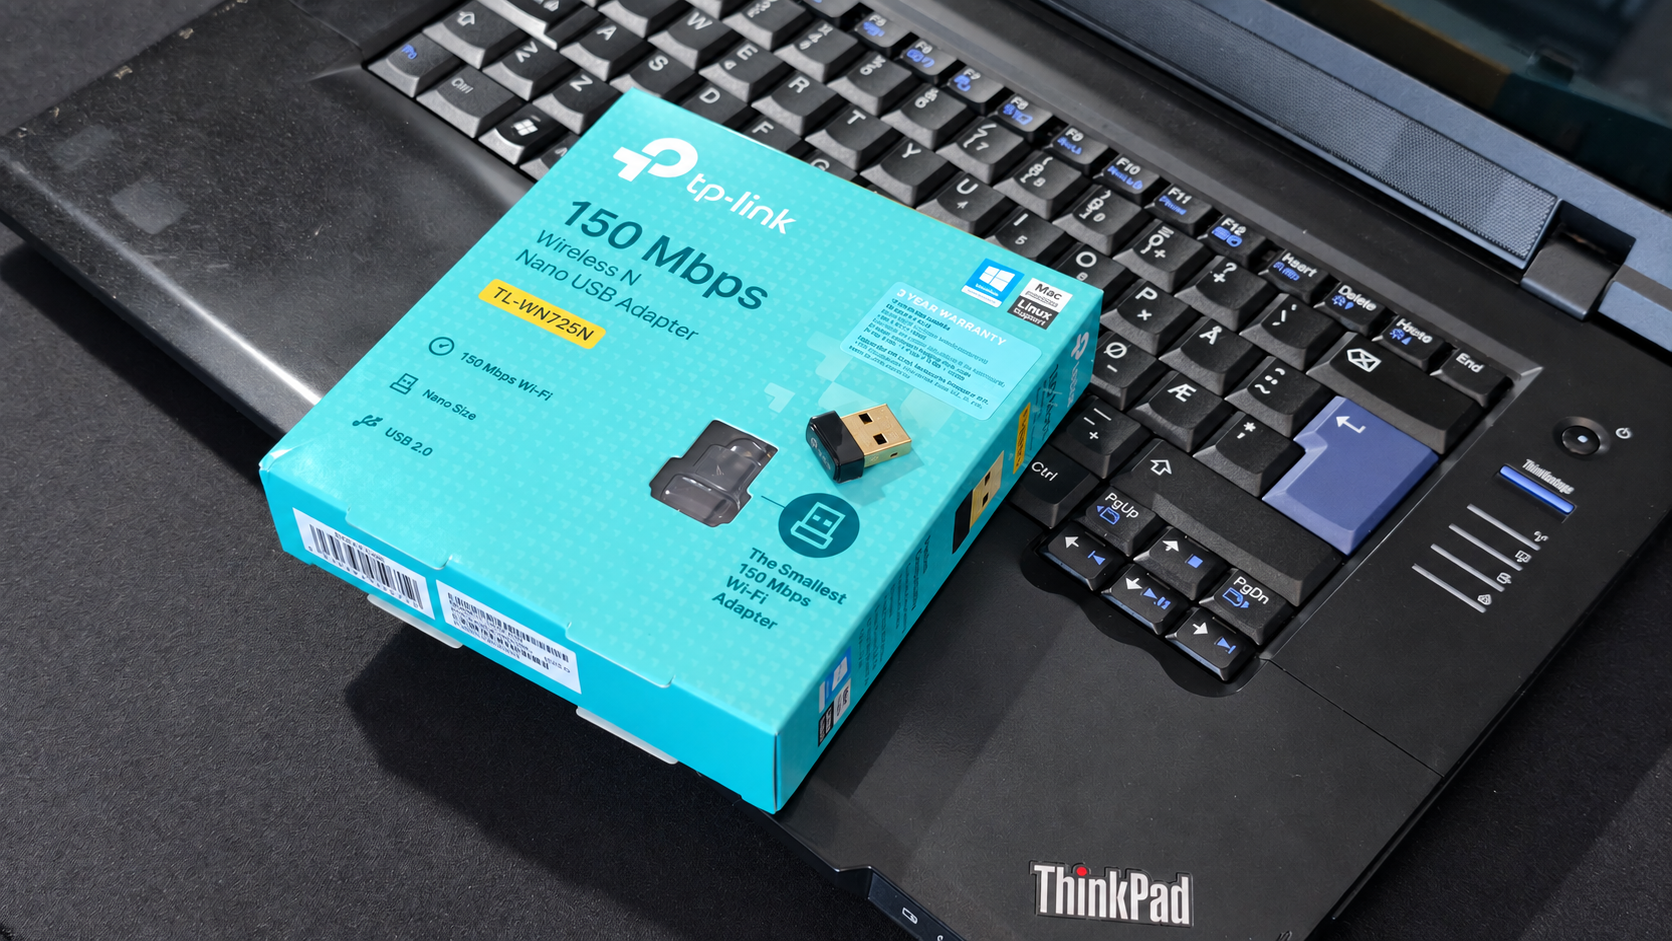
I bought this nano adapter from a local computer shop in Ivančna Gorica. My main requirement was simple: it needed to work under Linux, provide enough speed for everyday browsing and remain small enough to leave permanently connected to the ThinkPad.
02 // QUICK UNBOXING
The packaging is basic, which is exactly what I expected from an inexpensive USB Wi-Fi adapter.
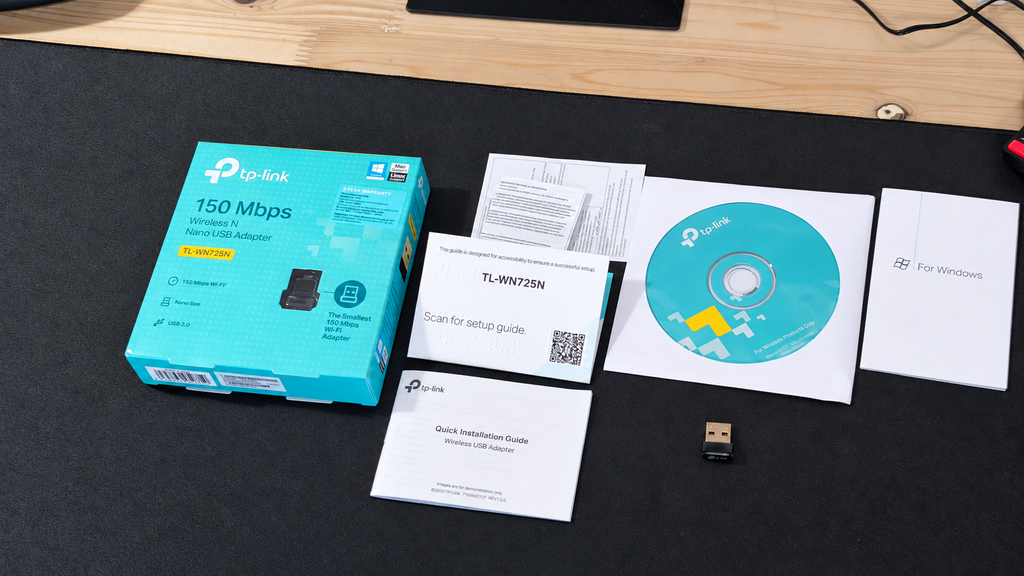
Inside the package, you receive:
The nano USB Wi-Fi adapter
Driver disc
Quick Setup Guide
Basic product documentation
There is no complicated setup hardware and nothing unnecessary. The adapter itself is the main attraction, and it really is tiny.
The short unboxing video above shows the packaging, included contents and the size of the adapter before installing it in the ThinkPad.
03 // SPECIFICATIONS AND SIZE
The TP-Link TL-WN725N is a compact Wireless N USB adapter designed to add Wi-Fi connectivity without leaving a large device sticking out of the laptop.
It connects through USB 2.0 and supports IEEE 802.11b, 802.11g and 802.11n networks on the 2.4 GHz band. TP-Link advertises a maximum wireless link rate of up to 150 Mbps. This is not the same as a guaranteed internet speed, but it should be sufficient for browsing, downloading updates, streaming video and other everyday tasks.
Specifications:
Model: TP-Link TL-WN725N
Product type: Wireless N Nano USB Adapter
Interface: USB 2.0
Wireless standards: IEEE 802.11b/g/n
Frequency: 2.4 GHz
Maximum advertised rate: Up to 150 Mbps
Antenna: Internal
Dimensions: 18.6 × 15 × 7.1 mm
Weight: 2.1 g
Wireless security: WEP, WPA/WPA2 and WPA/WPA2-PSK
Official operating-system support: Windows and Linux
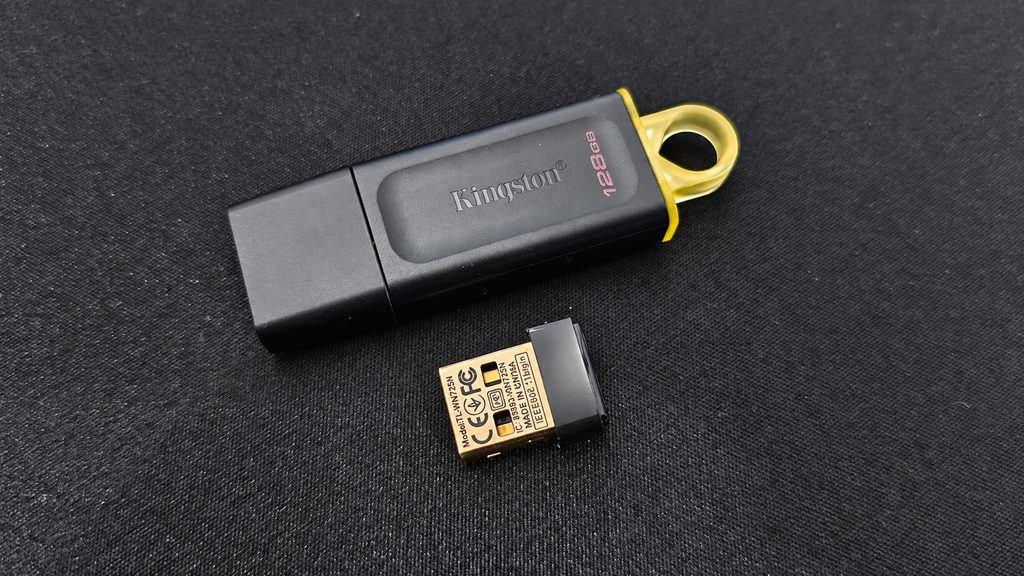
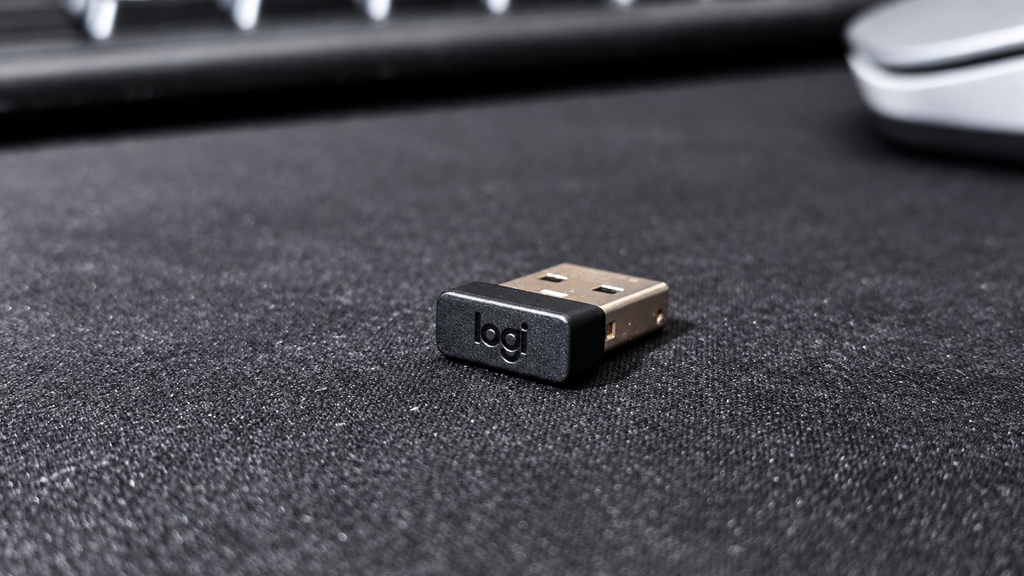
The nano design is one of the TL-WN725N’s biggest advantages. Once inserted, only a small part of the adapter remains outside the USB port. It is noticeably smaller than a normal USB flash drive and is closer in size to the receiver supplied with a wireless mouse.
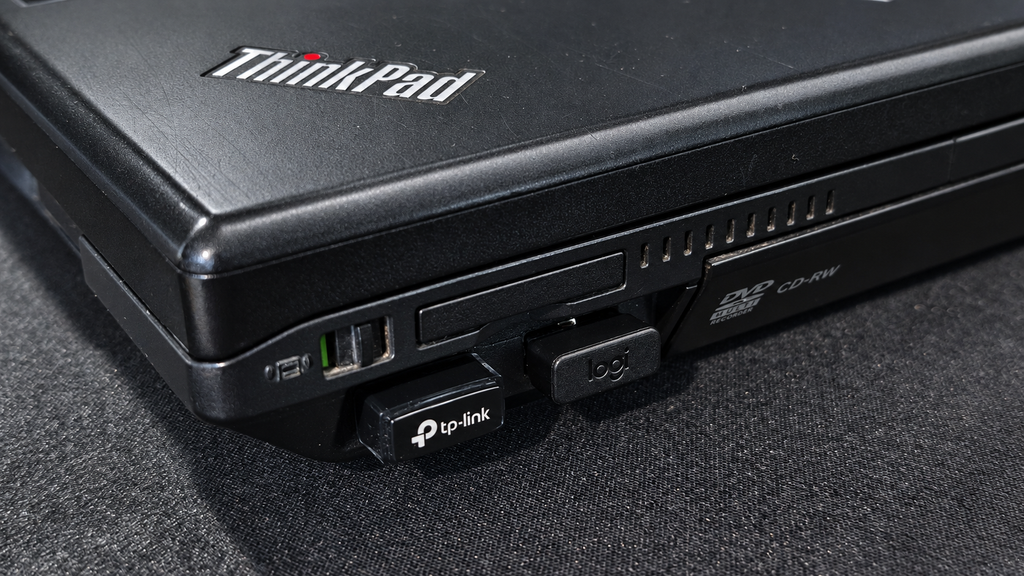
This makes it particularly suitable for a laptop like my ThinkPad SL510. I can leave it connected while carrying the laptop around, without having a large adapter protruding from its side. It still occupies one USB port, but its compact body does not block the neighbouring connections.
A larger adapter with an external antenna would likely provide better range, but the purpose of the TL-WN725N is convenience. It is designed to be inserted once and left in place, which is exactly what I wanted for the ThinkPad.
04 // LINUX SETUP
I tested the dongle on the ThinkPad SL510 running Linux Mint 22.3.
After inserting it into a free USB port, the wireless networks appeared in the network menu. I selected my home network, entered the password and connected normally.
This is exactly the experience I wanted. Instead of troubleshooting the ThinkPad’s internal wireless adapter again, I could insert the dongle and get back online.
For anyone considering a similar adapter specifically for Linux, chipset support is more important than the name printed on the packaging. Two visually identical nano adapters can sometimes use different internal chipsets, so it is worth checking the exact model before buying.
05 // SPEED AND SIGNAL-STRENGTH TEST
A nano Wi-Fi adapter does not need to break speed records to be useful in an older laptop. It needs to provide a stable connection that is fast enough for web browsing, updates, video playback and writing.
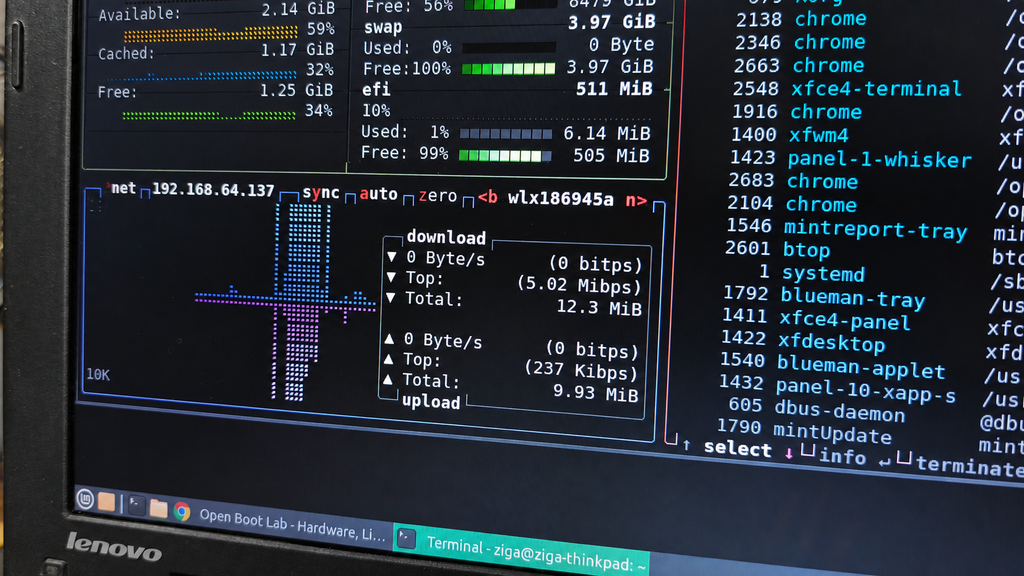
In my initial test, this adapter reached approximately 30 Mbps. That is more than enough for how I use the ThinkPad SL510.
Test results:
Test location
Signal strength
Download
Upload
Ping
Close to the router
Full signal
Approximately 30 Mbps
Approximately 35 Mbps
5 ms
Garage
Half of the signal
Approximately 3.5 Mbps
4.5 Mbps
8 ms
It is important to treat these results as a test of the complete setup, rather than the absolute maximum performance of the TL-WN725N. The ThinkPad SL510 is an older laptop, and its USB controller, processor, operating system, browser and other hardware limitations may all influence the final measured speed. USB 2.0 itself should provide more than enough bandwidth for this adapter, but the age of the overall platform can still affect real-world performance.
The location also presents a difficult Wi-Fi environment. My garage is situated in the lower part of the house, with the wireless signal travelling through several concrete walls before reaching the laptop. This can significantly reduce both signal strength and throughput. Considering the age of the ThinkPad and the challenging location, the result is still perfectly adequate for browsing, writing and downloading updates.
06 // DAILY USE
The greatest compliment I can give this adapter is that I barely notice it.
It remains inserted in the ThinkPad and provides the wireless connection whenever I start the laptop. Its small size means I do not have to remove it when moving the computer between rooms, and it does not make the side of the laptop look cluttered.
During everyday browsing and writing, the approximately 50 Mbps connection feels completely adequate. The ThinkPad itself is far more likely to become the limiting factor than the Wi-Fi dongle.
A nano adapter may not be the best solution for maximum range, very fast local file transfers or competitive online gaming. For restoring dependable wireless connectivity to an older Linux laptop, however, it makes a lot of sense.
07 // FINAL THOUGHTS
This tiny USB Wi-Fi dongle solved a real problem with minimal effort.
Instead of continuing to troubleshoot the ThinkPad SL510’s internal Wi-Fi adapter, I now have a compact and affordable solution that works for my everyday Linux use. It is small enough to remain permanently installed and its approximately 50 Mbps real-world speed is sufficient for browsing, writing, software downloads and online video.
What I liked:
Very compact nano design
Simple Linux setup
Fast enough for everyday use
Can remain permanently connected
Affordable solution for an older laptop
What could be better
Less range than adapters with external antennas
Occupies one of the ThinkPad’s USB ports
Exact Linux compatibility may depend on the internal chipset
Not intended for maximum wireless performance
If you have an older laptop with an unsupported or unreliable internal Wi-Fi adapter, a compatible nano USB dongle can be one of the easiest ways to bring it back online.
It may not be the most exciting upgrade inside the OpenBootLab, but it turned my ThinkPad from an offline project into a useful Linux writing machine, and sometimes the smallest upgrades make the biggest difference.
Sometimes the best upgrades don’t need more RAM, a faster SSD or a new CPU.
Sometimes they just arrive in an envelope.
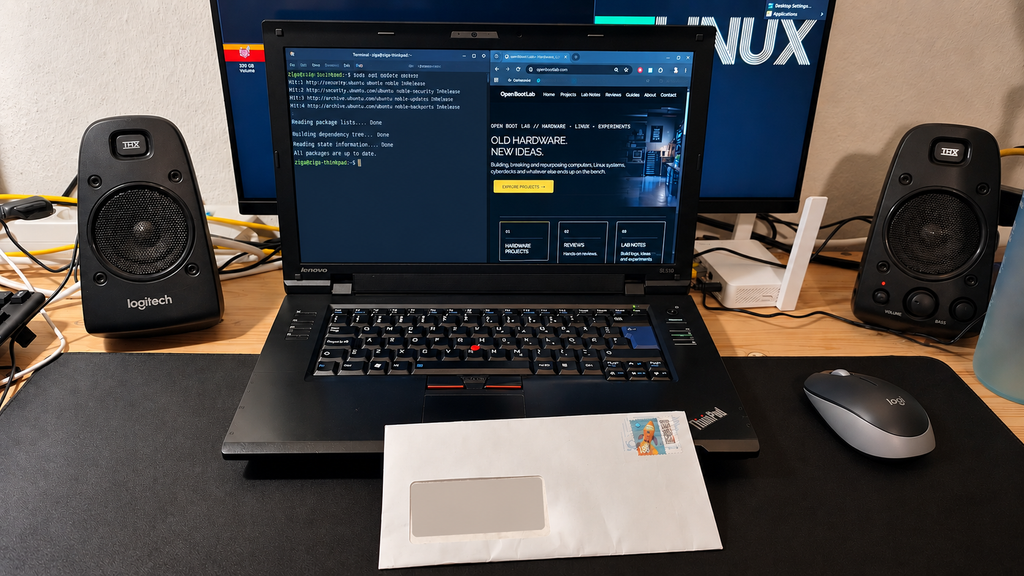
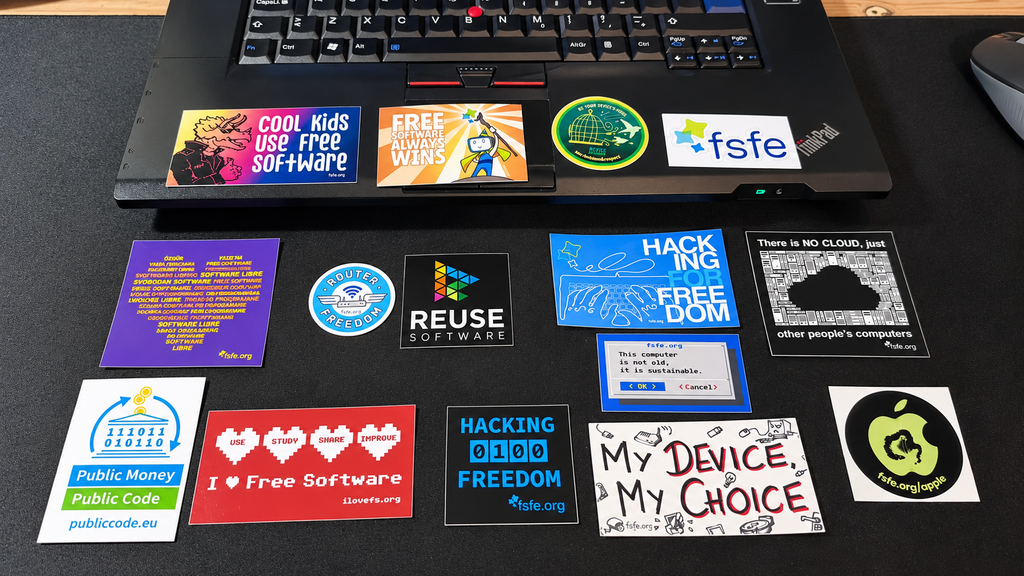
A few days ago, I got in touch with the Free Software Foundation Europe (FSFE). Today, an envelope from Berlin arrived at OpenBootLab, filled with stickers, Free Software material and a few other surprises.
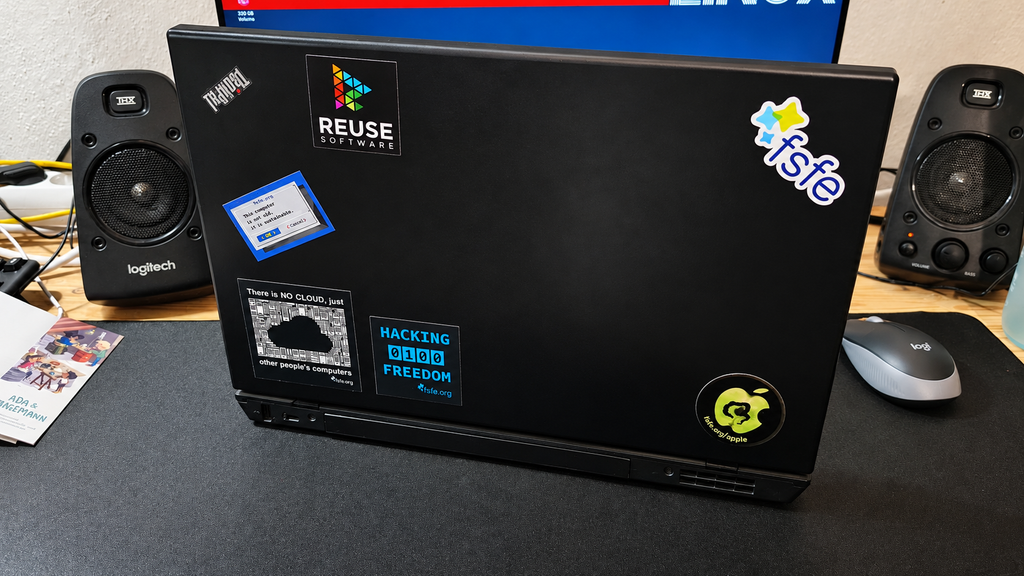
Naturally, it didn’t take long before some of them found their way onto a ThinkPad.
02 // WHAT IS THE FSFE?
The Free Software Foundation Europe, usually shortened to FSFE, is a charitable organisation that has been working to promote software freedom in Europe since 2001.
Their goal is to empower people to control the technology they use. When we talk about Free Software, the important part isn’t necessarily the price. It’s about freedom, having the ability to use, study, share and improve software. FSFE works on this from several directions, including public awareness, policy, legal support, education and campaigns surrounding digital freedom.
And that philosophy fits OpenBootLab rather nicely.
A lot of what happens here involves taking older hardware and finding new ways to use it. Linux and Free Software can often keep machines useful long after their original operating systems and manufacturers have moved on.
Sometimes a computer doesn’t need replacing. It just needs a different purpose.
03 // THE THINKPAD GETS INVOLVED
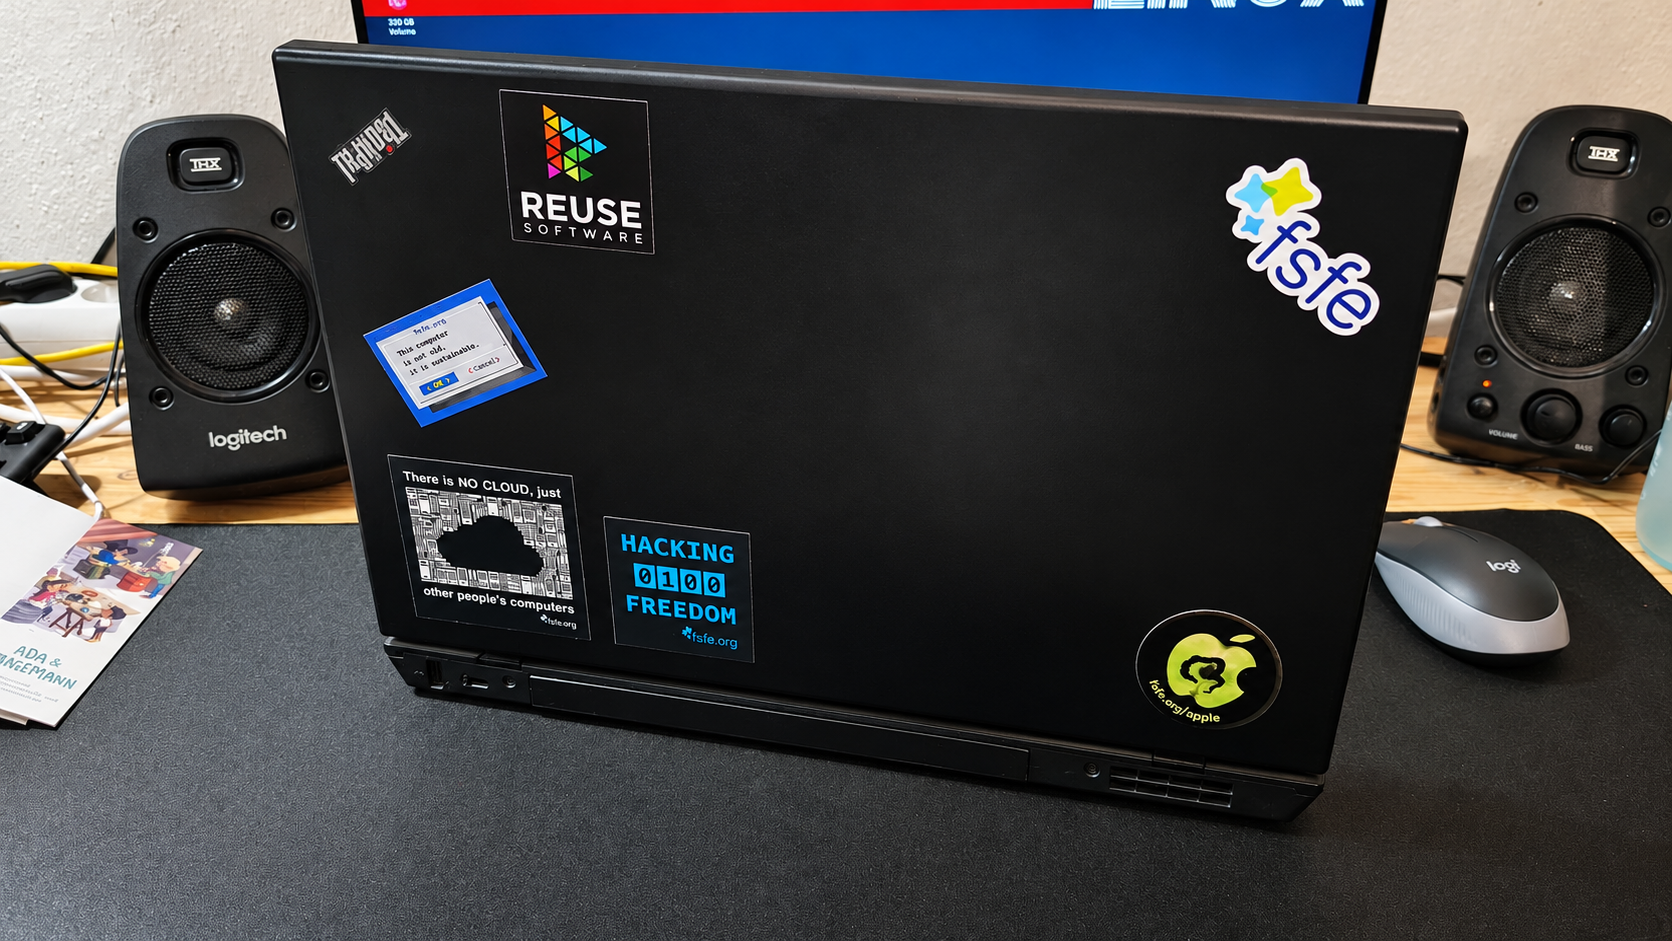
It was probably inevitable that at least a few of these stickers would end up on the ThinkPad. The machine has already become one of the regular OpenBootLab systems, and it somehow feels like the right place for a few Free Software stickers.
The first ones I picked were some of the designs that fit the spirit of the project best:
HACKING 0100 FREEDOM THERE IS NO CLOUD, JUST OTHER PEOPLE’S COMPUTERS REUSE SOFTWARE, THIS COMPUTER IS NOT OLD, IT IS SUSTAINABLE FSFE LOGO
They work surprisingly well on an old ThinkPad that is still being used for Linux, writing, testing and whatever else ends up happening on the bench. I’m not planning to cover the whole machine though. A few stickers are enough to give it some character, and the rest can wait for other hardware. There are definitely enough machines around here that they’ll eventually find a home.
And before the rest disappear onto laptops, cases and other hardware, here is the full set that arrived from FSFE together with the letter included in the package.
04 // GET IN TOUCH WITH FSFE
If you want to learn more about FSFE, their campaigns or the work they’re doing around Free Software in Europe, their website is the best place to start.
FSFE also maintains several ways for people to get involved with the community, including local groups, mailing lists and online communication channels.
Finally, a big thank you to the FSFE team for sending all of this over.
It’s a small thing, but it’s genuinely cool seeing organisations supporting the Free Software community with material like this — and several of these stickers already look very much at home in the lab.
The ThinkPad has claimed a few.
The rest?
They’ll have to wait and see which machine comes across the bench next.
// FREE SOFTWARE // OLD HARDWARE // KEEP EXPERIMENTING
REVIEW 004 // LOGITECH M190 // SIMPLE WIRELESS MOUSE FOR EVERYDAY USE
SEPTEMBER 2026
A simple full-size wireless mouse for around €15. But is there really anything more you need?
01 // WHY I BOUGHT IT
I’ve recently been putting several older laptops back into use for OpenBootLab, and that created a very simple problem: I needed a wireless mouse.
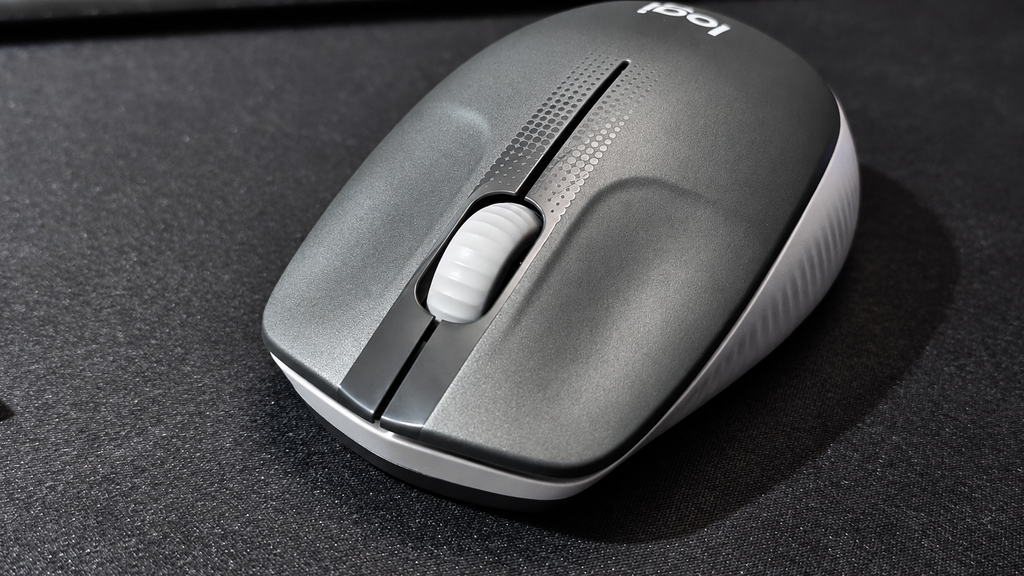
I wasn’t looking for RGB lighting, gaming features or software with twenty different settings. I wanted something inexpensive, reliable and comfortable enough to throw into a laptop bag and use without thinking about it. That led me to the Logitech M190.
Logitech has been making inexpensive mice like this for years, and the M190 is about as straightforward as they come: a full-size wireless mouse, a tiny USB receiver and not much else. So I bought one to see whether a basic mouse like this is really all you need for an everyday laptop.
02 // UNBOXING
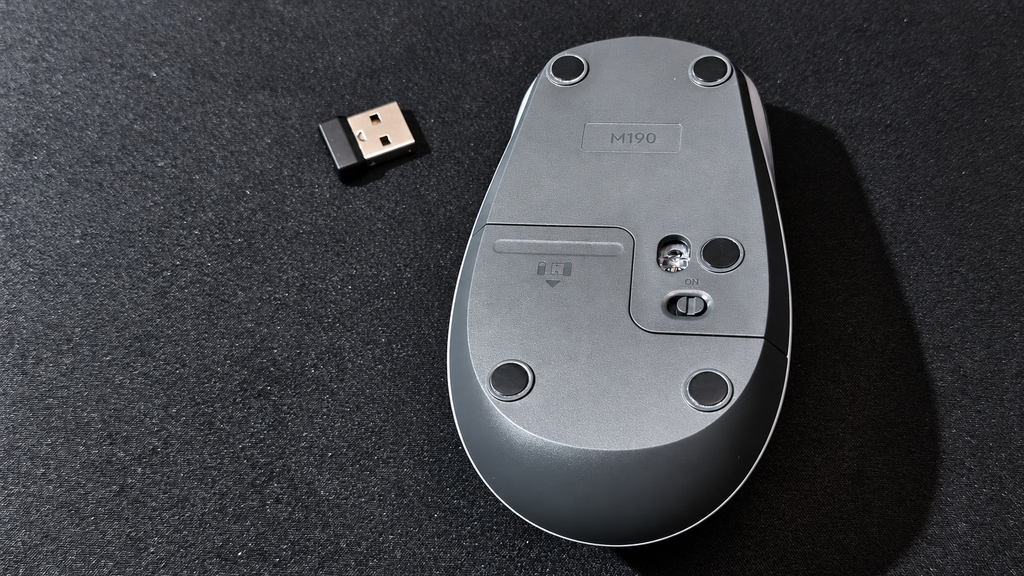
There really isn’t much ceremony here. Inside the packaging you get the Logitech M190, its small USB receiver and the included AA battery. The receiver can be stored inside the mouse when you’re not using it, which is particularly useful if the M190 spends most of its time travelling inside a laptop bag.
Setup is exactly what you’d expect. Plug the receiver into a free USB port, switch on the mouse and start using it. No account. No pairing process. No additional software required for basic operation.
03 // DESIGN AND BUILD QUALITY
The M190 is a full-size mouse, which is one of the main reasons I chose it over some of Logitech’s smaller portable models.
The shape is simple and fairly conventional, with a curved body and textured sides that provide some additional grip.
Build quality feels appropriate for an inexpensive Logitech mouse. It’s almost entirely plastic and doesn’t pretend to be a premium peripheral, but nothing immediately feels particularly fragile either. There are only the essentials: left and right buttons, a clickable scroll wheel and an on/off switch underneath.
And honestly, that’s part of the appeal.
04 // USING IT
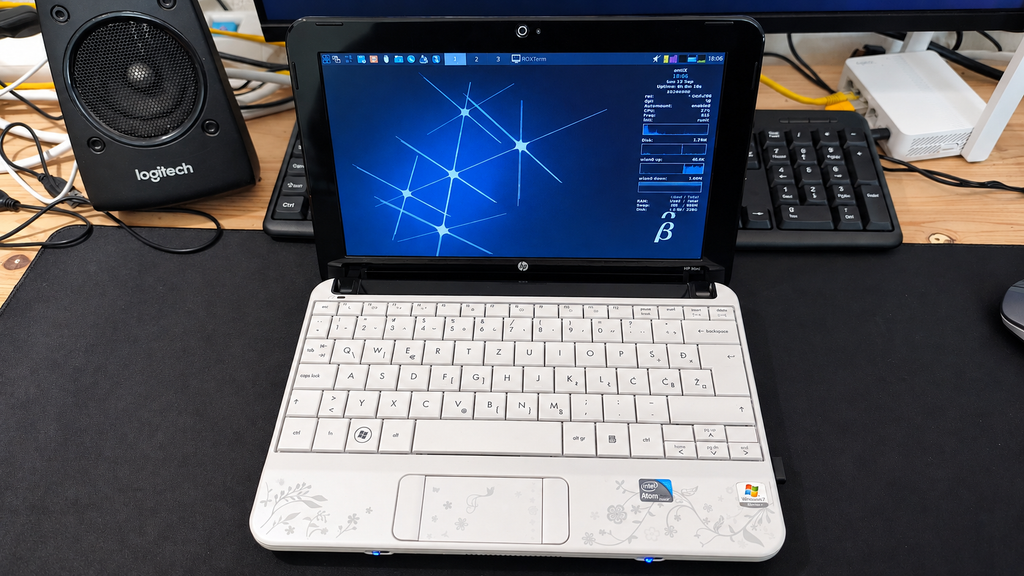
I’ve been using the M190 with both my ThinkPad SL510 and the HP Mini 110 that I recently brought back to life with antiX Linux.
The ThinkPad has recently become my main writing laptop for OpenBootLab, while the HP Mini is more of a lightweight Linux and home-lab machine. The M190 worked without any problems with both. Plug in the USB receiver and it is ready to go, including under antiX on the Mini.
For writing articles, browsing WordPress, working with files, using the terminal and normal desktop work, the M190 does exactly what I wanted it to do. Tracking feels perfectly adequate, the wireless connection has been trouble-free so far, and I haven’t found myself thinking about the mouse while using it.
That’s probably one of the better compliments you can give a basic peripheral.
For gaming, however, the M190 wouldn’t be my first choice. It is perfectly fine for an occasional casual game, but this isn’t a gaming mouse. There are no additional buttons, adjustable DPI settings or other gaming-focused features, and the overall feel is clearly designed around everyday productivity rather than fast or competitive gameplay. That’s not really a criticism of the M190, it simply isn’t what this mouse was designed for.
For web browsing, writing, office work, terminal use and general laptop use, however, I haven’t felt like I’m missing anything.
05 // THE USB RECEIVER
One disadvantage compared with Bluetooth mice is that the M190 requires its dedicated USB receiver. On an older laptop like my ThinkPad, that’s not much of a problem. There are traditional USB-A ports available, so I can simply leave the receiver connected.
The receiver itself is also tiny enough that it barely protrudes from the laptop. For newer ultrabooks with very few USB ports, or machines equipped only with USB-C, this approach is obviously less convenient. For the old hardware I’m using it with, however, it’s almost ideal.
06 // COMFORT AND EVERYDAY USE
After using the Logitech M190 regularly for about five days, I’ve had enough time to get a good feel for how comfortable it is during everyday use.
The first thing worth mentioning is the size. The M190 is a full-size mouse and seems better suited to larger hands. For me, that works well and I find it comfortable even during longer sessions. If you have smaller hands, however, the M190 might feel a little too large, especially compared with more compact laptop mice.
The main buttons feel good and have a satisfying click without being excessively loud. The sound is restrained enough that I would have no problem using the M190 in an office or other quiet environment.
The scroll wheel is similarly straightforward. It doesn’t feel particularly premium, but for web browsing, scrolling through documents and working in WordPress, it does exactly what I need it to do. After several days of using it with both the ThinkPad SL510 and HP Mini 110, comfort hasn’t been an issue. It’s not trying to reinvent the mouse—it simply provides a comfortable, predictable experience for normal everyday work.
For the kind of inexpensive everyday mouse the M190 is supposed to be, that’s more than adequate.
07 // A BORING MOUSE — IN A GOOD WAY
The Logitech M190 isn’t an exciting mouse, and after using it for several days, I think that’s actually one of its strengths.
There is no RGB lighting, no software to configure, no adjustable DPI and no collection of extra buttons. You plug the tiny USB receiver into your computer, switch the mouse on and start using it. For gaming, I would definitely look elsewhere. But for the job I bought it for—writing, browsing, working on OpenBootLab and general everyday computer use—I don’t really need anything more.
I’ve used it with both my ThinkPad SL510 and HP Mini 110, and it has worked exactly as expected with both machines. The full-size body fits my hands well, the buttons feel good, the clicks are quiet enough for office use and the scroll wheel is perfectly adequate for browsing and documents.
It’s also exactly the kind of peripheral that makes sense with older hardware. There’s no software dependency or complicated setup to worry about. Just a USB receiver and a mouse. The M190 isn’t going to make an old laptop more exciting. It just makes it easier to use.
And for a simple everyday wireless mouse, that’s really all I wanted.
LAB NOTE 004 // HP MINI 110 // ANTIX // 32-BIT LINUX
SEPTEMBER 2026
The HP Mini 110 comes from an era when netbooks were everywhere. These tiny and inexpensive computers were designed for basic browsing, writing and accessing the internet while travelling.
Today, their limited memory and ageing Intel Atom processors make them difficult to use with modern software. My particular HP Mini is powered by the 32-bit Intel Atom N270, which restricts the choice of supported operating systems even further.
With the right lightweight Linux distribution, could this little netbook still serve a useful purpose in 2026?
I recently acquired this white HP Mini 110 Special Edition as part of a €95 bundle containing four older laptops. It turned out to be one of the most interesting machines in the entire collection.
01 // THE LAPTOP HAUL
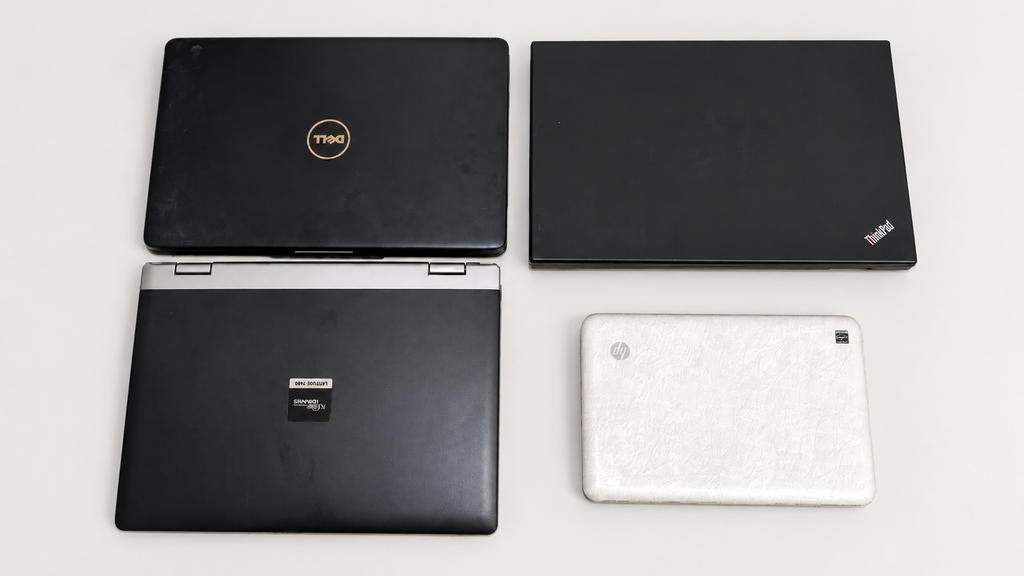
The HP Mini 110 arrived together with three other laptops:
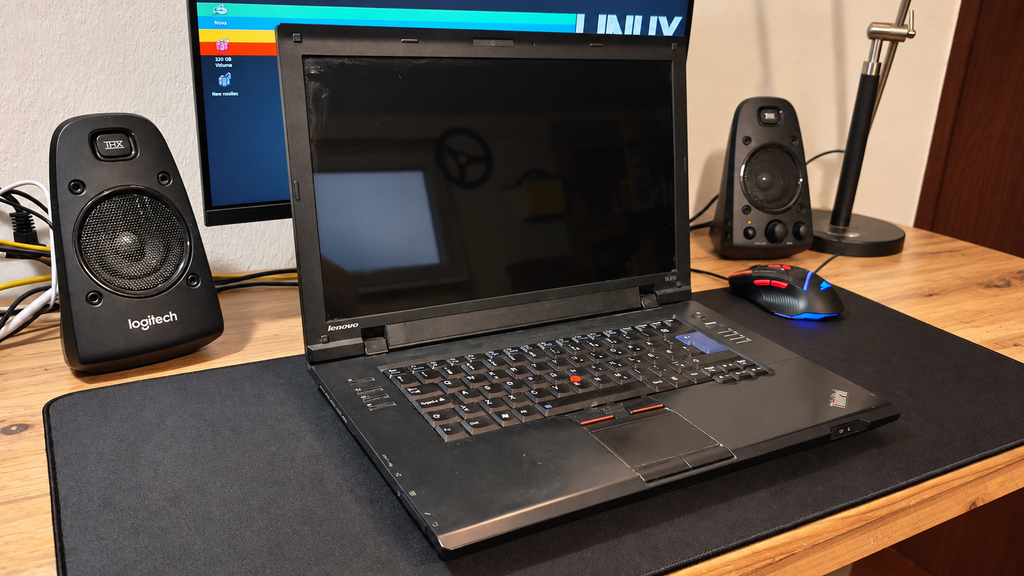
Lenovo ThinkPad SL510
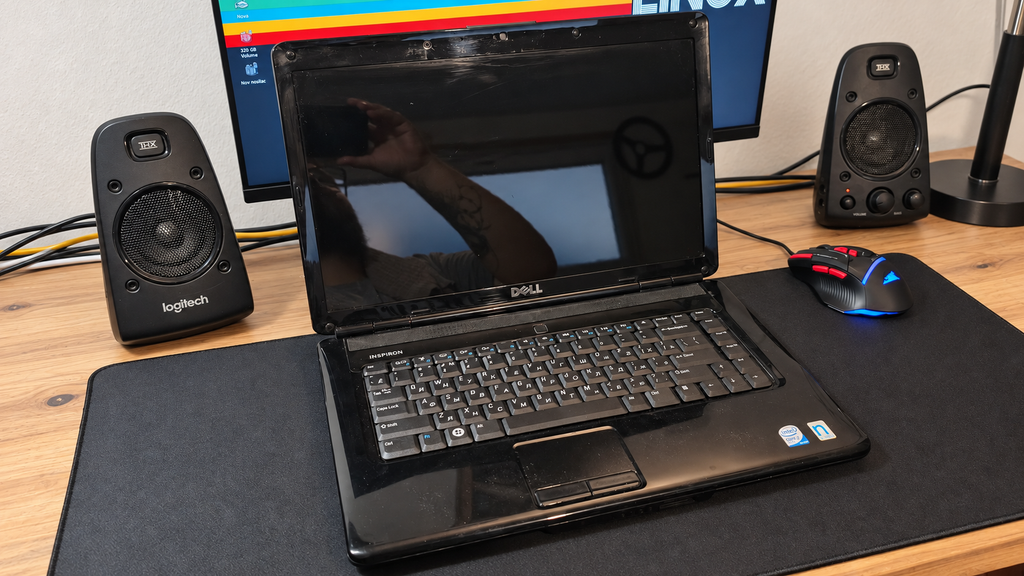
Dell Inspiron 1545
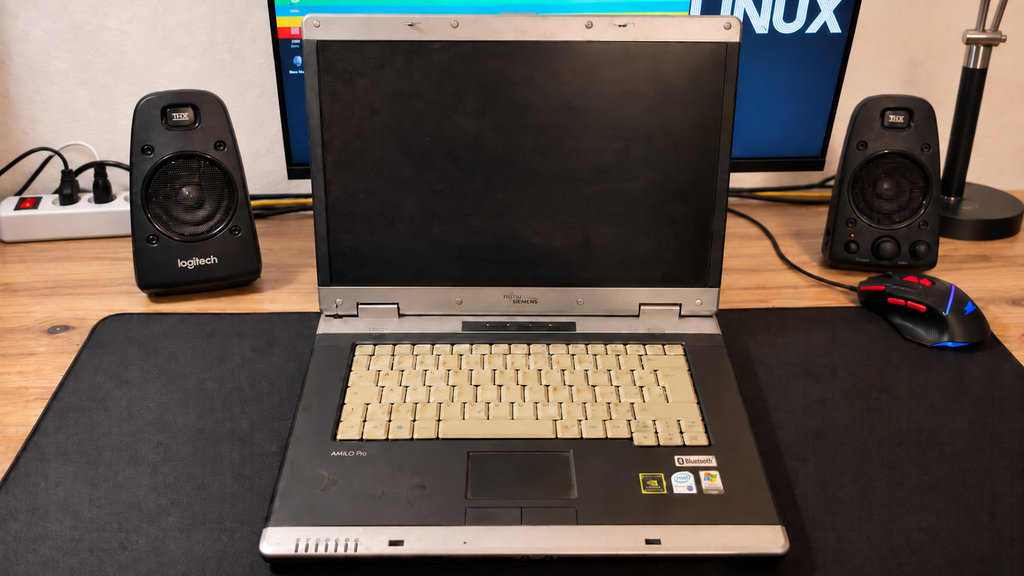
Fujitsu Siemens Amilo Pro V3545
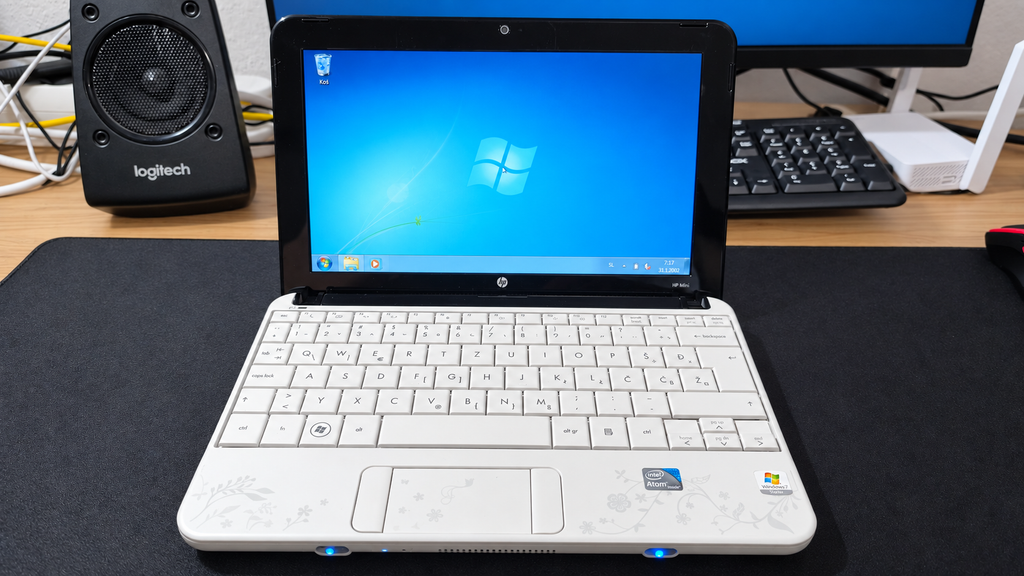
HP Mini 110 Special Edition
All four computers were working, which already made the €95 bundle a surprisingly good purchase.
The batteries in the three larger Core 2 Duo laptops were effectively dead. Surprisingly, the little HP Mini was the only machine in the collection that could still run from its original battery.
That immediately made it more interesting as a genuinely portable retro computer.
The HP Mini 110 was the smallest of the four laptops, and interestingly, the only one that arrived with a working battery. You can read more about the full €90 laptop haul here.
02 // THE TORD BOONTJE SPECIAL EDITION
This is not an ordinary black netbook like the Asus EeePC.
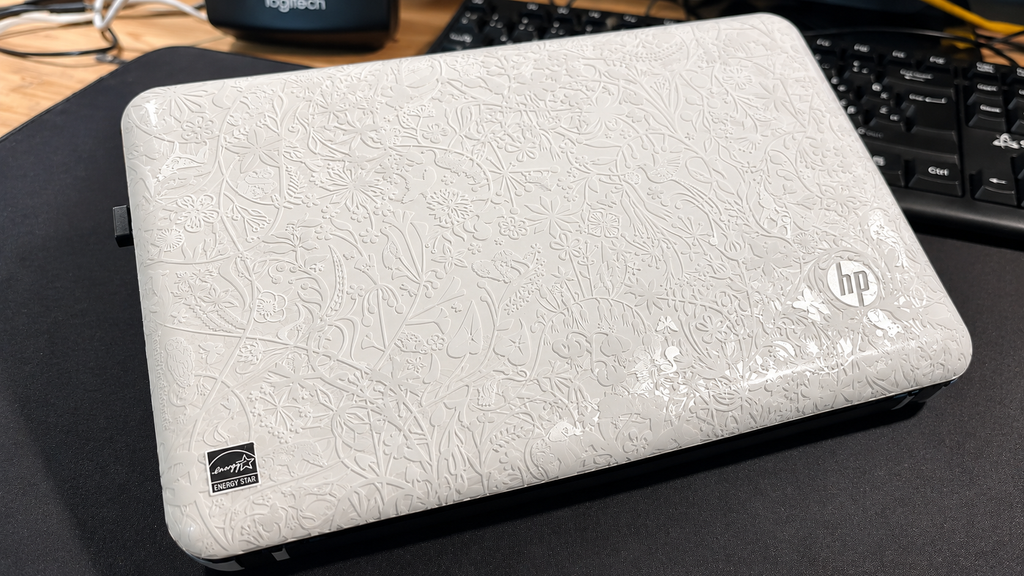
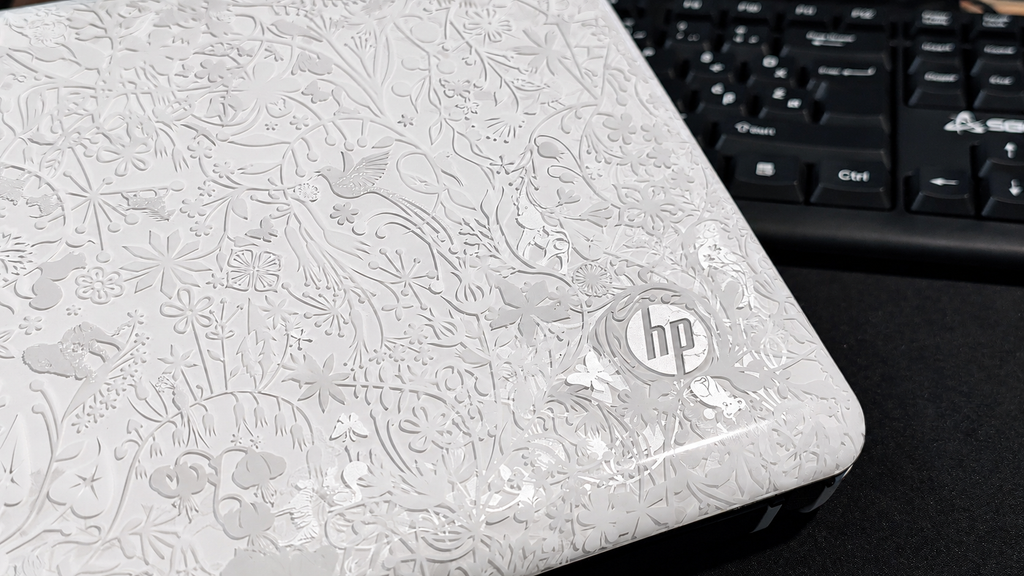
The model number printed on my machine is VT867EA#BED, but what makes it particularly interesting is its design. This is the HP Mini 110 by Studio Tord Boontje, a special edition created in collaboration with Dutch designer Tord Boontje.
Its white exterior is covered with an intricate floral pattern extending across the lid and palm rest. The layered design includes flowers, branches and small animals hidden among the details. It gives the netbook an appearance unlike almost any modern laptop.
The design is unmistakably connected to the late 2000s and early 2010s—a period when computer manufacturers were much more willing to experiment with colours, patterns and unusual limited editions.
The distinctive floral artwork makes this much more interesting than an ordinary old netbook.
The finish has collected some marks over the years, but the netbook remains in good overall condition. I initially considered covering parts of it with black vinyl, although I am now hesitant to hide such a distinctive part of the machine’s identity.
Its small display and compact keyboard make it considerably smaller than a conventional laptop. Combined with the unusual Tord Boontje artwork, it feels more like a preserved piece of netbook history than an ordinary old computer.
03 // THE ORIGINAL WINDOWS 7 STARTER INSTALLATION
When I received the HP Mini 110, it still had its original Windows 7 Starter installation.
Windows 7 Starter was a simplified edition of Windows created primarily for inexpensive netbooks. It offered fewer features than the other Windows 7 editions, but its lower hardware requirements made it a logical choice for machines such as the HP Mini 110.
Booting into the original installation felt like opening a small time capsule from the netbook era. Alongside Windows 7, HP had installed a considerable amount of additional software and bloatware.
One of the most noticeable additions was a game centre containing a collection of casual games. The selection included familiar titles such as Mahjong and Bejeweled, together with several other games divided across different categories and levels.
The original Windows 7 Starter installation was still present when I received the netbook.
The game centre was one of several additional programs preinstalled on the machine.
It is the kind of software package that was commonly installed on consumer laptops during this period. It adds to the authentic late-2000s experience, although it also consumes valuable storage and resources on a machine with very limited hardware.
The original installation was interesting to explore, but Windows 7 is no longer a suitable choice for a computer that will regularly connect to the internet. Instead of trying to turn it back into a practical everyday Windows machine, I decided to see whether lightweight Linux could give it a more useful second life.
04 // THE 32-BIT ATOM PROBLEM
The HP Mini 110 is powered by an Intel Atom N270, a single-core processor with two threads running at up to 1.60 GHz. It is paired with just 1 GB of RAM and, in my machine, a conventional 5400 RPM hard drive.
Even by modern low-end standards, that is an extremely limited combination. The 1 GB of memory leaves very little room for multitasking, while the mechanical hard drive makes loading applications and starting the operating system noticeably slower than what we are used to with SSDs today.
More importantly, the Atom N270 uses a 32-bit architecture. This significantly restricts the choice of modern operating systems because many Linux distributions no longer provide versions for 32-bit computers.
Atom processors were originally designed to consume little power and keep netbooks inexpensive. Even when these machines were new, performance was never their strongest feature. More than a decade later, modern websites and applications can easily overwhelm them.
Installing a conventional modern operating system would leave very few resources available for actual programs. Windows 10 or a feature-heavy Linux desktop would therefore make little sense on this hardware.
The challenge was not to make the HP Mini fast by modern standards. That would be impossible.
The goal was to find a lightweight 32-bit operating system capable of making its limited hardware useful again.
05 // INSTALLING ANTIX LINUX
For this experiment, I installed the 32-bit version of antiX Linux.
antiX is designed to work on older and resource-constrained computers. It avoids many of the heavy components found in mainstream desktop Linux distributions and provides a lightweight environment that remains practical on limited hardware.
Just as importantly, its availability for 32-bit hardware makes it suitable for systems powered by processors such as the Atom N270.
This made antiX a much more appropriate choice for the HP Mini 110 than the heavier Linux installations I use on my more powerful computers.
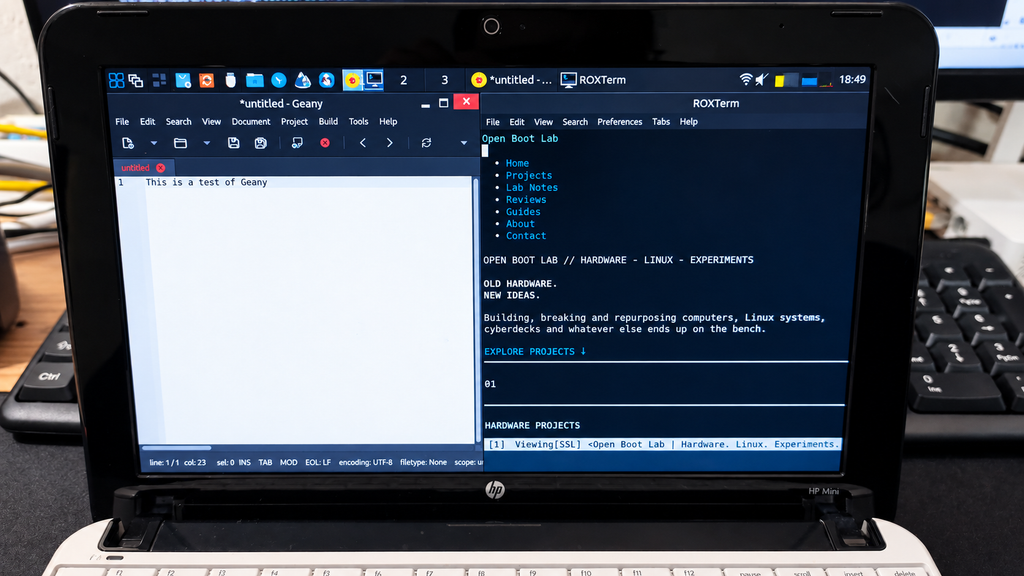
The result is not instant or especially fast, but the system is responsive enough to navigate, open lightweight applications and use the machine without constantly fighting the operating system.
Simply getting a usable Linux system running on hardware of this age already feels like a small victory. Here is what a full antiX boot looks like on the HP Mini 110 with its Atom N270, 1 GB of RAM and original 5400 RPM hard drive:
It is certainly not instant, but considering the age and limitations of the hardware, the result is surprisingly usable.
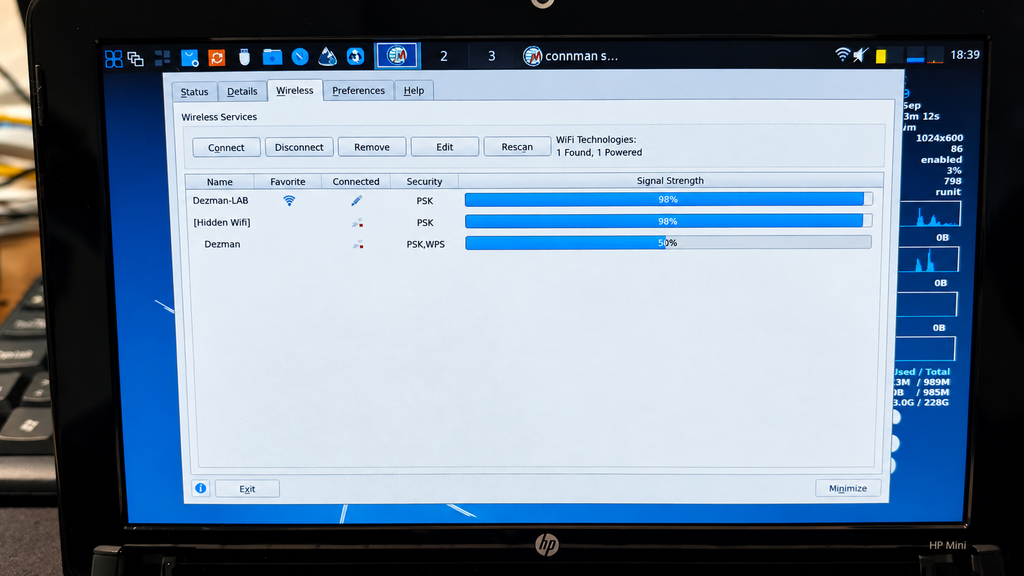
06 // FIXING THE WI-FI
The first issue appeared shortly after installing antiX: the internal Wi-Fi was not working correctly.
That was an important problem because a small portable computer loses much of its usefulness if it must remain connected through an Ethernet cable.
After some troubleshooting, I managed to get the wireless connection working. The HP Mini could finally connect to the network without needing an additional external adapter.
This is exactly the sort of small obstacle I expect when bringing old hardware back into service. The components may still work, but modern operating systems do not always support every old device immediately.
Once Wi-Fi was working, I could begin testing what the netbook was actually capable of doing.
With the internal Wi-Fi working, the HP Mini became a genuinely portable Linux machine again.
07 // WHAT CAN IT STILL DO?
The modern web is probably the worst possible workload for an old Atom netbook.
Many websites now contain heavy scripts, advertisements, animations and background processes. Even a simple page can require considerably more processing power and memory than an entire desktop environment from the HP Mini’s original era.
Lightweight browsing is still possible, but expectations need to remain realistic. Simple pages work much better than large modern websites, and opening multiple browser tabs quickly becomes impractical.
The machine is much more convincing when used for focused, lightweight tasks:
Writing text and notes
Basic file management
Using the Linux terminal
Connecting to IRC
Running terminal-based applications
Managing files on other computers
Lightweight network administration
Experimenting with older software
Learning more about Linux without distractions
These tasks suit the hardware much better than trying to use it like a modern multimedia laptop.
Of course, knowing that this is an old Atom-powered netbook did not stop me from trying a game or two.
The HP Mini is clearly not a gaming machine, but lightweight and older games are still worth experimenting with. Simple puzzle games, classic PC titles, DOS games and other less-demanding releases are a much better match for its limited hardware than anything modern. Testing games on computers that were never designed for gaming is also part of the fun. I do not expect impressive performance, but finding a few titles that run well could give the HP Mini another entertaining purpose.
I plan to cover my gaming results in a separate OpenBootLab lab note. Here’s Freedoom running on the HP Mini 110:
08 // A PORTABLE TERMINAL MACHINE
The most interesting role for the HP Mini may be as a small portable terminal.
Terminal applications require far fewer resources than modern graphical software. An IRC client, text editor, file manager or remote connection can run without placing the same load on the Atom processor as a modern browser. The small screen also makes more sense in this context. It is restrictive for complicated websites, but perfectly suitable for displaying a terminal, writing a document or monitoring another computer.
I have also been exploring terminal-based browsers and music clients. Not every modern service will work perfectly on hardware this old, but experimenting with these tools is part of the fun.
Rather than asking the HP Mini to do everything, I can give it a small number of specific jobs that match its capabilities.
09 // DISTRACTION-FREE WRITING
Another possible use is as a dedicated writing machine for OpenBootLab.
A modern computer makes it incredibly easy to become distracted by videos, social media, notifications and dozens of open browser tabs. The HP Mini does not encourage that kind of multitasking because it simply does not have the performance for it. That limitation could actually be useful.
With a lightweight text editor, the netbook could provide a simple environment for drafting articles and taking project notes. The keyboard is small, so I would not choose it for writing an entire book, but it could work well for preparing short drafts away from my main computer.
Sometimes a machine becomes more useful when it cannot do everything.
10 // THE LIMITATIONS
Installing antiX does not magically turn the HP Mini 110 into a fast computer.
Its limitations remain obvious:
The Atom N270 is extremely slow by current standards.
Its 32-bit architecture limits software and operating-system compatibility.
This is not a replacement for a modern laptop or Chromebook.
However, that is also not the point of the experiment. The HP Mini is interesting because it shows how much usefulness can still be recovered from hardware that most people would now consider obsolete.
11 // GIVING THE HP MINI A SECOND LIFE
The experiment with antiX proved that the HP Mini 110 can still be useful, but I am not quite finished with the hardware yet.
The first upgrade I would like to make is increasing the memory from 1 GB to 2 GB of RAM, assuming I can find a compatible module. Two gigabytes is still tiny by modern standards, but on a lightweight 32-bit Linux installation it should provide noticeably more breathing room.
The other obvious upgrade is storage. My HP Mini currently has its original-style 250 GB 5400 RPM mechanical hard drive, and replacing it with an SSD should make the system feel much more responsive when booting, launching applications and working with files. It will not make the Atom N270 any faster, of course, but it should remove one of the biggest remaining bottlenecks.
My original idea was to take this a little further and start using the HP Mini as an everyday-carry computer — a tiny machine that I could throw into a bag and use for writing, terminal work and other lightweight tasks.
There is just one problem with that plan. Since picking up the HP Mini, I have also started using an old ThinkPad SL510. With considerably more processing power, a much larger keyboard and a new replacement battery, the ThinkPad has unexpectedly become my main OpenBootLab writing machine.
That doesn’t mean the HP Mini is going back onto a shelf, though. Its tiny size, working battery and lightweight antiX installation give it a completely different character. I still want to upgrade it, experiment with it and find out exactly how useful a little Atom-powered netbook can be in 2026.
As for the ThinkPad? That is a story for another post.
12 // FINAL THOUGHTS
The HP Mini 110 is clearly obsolete as a conventional modern laptop. Its Atom N270 struggles with the modern web, 1 GB of RAM leaves very little room for multitasking, and its 32-bit architecture makes finding compatible modern software increasingly difficult.
But after spending some time with antiX, I don’t think this little netbook needs to be a conventional laptop anymore.
I can see it becoming a small home-lab terminal that I can keep nearby for connecting to servers and other machines over SSH, using IRC, running terminal applications and handling other lightweight tasks. For that kind of work, raw performance matters far less than having a small computer with a physical keyboard and a working battery. It could also become my truly portable writing machine.
The ThinkPad SL510 has already taken over as my main OpenBootLab writing laptop. It is considerably more powerful, has a much larger and more comfortable keyboard, and with the replacement battery I recently bought, it has become surprisingly practical for everyday use. I’ll have much more to say about that machine in another post.
But the ThinkPad is also big and heavy.
If I’m going for a walk in the woods, spending some time outdoors or going camping with my family, carrying a full-size old ThinkPad around doesn’t make much sense. The HP Mini does. It is small enough to throw into a bag and forget about until I want to sit down somewhere and write a few paragraphs, capture an idea or access something remotely.
There are still a couple of upgrades I would like to make. If I can find compatible memory, I want to increase it to 2 GB of RAM, and replacing the current 250 GB 5400 RPM hard drive with an SSD should make everyday use considerably more pleasant. Those upgrades won’t suddenly make an Atom N270 fast. They don’t need to.
For €90, I didn’t just get four working old laptops. I also found a tiny, unusual netbook that may end up having a surprisingly specific place in my setup: part home-lab terminal, part portable writing machine, and part Linux experimentation platform.
The HP Mini 110 may no longer be fast, but I think I’ve found a reason to keep using it.
I was only looking for one cheap laptop, but somehow I ended up buying a bundle of four older machines for €95.
The haul included a Lenovo ThinkPad SL510, Dell Inspiron 1545, Fujitsu Siemens Amilo Pro V3545, and a tiny HP Mini 110. Even better, all four turned out to be working.
01 // HOW I ENDED UP WITH FOUR LAPTOPS
I originally started looking for a cheap laptop that I could use mainly for writing OpenBootLab posts, browsing, and some light Linux testing.
My budget was around €100, and at first I was looking at inexpensive refurbished Chromebooks and other low-cost used laptops. One of the options I was seriously considering was a refurbished Dell Chromebook.
Instead, I contacted a seller I had bought hardware from before and asked if he had any older laptops available. You may already recognize the seller from the Mainframe project, where I previously bought a €30 bundle of old PC hardware from him. He usually has quite a bit of interesting older hardware around, so I have a feeling this probably will not be the last time something from him ends up in OpenBootLab.
He had several laptops available, and after going through the options I ended up choosing four of them: a Lenovo ThinkPad SL510, Dell Inspiron 1545, Fujitsu Siemens Amilo Pro V3545, and a tiny HP Mini 110.
The total price for all four was €90.
What made the deal especially interesting was that I paid less for these four machines combined than I would have paid for the single refurbished Dell Chromebook I had been considering. At that price, I expected at least one of them to be completely dead or to need quite a bit of work.
Instead, all four powered on and worked.
So what started as a search for one inexpensive writing laptop somehow turned into four different machines, four potential OpenBootLab projects, and plenty more content for both me to make and you to enjoy.
02 // WHAT I ACTUALLY GOT
Now that the story behind the haul is out of the way, it is time to look at the four machines themselves.
The four laptops are all from slightly different parts of the same era, but they are also very different from each other. There is a business-oriented ThinkPad, a mainstream Dell, an older Fujitsu Siemens machine, and a tiny HP netbook.
The lineup looks like this:
Lenovo ThinkPad SL510
Dell Inspiron 1545
Fujitsu Siemens Amilo Pro V3545
HP Mini 110
All four came with their power adapters, and all four were able to power on. Some of them also already had useful upgrades such as SSDs or additional RAM, which made the deal even more interesting.
Of course, they are far from perfect. The cases show their age, there are scratches and signs of use, and the batteries on the larger machines are basically finished. But that is also part of the reason I wanted them.
These are not collector pieces or restored machines. They are old laptops that have clearly been used, and now they get another chance to do something useful.
From here, I will take a closer look at each one individually.
03 // LENOVO THINKPAD SL510
The Lenovo ThinkPad SL510 was probably the machine I was most interested in when choosing the four laptops.
I have always liked the more practical design of older ThinkPads, and this one still has a lot of the features people usually associate with them: a solid keyboard, the red TrackPoint in the middle, a fairly simple black chassis, and a design that is more functional than flashy.
Cosmetically, it definitely shows its age. The lid has plenty of scratches and marks from years of use, but I actually prefer leaving that visible instead of trying to make it look brand new. This is a used machine, and the wear is part of its history.
The good news is that the laptop itself works. The main downside is the battery, which is basically dead, so for now it needs to stay connected to the charger.
My current plan is to turn the SL510 into a simple Linux laptop that I can use for writing OpenBootLab posts, browsing, terminal work, and some light testing. I am also considering replacing the battery later if I can find one at a reasonable price.
Out of the four laptops, this is probably the one with the best chance of becoming an actual everyday-use machine rather than just another experiment.
04 // DELL INSPIRON 1545
The Dell Inspiron 1545 feels quite different from the ThinkPad. It is more of a mainstream consumer laptop from its era, with a simpler design and a glossy finish that definitely shows fingerprints, scratches, and years of use.
Like the SL510, the important part is that it works.
One thing I noticed immediately during the first boot was the charger situation. The seller had already mentioned that if I wanted the battery to charge properly, I would probably need to get an original Dell charger. He did not have one available, so he included a compatible HP power adapter instead. It powers the laptop without a problem, but the Inspiron does not recognize it as a proper Dell charger because it is missing Dell’s identification chip. Because of that, the laptop can run from the adapter, but battery charging is limited or unavailable.
The battery itself is already in poor condition anyway, so this is not a major problem for what I currently want to do with the machine. If I eventually decide to replace the battery, I will probably also look for a proper Dell charger.
Unlike the ThinkPad, I already have a fairly clear idea for the Inspiron. This will probably become one of my main Linux distribution testing machines, especially for lightweight distributions designed for older hardware. Instead of only testing them inside a virtual machine, I want to see how they actually behave on real hardware from this era.
That should make the Inspiron useful for future OpenBootLab posts where I can compare different lightweight Linux distributions, installation experiences, hardware support, performance, and how usable they still are on an older laptop.
So while it may not become my everyday writing machine, it could end up being one of the most frequently experimented-on laptops from the entire haul.
05 // FUJITSU SIEMENS AMILO PRO V3545
The Fujitsu Siemens Amilo Pro V3545 is probably the most unusual laptop in the group, at least compared with the Dell and ThinkPad. Its design feels noticeably older, with a chunkier chassis, silver trim, and a much more early-2000s business-laptop look. It also stands out visually because of the light-colored keyboard and the large silver hinge area.
Like the others, it is far from perfect cosmetically. There are scratches, marks, and signs of long-term use, but the machine itself still works, which is what matters most here.
This one also came with Windows XP already installed, and I have decided to keep it that way.
Because the laptop has a dedicated NVIDIA graphics card, my plan is to turn the Amilo Pro into an XP gaming laptop for older PC games and software from that era. Instead of trying to modernize it too much, I think it makes more sense to keep it close to the period it originally came from. That should make it useful for testing older games, software, drivers, and other Windows XP-era experiments without needing to set up a virtual machine every time.
So unlike the Dell, which will mainly become a Linux testing machine, the Amilo already has a much clearer role in the lab: a dedicated Windows XP gaming and retro software machine.
06 // HP MINI 110
The HP Mini 110 is easily the most different machine in the whole haul.
Compared with the other three laptops, it is tiny. The small screen, compact keyboard, and lightweight chassis make it feel more like a little portable experiment than a normal laptop, which is exactly why I like it. This particular one is also a special edition model, which makes it even more interesting. Instead of the usual plain finish, it has the distinctive white floral-patterned lid, giving it a very different look from the typical black and silver laptops from the same era.
It also surprised me in another way: the battery still works.
That already makes it more practical than the larger laptops, especially for something I can actually carry around and use away from the desk. Performance is obviously limited by the Atom platform, but that is also what makes it interesting.
I have already started experimenting with antiX Linux on it, and the goal is to see how usable such a low-powered machine can still be today with lightweight software. I want to try things like lightweight web browsing, IRC, terminal-based tools, music playback, writing, simple file transfers, and other low-resource Linux applications.
The HP Mini will probably become my dedicated ultra-lightweight Linux experiment.
It is definitely not the fastest machine in the group, but because of its size, working battery, special-edition design, and limitations, it may end up producing some of the most interesting Lab Notes from the entire haul.
07 // WHAT HAPPENS NEXT
What started as a search for one cheap laptop turned into four different machines, each with its own role.
The ThinkPad SL510 will probably become a regular appearance on OpenBootLab. It is the machine I can see myself using most often for writing, Linux, browsing, and general testing. The Dell Inspiron 1545 will mainly be used for experimenting with different lightweight Linux distributions on real hardware. The Fujitsu Siemens Amilo Pro V3545 is staying on Windows XP and will become my retro gaming and older software machine. And the tiny HP Mini 110 will continue as my low-power Linux experiment.
For €90, I am more than happy with how this turned out.
This post was only the introduction to the haul. I also plan to make a separate post for each laptop, where I can go into much more detail about the hardware, specifications, condition, upgrades, operating systems, performance, and what I eventually decide to use each machine for.
None of these laptops are perfect. They are scratched, worn, old, and limited in different ways, but that is exactly what makes them interesting. They are not going onto a shelf. They are going back to work.
And this definitely will not be the last time you see them on OpenBootLab.
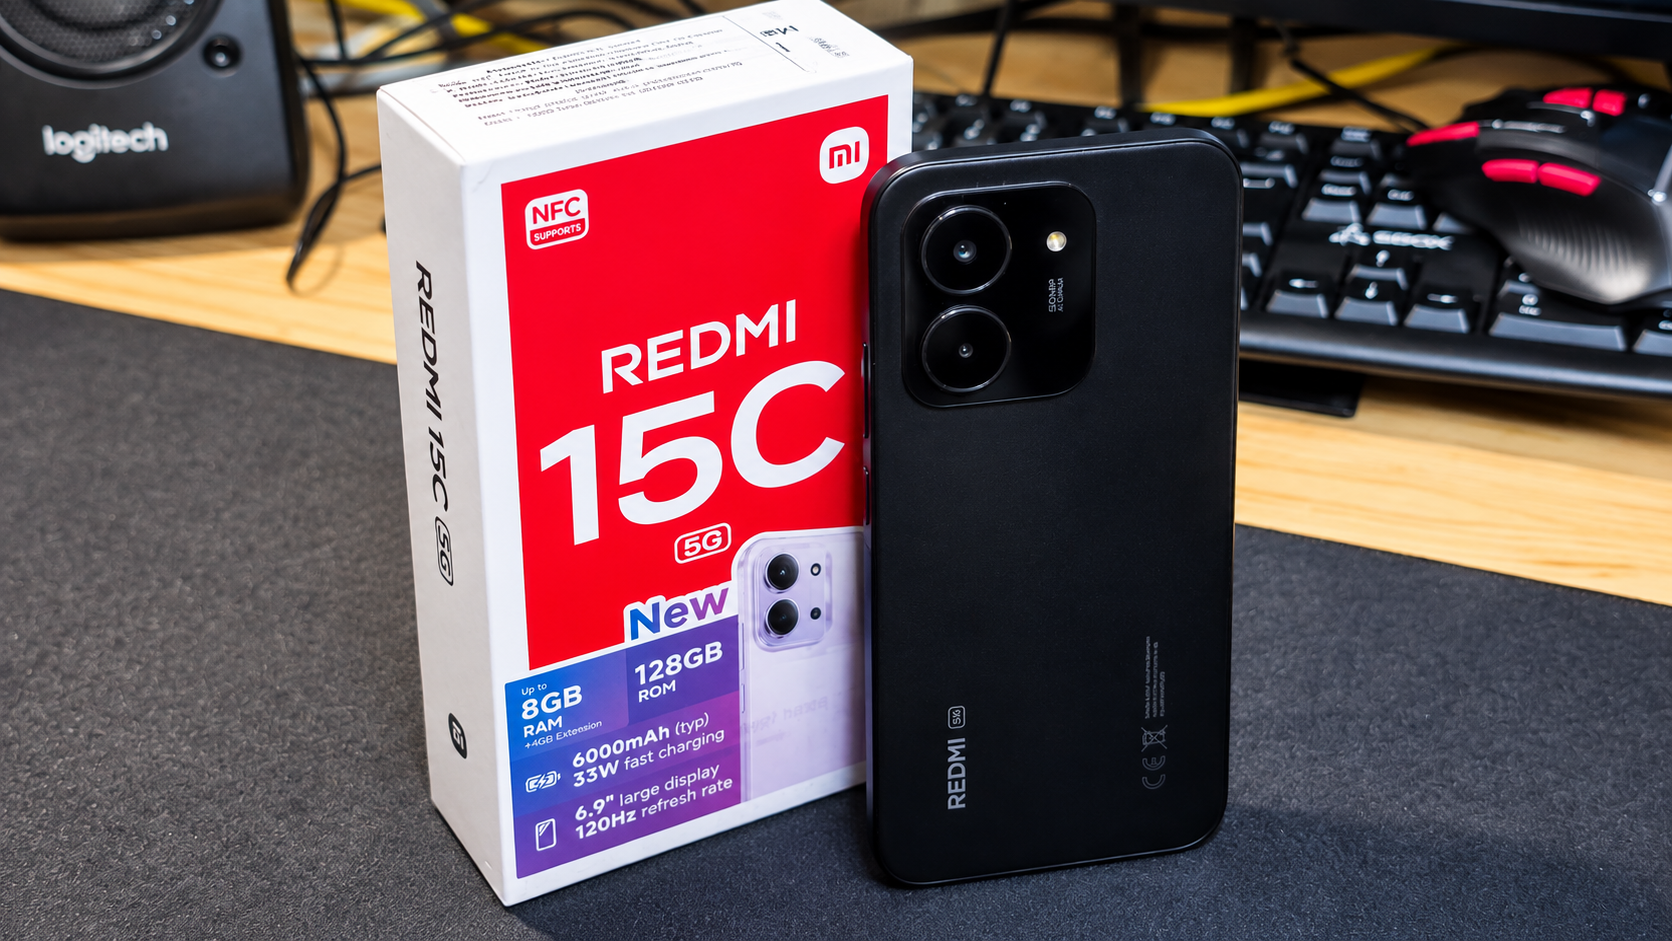
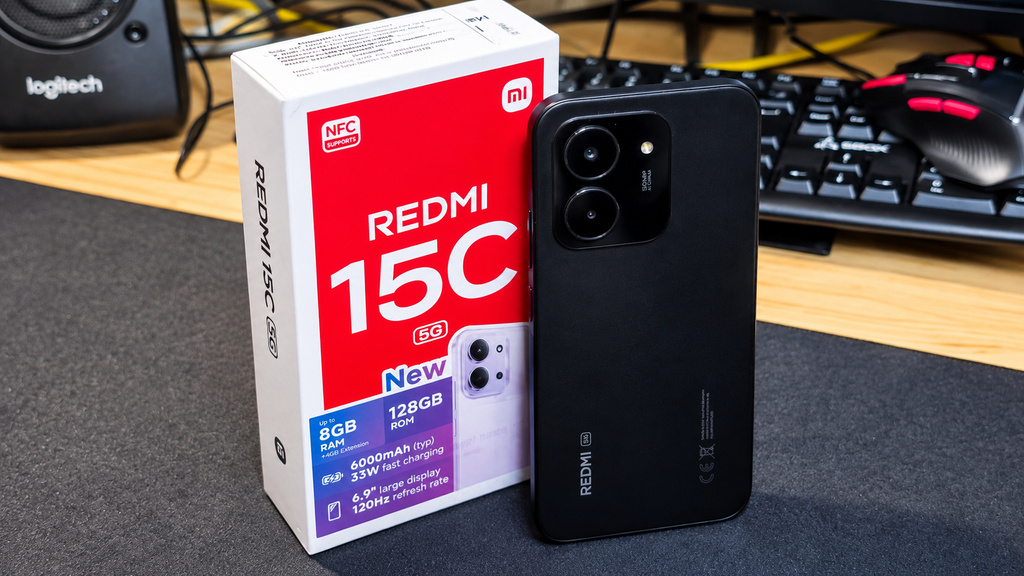
The Redmi 15C 5G is an affordable Android phone with a large display, 5G connectivity and a massive battery. I picked one up not only to see what Xiaomi offers at the budget end in 2026, but also with a future OpenBootLab project in mind.
Before the experiments begin, let’s unbox it and take a first look.
01 // WHY THE REDMI 15C 5G?
The interesting part here is that this wasn’t originally supposed to be a normal smartphone purchase.
After experimenting with running Linux on my Redmi A3, I decided that I wanted to take the idea further and build a phone-powered cyberdeck. The A3 proved that the basic concept worked, but for the final project I wanted something newer and more capable.
The Redmi 15C 5G looked like an interesting candidate: it’s still a relatively inexpensive Android phone, but gives me a more modern platform to experiment with.
And before I start doing strange things to it, I thought it deserved a proper unboxing.
02 // UNBOXING
The unboxing experience is pretty straightforward. For the European market, there is no power adapter included in the box. You do get a USB-A to USB-C charging cable, documentation and the usual SIM eject tool.
One nice addition is the included clear TPU case. It feels surprisingly good quality for a case bundled with a budget phone and fits the device well. It’s nothing fancy, but it means the phone is protected straight out of the box without needing to buy a case separately.
In the video below, you can see the full unboxing, first boot and a quick look around Xiaomi HyperOS.
03 // BUILD & DESIGN
The Redmi 15C 5G is a large phone, and you notice that immediately when you pick it up. Despite its budget price, though, it doesn’t feel particularly cheap in the hand. The plastic construction feels solid, and the overall design is clean and modern.
The camera module on the back gives the phone a slightly more premium appearance than I expected at this price point. Xiaomi has kept the rest of the design fairly simple, which I actually like.
Another welcome feature is the 3.5 mm headphone jack. It’s becoming increasingly uncommon on modern smartphones, so it’s nice to see Xiaomi keeping it on an affordable device like this. You can simply plug in a pair of wired headphones without needing an adapter or USB-C headphones.
Of course, the size won’t be for everyone. This is definitely not a compact smartphone, but the large body also makes sense considering the big display and battery inside.
Overall, my first impression of the build quality is positive. It still feels like a budget device, but not an unnecessarily cheap one.
04 // DISPLAY & HYPEROS
The Redmi 15C 5G comes with a large 6.9-inch display with a refresh rate of up to 120 Hz. The size is immediately noticeable, and for browsing, watching videos or simply navigating around Android, there’s plenty of screen space to work with. The bezels are still quite large, especially compared to more expensive modern smartphones, and there’s a noticeable chin at the bottom. At this price point, though, that’s difficult to complain about too much — some compromises have to be made to keep the price down.
The display itself isn’t anything particularly premium, but for normal everyday use my first impression is that it does the job well. The higher refresh rate also helps make navigating through the interface feel smoother.
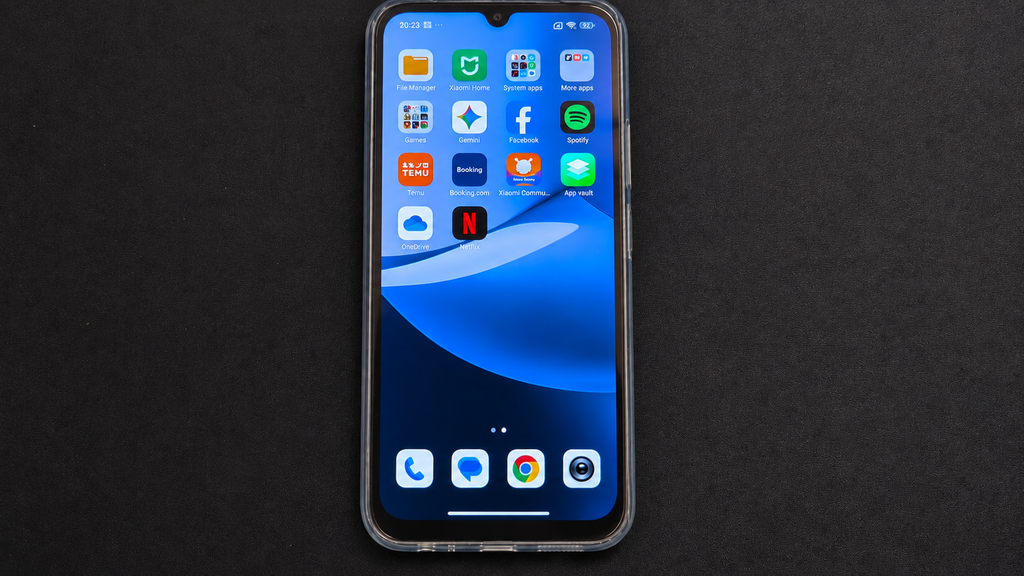
The phone runs Xiaomi HyperOS, which felt responsive enough during my initial setup and short time navigating through the menus.
One thing I wasn’t particularly impressed by was the amount of pre-installed software. There are already quite a few additional apps and games on the phone out of the box. Even during the initial setup, you’re presented with an option to install more supposedly “essential” apps, many of which are basically games.
Most of this can be removed or simply skipped during setup, but it does make the initial experience feel unnecessarily cluttered. It’s something I’ve come to expect to some degree from inexpensive Android phones, but I’d still prefer a much cleaner installation from the start.
I’ll need considerably more time with HyperOS on this hardware before making any conclusions about performance. And considering what I actually bought the Redmi 15C 5G for, stock Android usage is only the beginning.
05 // HARDWARE & PERFORMANCE
Inside, the Redmi 15C 5G is powered by the MediaTek Dimensity 6300, which also brings 5G connectivity to the device. My version comes with 128 GB of storage, with the box advertising up to 8 GB of RAM using memory extension.
So far, performance feels perfectly adequate for what this phone is supposed to be. Navigating through HyperOS, opening apps and going through the initial setup hasn’t shown any major issues, although this is obviously far from a proper performance test.
One of the bigger highlights is the 6000 mAh battery, paired with support for 33 W fast charging. For an inexpensive phone, having such a large battery is definitely appealing, although I’ll need to actually use the phone for a while before commenting on real-world battery life.
You also get 5G and NFC, which makes the 15C considerably more interesting as an inexpensive everyday device — and also gives me a better platform for the experiments I have planned.
I’m not going to run benchmarks or make any serious performance claims yet. This is only a first look, and there will be plenty of opportunities to push the hardware harder later.
06 // CAMERA
The Redmi 15C 5G features a 50 MP main camera, but I haven’t spent enough time with it yet to give it a proper evaluation.
During my first look, I only briefly opened the camera and explored the interface. I haven’t taken enough photos in different conditions to make any meaningful conclusions about image quality.
For now, I’ll leave the camera testing for a future post after I’ve actually spent some time using the phone.
07 // FIRST IMPRESSIONS & WHAT’S NEXT
My first impressions of the Redmi 15C 5G are mostly positive. It’s obviously a budget phone and there are compromises, such as the large display bezels and the amount of pre-installed software, but the phone itself feels solid, HyperOS runs smoothly enough so far, and features such as 5G, NFC, a 6000 mAh battery and the 3.5 mm headphone jack make it an interesting package for the price.
But simply using it as a normal Android phone isn’t really why I bought it.
The Redmi 15C 5G will become part of several upcoming OpenBootLab experiments. First, I want to pair it with the Rii Bluetooth mini keyboard I’ve recently picked up and see how practical the combination actually is.
After that, things get more interesting. I’ll be experimenting with running Linux on the Redmi 15C 5G, building on what I previously tried with the Redmi A3.
Eventually, the phone is planned to become the heart of my Android Cyberdeck project, where the goal is to turn an inexpensive smartphone into something closer to a tiny portable computer.
So this isn’t really the conclusion for the Redmi 15C 5G.
Can a €6 Keyboard Be Any Good? SBOX K-14 Unboxing and First Impressions.
01 // INTRODUCTION
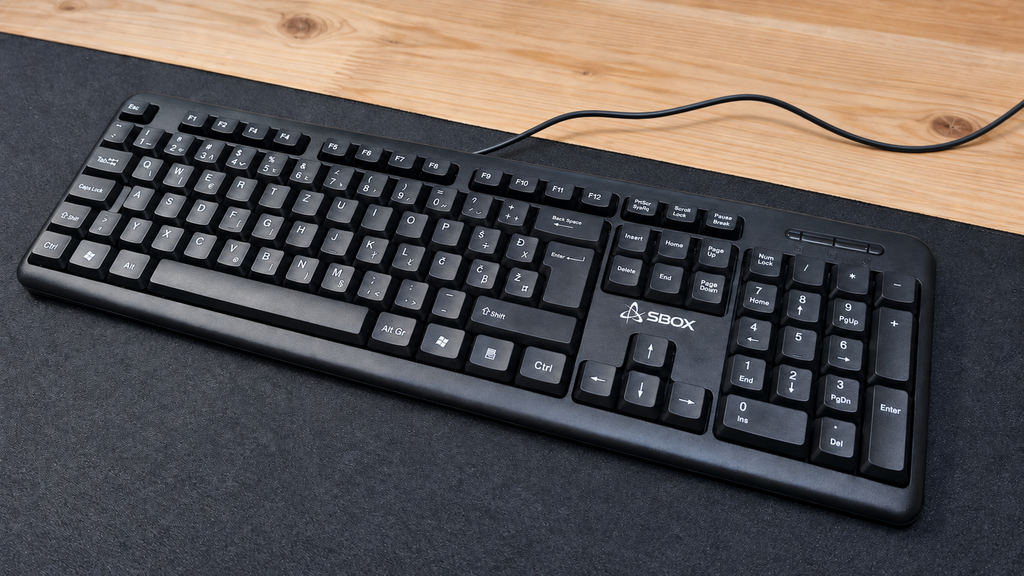
The SBOX K-14 is one of the cheapest new keyboards I could find. I purchased it from TechTrade for only €6.71, which made me curious about what such a low-cost keyboard could actually offer.
I wanted to find out whether it could be used for gaming, writing OpenBootLab posts and basic everyday tasks, or whether its extremely low price would make it frustrating to use.
My immediate reaction after removing it from the box was simple: this keyboard is unbelievably light. The plastic feels very cheap, and the entire body flexes significantly with little pressure. That was not completely unexpected for €6.70, but the amount of flex still surprised me.
Build quality is only one part of the experience, however. The real question is whether the SBOX K-14 can still function as a usable keyboard despite feeling so inexpensive.
Watch the complete SBOX K-14 unboxing below:
02 // SPECIFICATIONS
The SBOX K-14 is a basic full-size wired keyboard designed for everyday computer use. According to the specifications listed by TechTrade, it offers:
105-key full-size layout
Slovenian/Croatian key layout
Membrane switches
Rated lifetime of three million presses per key
USB 2.0 connection
1.35-metre fixed cable
5 V / 100 mA USB power
Dimensions of 445 × 156 × 22 mm
Weight of approximately 530 g
Official compatibility with Windows XP, Vista, 7, 8 and 10
12-month warranty
The official compatibility list appears dated and does not mention Windows 11 or Linux. However, as a standard USB keyboard, it should work as a plug-and-play input device on most modern operating systems. I tested it on Arch Linux and will cover the results later in the post.
There is no backlighting, wireless connectivity, software suite or gaming-focused feature set. This is a conventional membrane keyboard focused on providing the most basic functionality at the lowest possible price.
03 // DESIGN AND BUILD QUALITY
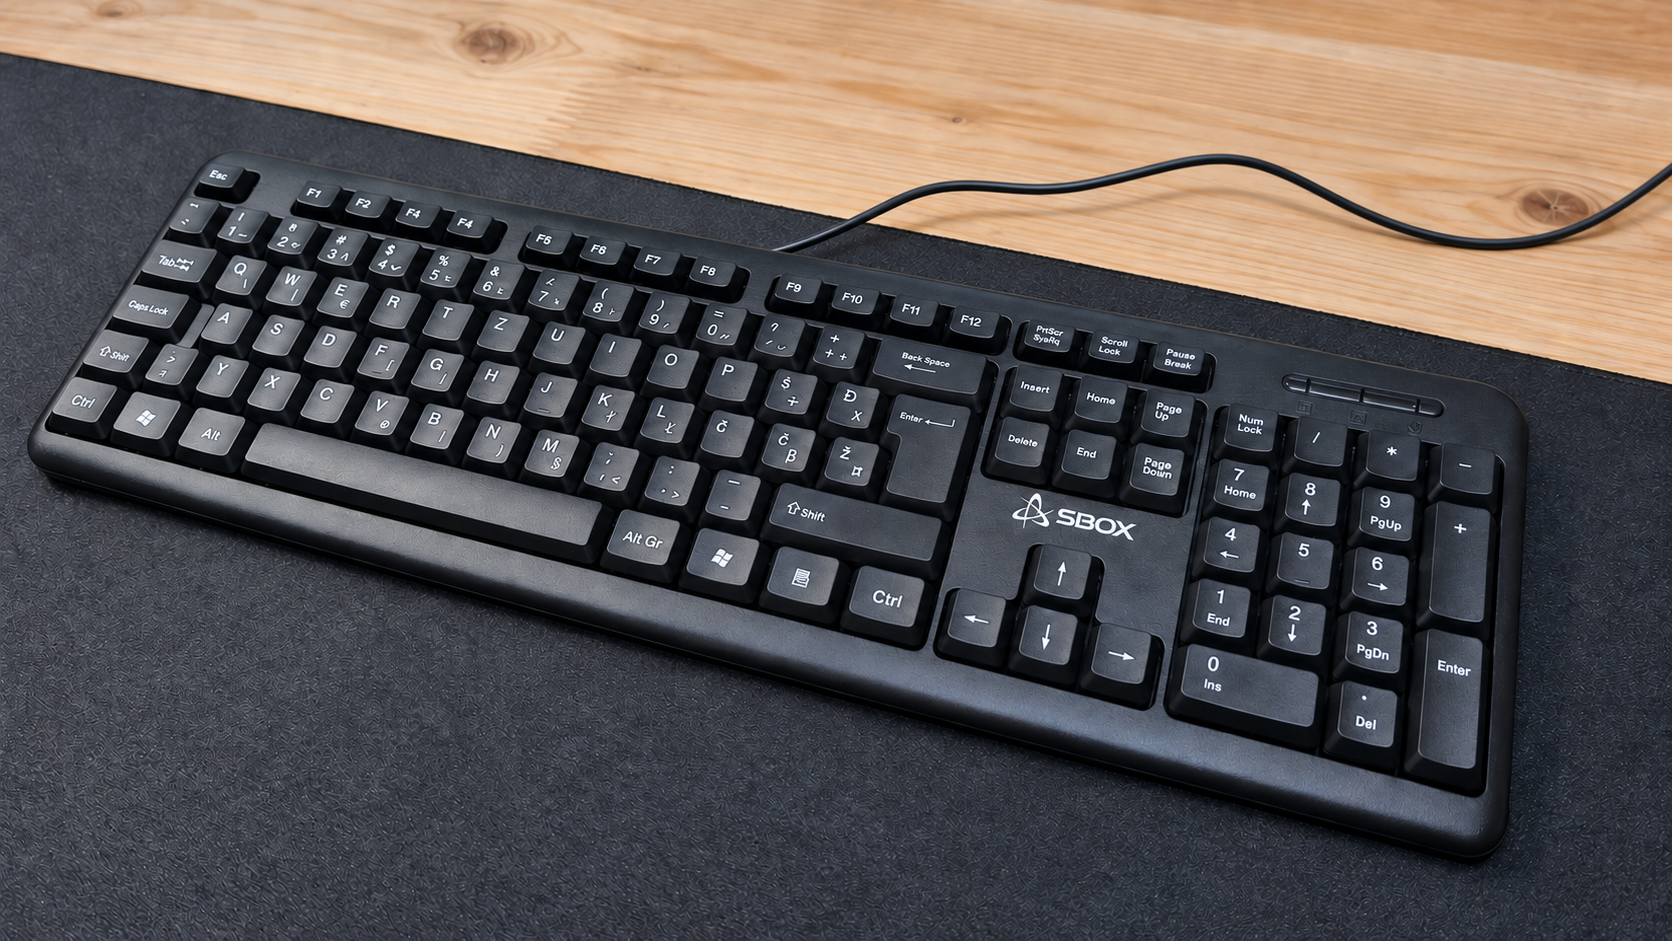
he SBOX K-14 has a traditional full-size layout with a function-key row, navigation keys, arrow keys and a numeric keypad. One positive aspect is its relatively compact outer frame. There is very little unnecessary plastic surrounding the keys, so it does not occupy more desk space than a full-size keyboard actually needs.
Its construction immediately reveals where the low price comes from. The plastic feels very cheap, the keyboard is extremely light, and the chassis flexes significantly with little pressure. It does not feel particularly sturdy, although that is not entirely surprising for a keyboard costing only €6.70.
There are fold-out legs underneath, allowing the keyboard to be raised to a more comfortable typing angle. However, it has no rubber feet to grip the desk. Combined with its low weight, this means the keyboard slides around with very little force. The underside also includes several drainage holes. These should allow small amounts of spilled liquid to pass through the keyboard instead of remaining trapped inside, although I did not deliberately test this feature.
The permanently attached 1.35-metre USB cable also feels thin and inexpensive. It should be long enough for a typical desktop setup, but its durability will only become clear after longer use.
Overall, the K-14 offers a sensible and space-efficient full-size form factor, but its materials, flex and lack of grip make it obvious that keeping the price as low as possible was the main priority.
04 // TYPING FEEL AND SOUND
The SBOX K-14 uses membrane switches, and the keys feel very mushy when pressed. Despite that, they are reasonably responsive for normal typing, and the keyboard is more comfortable to use than its extremely cheap construction initially suggested.
The plastic does not feel pleasant beneath the fingers and constantly reminds you that this is a €6.70 keyboard. The larger keys, including Space and Enter, feel and sound fairly average. They are not particularly good, but they also do not stand out as a major problem.
I made a few typing mistakes while testing it, although the number of missed or incorrect presses was not bad enough to make the keyboard frustrating. With more time, I would probably become more accustomed to its feel.
One of its strongest qualities is how quiet it is. The K-14 produces very little noise during normal typing, which could make it suitable for a shared room, a quiet office or late-night use.
If this were the only keyboard I had, I could comfortably use it to write multiple OpenBootLab posts and complete everyday tasks. However, if I had more money available, I would choose something with better materials and a more precise typing feel.
The video below demonstrates how the SBOX K-14 sounds during normal typing and when pressing several individual keys. No background music was added, allowing the keyboard itself to be heard clearly.
05 // CONNECTION AND COMPATIBILITY
I tested the SBOX K-14 with my main desktop running Arch Linux and with my laptop running Windows 11 Pro.
The keyboard was recognised immediately on both systems. I only had to connect the USB cable, and it was ready to use within seconds. No drivers, additional software or manual configuration were required—which is exactly what I expected from a standard wired USB keyboard.
All the keys I tested worked correctly, including the Slovenian and Croatian characters Č, Š, Ž and Đ. The numeric keypad and the rest of the full-size layout also worked without any problems.
Although the product information only officially lists older Windows versions, the K-14 worked normally with Windows 11 Pro and Arch Linux during my testing. Its simple plug-and-play compatibility is one of the areas where this inexpensive keyboard delivers exactly what it should.
06 // GAMING TEST
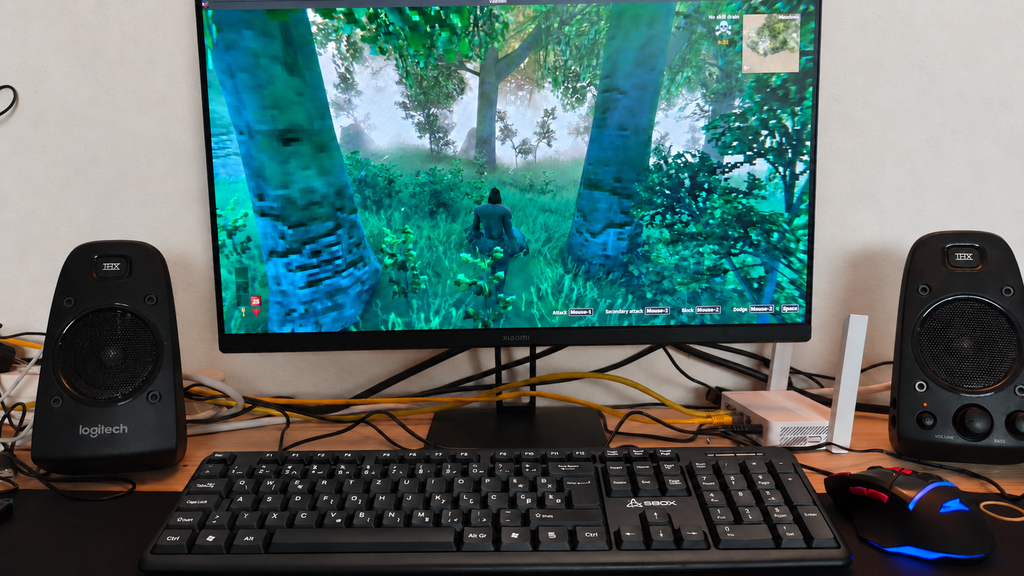
I mainly play single-player games rather than competitive multiplayer titles, and for that kind of gaming, the SBOX K-14 is good enough.
Basic movement and normal controls work without any major problems. However, when moving and pressing several keys very quickly, the keyboard can occasionally fail to register an input. This is unlikely to be a serious issue in slower single-player games, but it could become frustrating in fast or competitive titles where every keypress matters.
The lack of rubber feet is also more noticeable while gaming. Because the keyboard is extremely light, it can slide across the desk during more intense moments.
This is clearly not a gaming keyboard, and anyone who needs reliable multi-key input should look for something better. However, if the SBOX K-14 is the only new keyboard you can afford, it is still sufficient for casual gaming and everyday computer use.
I am also writing this post on the K-14, which proves that it is usable beyond a short test. And if a particularly frustrating game ever causes it to meet an unfortunate end, at least replacing a €6.70 keyboard will not be too painful.
07 // FINAL VERDICT
So, can a €6.70 keyboard actually be any good? The answer depends entirely on what you expect from it.
The SBOX K-14 feels extremely cheap. Its plastic is unpleasant, the chassis flexes considerably, the cable is thin, and the lack of rubber feet allows it to slide around the desk. The keys are also very mushy, and fast combinations are not always registered correctly.
Despite those weaknesses, the keyboard is still functional. It is comfortable enough for writing, extremely quiet, compatible with both Arch Linux and Windows 11 Pro, and usable for basic tasks and casual single-player gaming. I even wrote this post using it.
I would not choose the K-14 if I had enough money for a better keyboard. However, for someone who needs the cheapest possible new keyboard, a temporary replacement, or a spare for troubleshooting computers, it does the job.
For €6.70, I cannot call it impressive—but I also cannot call it useless. It is exactly what it promises to be: an extremely cheap keyboard that works.
Would you use a keyboard this inexpensive as your main keyboard, or would you keep it only as a spare?
A quick guide to running the classic Deluxe Ski Jump 2 on Arch Linux using DOSBox.
01 // INTRODUCTION
Deluxe Ski Jump 2 is much more than just an old game to me. Returning to it was a real nostalgia trip because I originally played it on our family’s first computer, which was running Windows 95. Despite its simple graphics and tiny size, I remember spending hours trying to improve my jumps and beat my previous records.
Years later, I wanted to find out whether I could bring this childhood favourite back to life on my modern Arch Linux system. Because Deluxe Ski Jump 2 was developed for DOS, it cannot be launched directly like a modern Linux game. Fortunately, DOSBox provides a simple way to run it.
In this guide, I will show you how I installed DOSBox, downloaded the official demo version of Deluxe Ski Jump 2 and launched it on Arch Linux. I will also cover the slow gameplay I encountered in Practice mode and the simple adjustment that fixed it.
02 // WHAT YOU NEED
To follow this guide, you will need:
A computer running Linux
An internet connection
DOSBox
The official Deluxe Ski Jump 2.1 demo
A keyboard and mouse
I tested the game on Arch Linux with the XFCE desktop environment. However, the same game can also be run through DOSBox on Debian-based distributions such as Debian, Ubuntu and Linux Mint. The DOSBox installation command will be different depending on your distribution, but the remaining setup process should be very similar.
The official demo/shareware version of Deluxe Ski Jump 2.1 can be downloaded from the Mediamond website. The ZIP archive is only around 300 kB.
Download the archive and extract it somewhere convenient. The demo is enough to test the game and follow this guide, although it contains less content than the registered version.
03 // INSTALL DOSBOX
On Arch Linux, DOSBox is available directly from the official repositories. Open a terminal and install it with Pacman:
sudo pacman -S dosbox
Confirm the installation when prompted. On Debian, Ubuntu, Linux Mint and other Debian-based distributions, use:
sudo apt update
sudo apt install dosbox
Once the installation is complete, open your applications or Start menu, search for DOSBox and select it. You can also launch it directly from a terminal with:
dosbox
A new window should open with a classic DOS-style command prompt. DOSBox is now installed and ready, but it still needs access to the folder containing Deluxe Ski Jump 2.
04 // PREPARE THE GAME FOLDER
After downloading Deluxe Ski Jump 2.1 from the official Mediamond website, locate the ZIP archive and extract it.
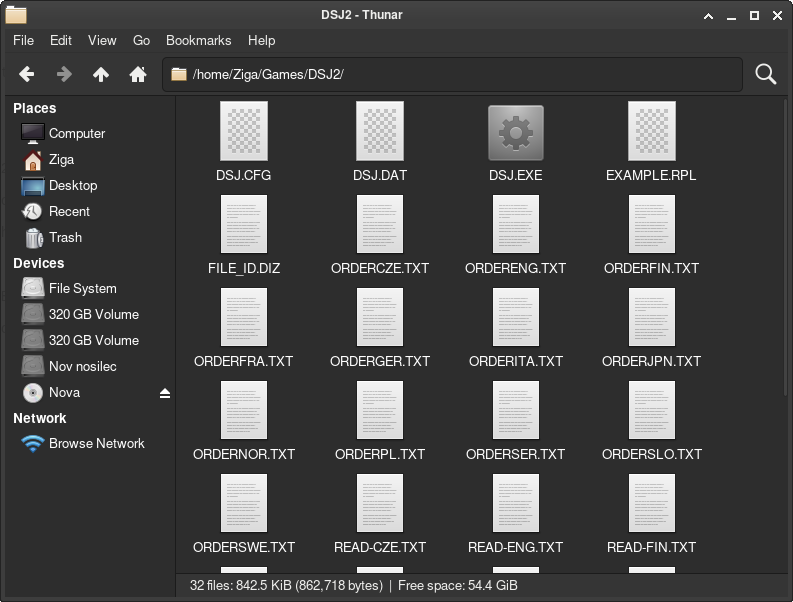
To keep my games organised, I created a folder named Games inside my home directory and placed the extracted DSJ2 folder inside it. My folder structure looked like this:
/home/YOUR_USERNAME/Games/DSJ2
Replace YOUR_USERNAME with your Linux username. You can also create the required folders from the terminal:
mkdir -p ~/Games/DSJ2
Then copy the extracted Deluxe Ski Jump 2 files into the DSJ2 folder. Open the folder and confirm that it contains dsj.exe, as this is the executable we will use to launch the game.
You can store the game somewhere else if you prefer. Just remember the complete folder path because you will need it when mounting the directory inside DOSBox.
05 // MOUNT THE GAME DIRECTORY IN DOSBOX
DOSBox cannot automatically access folders from your Linux system. Before launching the game, you need to mount the Games folder as a virtual DOS drive.
Open DOSBox and enter:
mount c /home/YOUR_USERNAME/Games
Replace YOUR_USERNAME with your actual Linux username.
Do not use ~ in the path. Although it represents your home directory inside a normal Linux terminal, DOSBox may not expand it correctly. Using the complete /home/... path is more reliable.
DOSBox should confirm that the directory has been mounted as drive C:. Switch to that drive by entering:
c:
Next, open the Deluxe Ski Jump 2 directory:
cd DSJ2
You can confirm that you are in the correct folder and view its contents with:
dir
Look for dsj.exe in the displayed file list. Once you see it, the game is ready to be launched.
06 // START DELUXE SKI JUMP 2
Once you are inside the DSJ2 directory, launch the game by entering:
dsj.exe
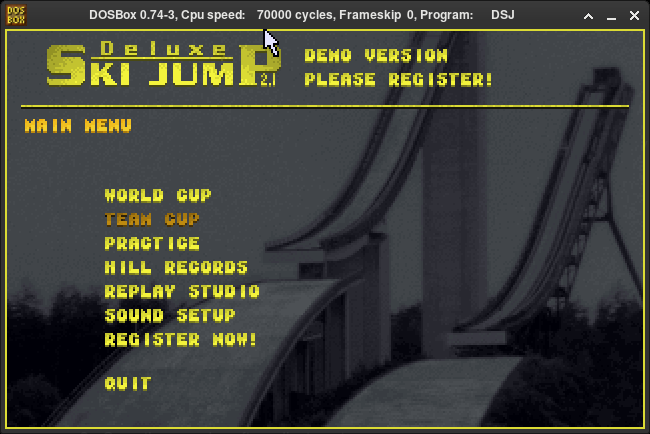
The familiar Deluxe Ski Jump 2 menu should now appear.
For me, seeing this menu again immediately brought back memories of playing the game on our first family computer running Windows 95. Modern games may be far more advanced, but returning to such a simple childhood favourite still felt special.
The game launched successfully on my Arch Linux system. However, when I entered Practice mode, the gameplay was noticeably too slow. Fortunately, this was not a problem with the game itself and could be corrected by adjusting the emulated CPU speed in DOSBox.
07 // FIX SLOW GAMEPLAY
Although the game opened normally, Practice mode initially ran much too slowly on my system. This happened because DOSBox was using too few emulated CPU cycles.
Normally, the number of cycles can be increased while the game is running by pressing:
Ctrl + F12
However, this keyboard shortcut did not work on my system. Instead, I exited the game and entered the following command directly into DOSBox:
cycles 70000
I then launched the game again.
At around 7,000 cycles, Practice mode became playable on my system. This may not be the perfect setting for every computer, so it is worth experimenting with slightly higher or lower values until the speed and sound feel correct.
The ideal value depends on your hardware and DOSBox configuration. If the game runs too slowly, increase the number. If it becomes too fast or the audio starts breaking up, reduce it.
08 // FULLSCREEN AND MOUSE CONTROL
DOSBox can run Deluxe Ski Jump 2 in either windowed or fullscreen mode. To switch between them, press:
Alt + Enter
The game is controlled primarily with the mouse. When you click inside the DOSBox window, DOSBox may capture the mouse pointer so it remains inside the game.
To release the mouse and return control to your Linux desktop, press:
Ctrl + F10
These shortcuts allow you to move easily between the game and your desktop without closing DOSBox.
GAMEPLAY VIDEO
Here is a short gameplay test showing Deluxe Ski Jump 2 running on Arch Linux through DOSBox:
09 // FINAL THOUGHTS
Running Deluxe Ski Jump 2 on Arch Linux turned out to be a simple and enjoyable experiment. After installing DOSBox, mounting the game folder and adjusting the CPU cycles, the official demo worked well and was completely playable.
More importantly, it was a real nostalgia trip. Seeing the familiar menu and jumping hills again immediately reminded me of playing the game on our first family computer running Windows 95.
The demo version is enough to test the game and revisit those memories, although it naturally contains less content than the registered version. If you want to experience this classic DOS game on a modern Linux system, DOSBox remains an easy way to bring it back to life.
Have you played Deluxe Ski Jump 2 before? Let me know which computer or operating system you originally played it on.
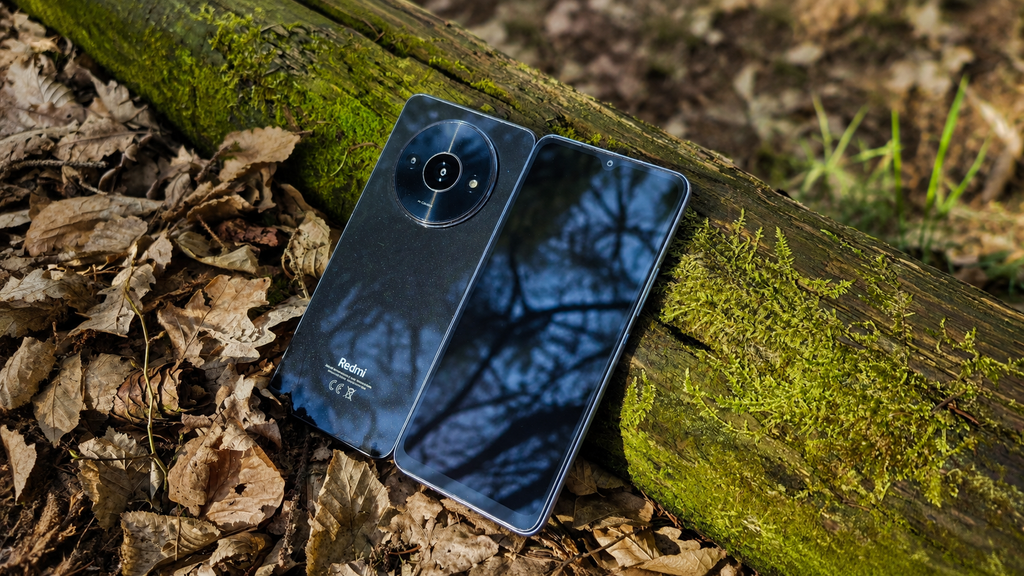
The Xiaomi Redmi A3 is one of the cheapest Android smartphones you can buy, which made it an interesting device for OpenBootLab. After unboxing it, I used the phone for around two months to see what it was actually like to live with before eventually experimenting with Linux and turning it into something a little less ordinary.
01 // WHY I BOUGHT IT
I bought the Redmi A3 around a year ago because I was curious about just how usable an extremely cheap smartphone could be. At the time, I paid around €59 per phone, which made me wonder whether you could actually live with a device this inexpensive as a normal daily phone. To make the experiment a bit more interesting, I actually bought two Redmi A3s, one for me and one for my wife. The idea was to use them normally and see how both of us would get along with such a cheap phone in everyday use.
Rather than judging the Redmi A3 only from its specifications, I wanted to find out where the compromises would actually start to show after living with it for a while.
02 // THE UNBOXING
The unboxing experience itself is pretty basic, which is exactly what I expected from a phone at this price. There is no premium presentation or anything unnecessary — you open the box, take out the phone, and get the essentials needed to start using it.
You can watch the full Redmi A3 unboxing on the OpenBootLab YouTube channel below:
What stood out more than the packaging was the phone itself. The Redmi A3 looked surprisingly good for something that cost around €59. The large circular camera module gives it a much more distinctive design than I expected from an entry-level device, and at first glance it really does not look like one of the cheapest smartphones on the market.
That first impression became even stronger once I picked it up, but I’ll get into that in the next section.
03 // FIRST IMPRESSIONS
The first thing that surprised me about the Redmi A3 was how good it actually felt for the price. I already had a Samsung Galaxy A14 to compare it with, and despite the Redmi being the cheaper device, the A3 somehow felt more premium in the hand. A big part of that comes from the design. The large circular camera module gives the phone a much more distinctive look than most entry-level devices, and the overall build does not immediately scream “€59 phone.”
Once you start using it, though, one of the first things you notice is just how large the screen bezels are. They make the phone look noticeably more budget-oriented from the front, especially compared with more expensive modern smartphones.
The display, performance and cameras are also fairly basic, but during those first few hours the Redmi A3 still made a much better impression than I expected.
That was what made me curious enough to use it for a longer period and find out whether the good first impression would survive everyday use.
04 // TWO MONTHS OF DAILY USE
After the initial impressions, I used the Redmi A3 as my normal phone for around two months. For light everyday tasks, it genuinely surprised me. Messaging, browsing, watching videos and using simple apps all worked well, and it often felt more responsive than my Samsung Galaxy A16. I also liked having a 3.5 mm headphone jack. It is a small feature, but one I still appreciate.
The limitations show up once you ask more from the phone. Using it for work, opening multiple documents, checking emails and switching between apps quickly slows it down. It works best when you keep things simple and focus on one task at a time. The camera is usable for basic photos, but not much more. It can record in Full HD, but the overall video quality is still quite basic.
One downside is the occasional promotional notification for random apps and games. They can be disabled, but you have to dig through a few settings to get rid of them. It is annoying, but it is also one of the ways Xiaomi can keep phones like this so cheap.
After two months, I was still more impressed than disappointed. For around €59, the Redmi A3 proved to be surprisingly capable as a basic everyday smartphone.
5 // THE VERDICT
The Redmi A3 is not a phone for heavy users, but for the price it does a lot better than I expected. For basic everyday use, it is responsive, the battery lasts well, the design feels more premium than the price suggests, and you still get useful features like the 3.5 mm headphone jack. The compromises are mostly where you would expect them: multitasking, camera quality and some annoying software promotions.
Phones like the Redmi A3 also make a lot of sense in markets where more expensive smartphones can represent a much bigger part of someone’s income. In those places, a very cheap phone that still covers the basics can be far more important than flagship-level performance. It can also be a great choice as a first phone for a child. For watching YouTube, playing simple kids’ games and basic communication, it does the job without spending a lot of money on a device that may get dropped or damaged.
Would I use it as my main phone long term? Probably not. But as a basic phone, backup device, first phone for a child or cheap platform for experiments, it makes a lot of sense.
And that is exactly why this Redmi A3 did not end up sitting in a drawer. I later started experimenting with running Linux on it using Termux, Debian and Proot. You can check out that Lab Note here.
06 // SPECIFICATIONS
Display: 6.71-inch IPS LCD, 90 Hz Resolution: 720 × 1650 Chipset: MediaTek Helio G36 CPU: Octa-core RAM: 3 GB / 4 GB Storage: 64 GB / 128 GB Expandable Storage: microSD support Rear Camera: 8 MP Front Camera: 5 MP Video: Up to 1080p Battery: 5000 mAh Charging: 10 W Headphone Jack: 3.5 mm Connectivity: 4G LTE, Wi-Fi, Bluetooth Operating System: Android with Xiaomi software Fingerprint Sensor: Side-mounted USB: USB-C
Specifications may vary slightly depending on the region and configuration.
// END OF REVIEW 001
Privacy & Cookies
We use cookies to keep Open Boot Lab working properly and to understand how the site is used. You can accept all cookies, deny optional cookies, or choose your preferences.
Functional
Always active
The technical storage or access is strictly necessary for the legitimate purpose of enabling the use of a specific service explicitly requested by the subscriber or user, or for the sole purpose of carrying out the transmission of a communication over an electronic communications network.
Preferences
The technical storage or access is necessary for the legitimate purpose of storing preferences that are not requested by the subscriber or user.
Statistics
The technical storage or access that is used exclusively for statistical purposes.The technical storage or access that is used exclusively for anonymous statistical purposes. Without a subpoena, voluntary compliance on the part of your Internet Service Provider, or additional records from a third party, information stored or retrieved for this purpose alone cannot usually be used to identify you.
Marketing
The technical storage or access is required to create user profiles to send advertising, or to track the user on a website or across several websites for similar marketing purposes.