Category: Reviews

  • Baracuda Manta Gaming Mouse

    Baracuda Manta Gaming Mouse

    Gaming mice can get expensive very quickly. But what happens when you go completely in the opposite direction?

    The Baracuda Manta is a wired RGB gaming mouse that sits firmly in the budget category, but on paper it comes with features normally associated with much more expensive gaming mice. You get an optical sensor capable of up to 12,800 DPI, 8 buttons, 1000 Hz polling, RGB lighting and software support, all packed into an 81 g mouse.

    I’ve now been using the Manta for around three weeks, not only for gaming but also as my everyday mouse for work and writing. And surprisingly, I actually like it.
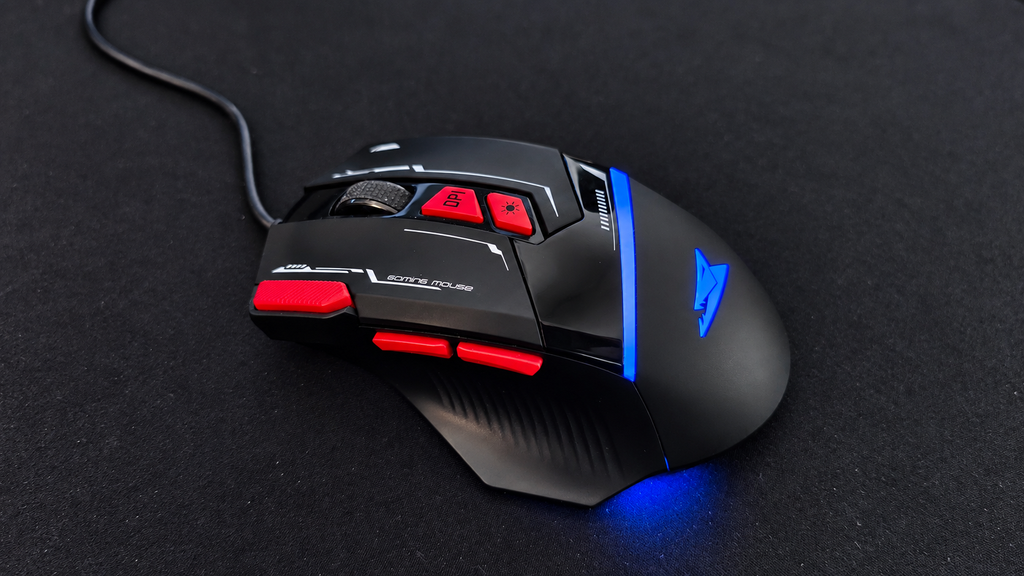

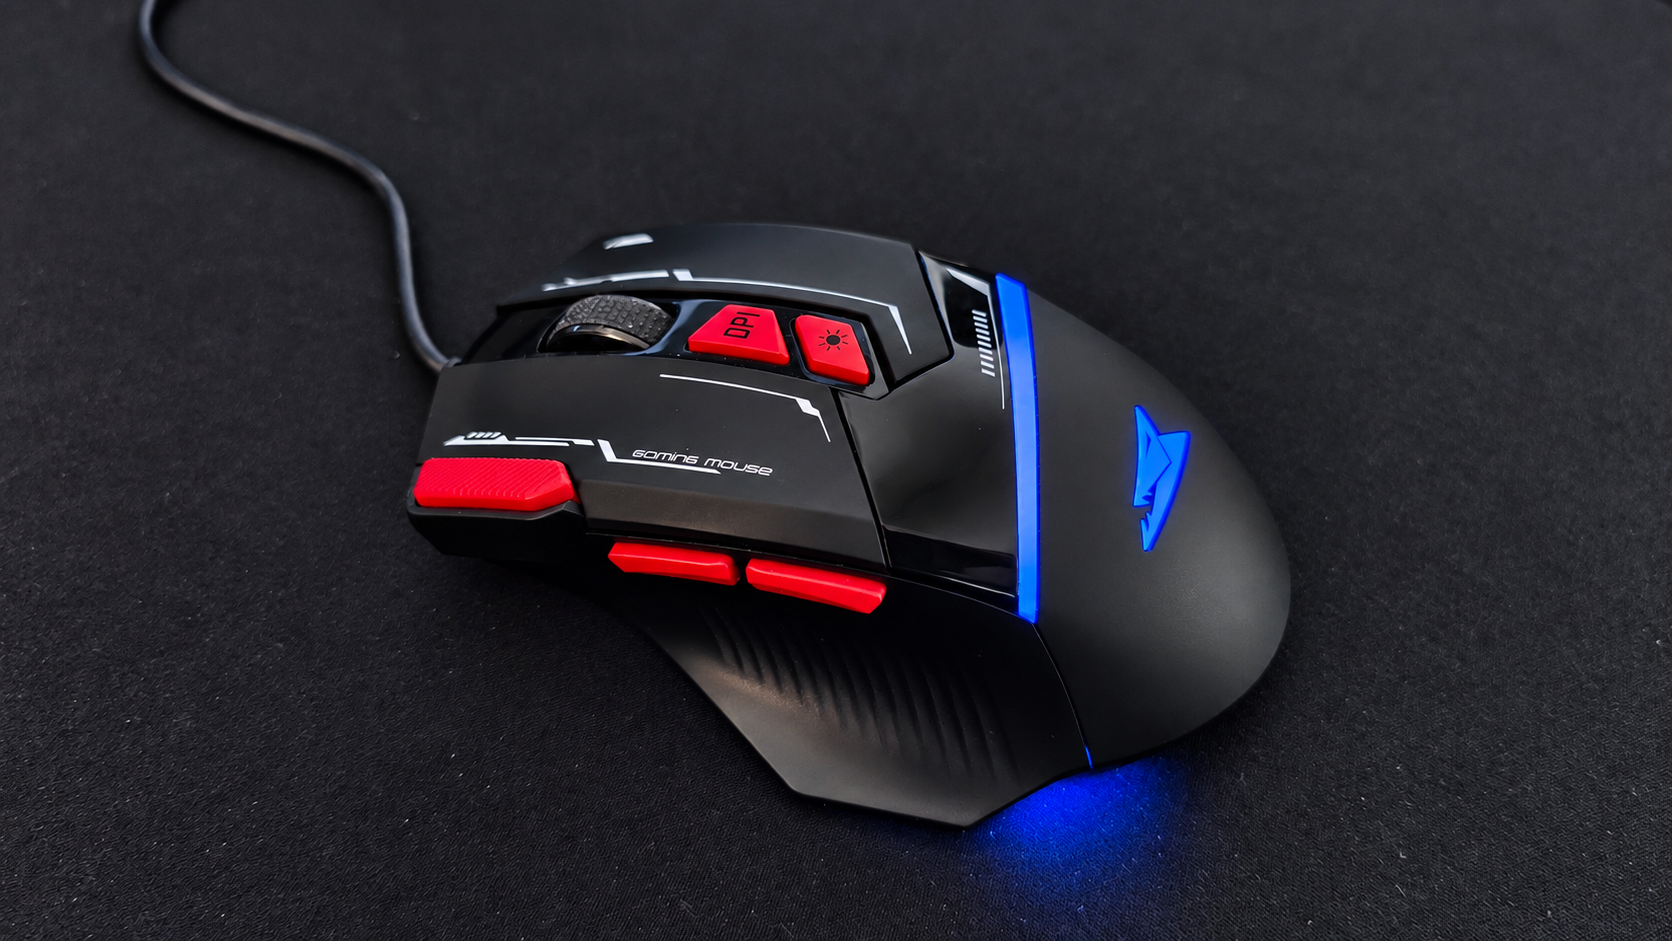
    The Manta is very clearly trying to be a gaming mouse. It has the aggressive shape, plenty of buttons, adjustable DPI and, of course, a healthy amount of RGB lighting. But I’ve actually ended up using it much more as an everyday mouse than purely as a gaming peripheral.

    That’s probably the more interesting test anyway.

    It’s easy to make a cheap mouse look good on a specification sheet. The question is whether you still want to use it after a few weeks.


    For something this inexpensive, the specification list is surprisingly long.

    • Optical Instant 825 sensor
    • Up to 12,800 DPI
    • 8 buttons
    • 1000 Hz polling rate
    • Up to 20 G acceleration
    • RGB lighting with 16.8 million colours
    • Software support
    • USB 2.0 wired connection
    • 1.5 m cable
    • 81 g
    • 126 × 82 × 42 mm
    • Rated for more than 5 million clicks
    • Windows and macOS support

    As always, numbers don’t tell you everything.

    After three weeks, the shape and button placement have mattered much more to me than the maximum DPI number.
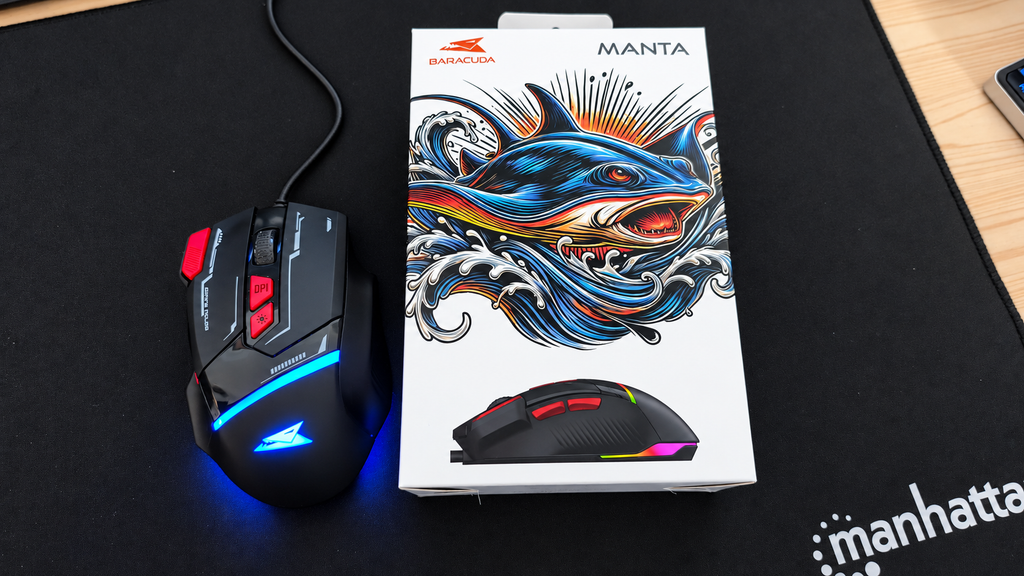

    The packaging is straightforward. Take the mouse out, connect the USB cable and you’re basically ready to go. That’s still one thing I like about simple wired peripherals. There is no battery to charge. No Bluetooth pairing. No wireless receiver to lose.

    Plug it in, the RGB comes alive, and start using it.


    This is probably one of the most important things to know about the Manta:

    It’s quite a large mouse. For me, that works well. I find the shape comfortable and after several weeks of use I haven’t had any problems using it for longer periods. But if you have smaller hands, I could definitely see the Manta feeling too big.

    So this isn’t necessarily a mouse I would recommend buying purely from the specification sheet without considering its size. The overall design is also something I genuinely like. It has that unmistakable gaming-mouse appearance without going completely overboard.
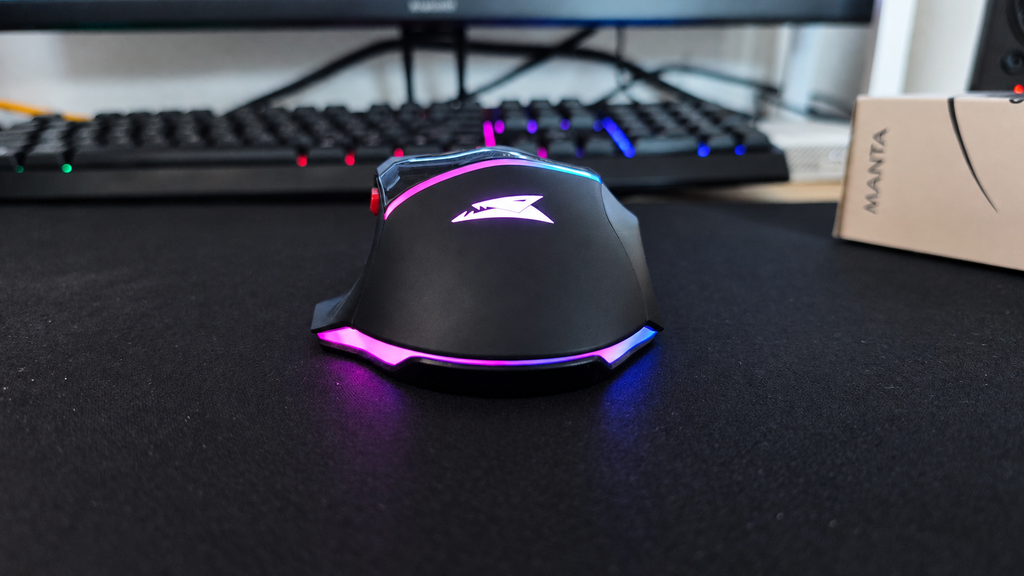
    And then there is the RGB. The lighting is easily one of my favourite parts of the Manta. It looks much better in person than I expected from such an inexpensive mouse and gives it considerably more personality when sitting on the desk.

    The cable is also perfectly acceptable for the price. It doesn’t feel especially premium and it isn’t something I would point to as a standout feature, but it also hasn’t given me any problems during normal use.

    In other words: it’s fine, but nothing to brag about.


    At around 81 grams, the Manta isn’t particularly heavy. At the same time, I wouldn’t describe it as an ultra-light gaming mouse either. It sits somewhere in the middle.For normal desktop use and the kind of games I play, that has been perfectly fine.

    If you’re heavily into competitive multiplayer games and specifically want the lightest mouse possible, you’ll probably be looking at a completely different category of product anyway.

    For my use, the weight hasn’t bothered me.


    This is where the Manta has actually surprised me the most.

    The two side buttons are positioned well and I’ve ended up using them a lot while working. They’re easy to reach without having to awkwardly change my grip, and after a few weeks they’ve become part of my normal workflow. There’s also an additional button next to the main left mouse button. I initially thought of it mostly as another gaming feature, but I’ve found it surprisingly useful when I’m doing a lot of text work and repeatedly working with copied text.

    These extra buttons have probably been more useful to me while working than while gaming.
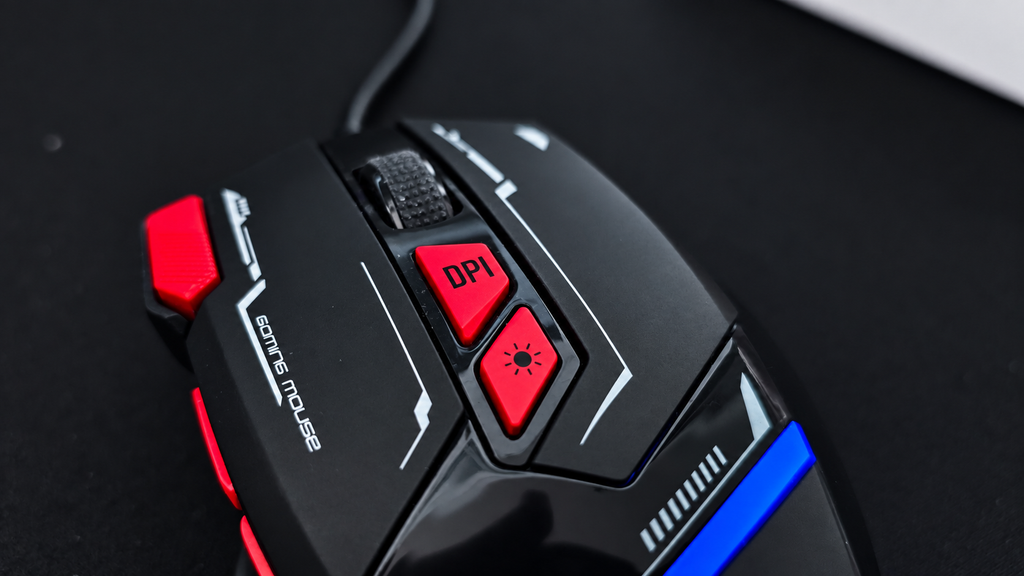
    The DPI button is also conveniently positioned and lets you quickly switch sensitivity. If you play a lot of competitive or multiplayer games, being able to change DPI quickly could be genuinely useful. For me personally, it isn’t particularly important because I don’t really play multiplayer games.

    Still, it’s nice to have.


    The buttons themselves feel good enough for everyday use.

    After several weeks I haven’t noticed anything that would make me want to stop using the mouse. The scroll wheel, on the other hand, is probably one of the least exciting parts of the Manta. It’s fine. It works. But that’s about it.

    I would describe it as average rather than particularly good or bad.

    Considering the price of the mouse, though, that’s not exactly a major complaint.


    Baracuda also provides software for the Manta, which should allow additional configuration of the mouse. Unfortunately, this is one part I haven’t been able to properly test yet. On most of my LAB computers I run Linux, but software is only supported for Windows.

    So I’m not going to judge the software without any test,beacuse for this review, I’ve mainly been using the mouse as it works out of the box.

    And honestly, even without touching the software, I’ve been perfectly happy using it.


    This is where the Manta has done better than I originally expected. I’ve been using it for roughly three weeks now for normal desktop work, writing and some gaming, and I haven’t felt the need to replace it. That’s probably one of the best things I can say about a cheap peripheral.

    The large shape works well for my hands. The side buttons are genuinely useful. The extra button has found its place in my normal work routine. The RGB looks great. The cable is good enough for normal use. And despite clearly being a budget product, nothing about it has made me want to immediately go back to another mouse.

    There are better mice. There are lighter mice. There are certainly more premium mice.

    But the Manta has been completely usable as an everyday mouse.


    After around three weeks with the Baracuda Manta, I like it more than I expected to. Its biggest consideration is probably its size. If you have larger hands, the shape can be very comfortable. If your hands are smaller, I would be a little more careful because this is definitely not a compact mouse.

    The RGB looks great, the button placement is genuinely useful and the mouse has worked just as well for everyday productivity as it has for casual gaming. The scroll wheel is average, the cable is nothing special and I haven’t been able to test the software yet.

    But that’s also missing the point. This is a very inexpensive gaming mouse. And after three weeks, I’m still happily using it every day.

    For a budget peripheral, that’s a pretty successful result.
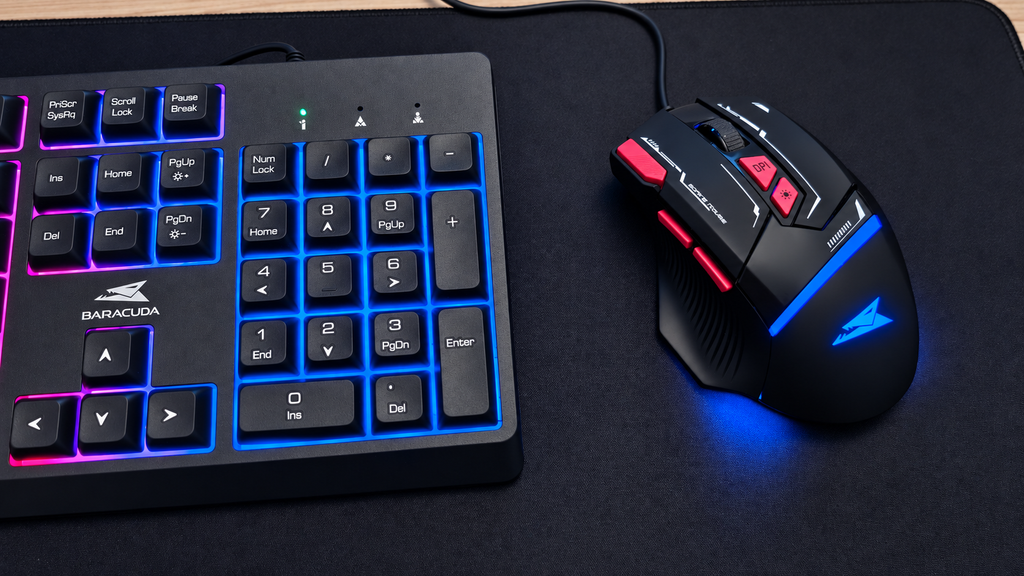
    Spoiler: the keyboard isn’t here by accident.


  • TP-Link TL-WN725N Review – This Tiny Wi-Fi Dongle Fixed My ThinkPad

    TP-Link TL-WN725N Review – This Tiny Wi-Fi Dongle Fixed My ThinkPad

    A tiny and inexpensive USB Wi-Fi adapter turned out to be the simplest solution to the wireless problems on my ThinkPad SL510. Here is the unboxing, Linux setup, size comparison and real-world performance test.


    While experimenting with Linux on my ThinkPad SL510, I encountered a frustrating problem with its internal Wi-Fi adapter.

    The system could see the wireless hardware, but connecting to my network was unreliable. At one point, NetworkManager repeatedly reported that the Wi-Fi network could not be found, even when the laptop was close to the router and other devices were connected normally.

    I experimented with different Linux installations and possible solutions, but I ultimately wanted something simple that would allow me to continue using the laptop instead of spending more time fighting its old internal wireless hardware.

    The answer was a small USB Wi-Fi dongle.

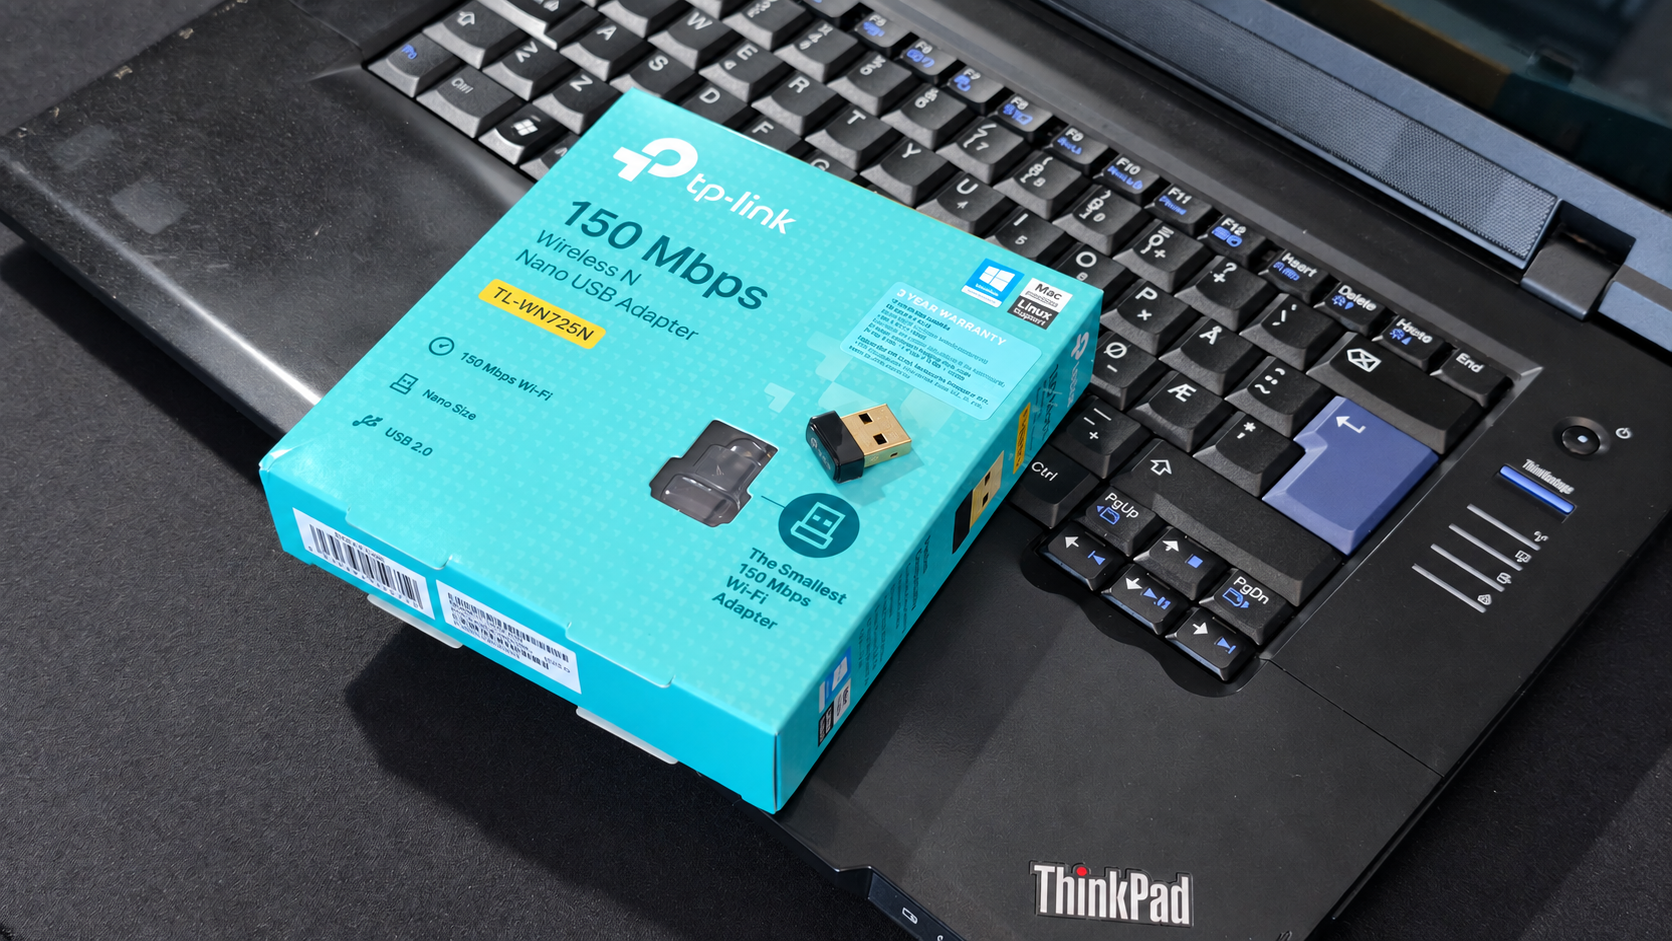
    I bought this nano adapter from a local computer shop in Ivančna Gorica. My main requirement was simple: it needed to work under Linux, provide enough speed for everyday browsing and remain small enough to leave permanently connected to the ThinkPad.


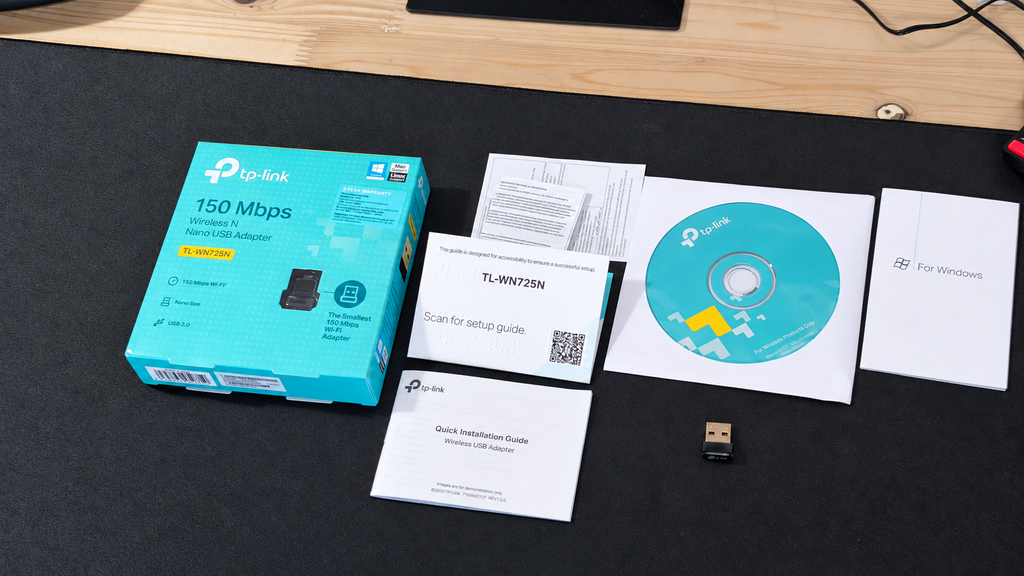
    The packaging is basic, which is exactly what I expected from an inexpensive USB Wi-Fi adapter.

    Inside the package, you receive:

    • The nano USB Wi-Fi adapter
    • Driver disc
    • Quick Setup Guide
    • Basic product documentation

    There is no complicated setup hardware and nothing unnecessary. The adapter itself is the main attraction, and it really is tiny.

    The short unboxing video above shows the packaging, included contents and the size of the adapter before installing it in the ThinkPad.


    The TP-Link TL-WN725N is a compact Wireless N USB adapter designed to add Wi-Fi connectivity without leaving a large device sticking out of the laptop.

    It connects through USB 2.0 and supports IEEE 802.11b, 802.11g and 802.11n networks on the 2.4 GHz band. TP-Link advertises a maximum wireless link rate of up to 150 Mbps. This is not the same as a guaranteed internet speed, but it should be sufficient for browsing, downloading updates, streaming video and other everyday tasks.

    Specifications:

    • Model: TP-Link TL-WN725N
    • Product type: Wireless N Nano USB Adapter
    • Interface: USB 2.0
    • Wireless standards: IEEE 802.11b/g/n
    • Frequency: 2.4 GHz
    • Maximum advertised rate: Up to 150 Mbps
    • Antenna: Internal
    • Dimensions: 18.6 × 15 × 7.1 mm
    • Weight: 2.1 g
    • Wireless security: WEP, WPA/WPA2 and WPA/WPA2-PSK
    • Official operating-system support: Windows and Linux

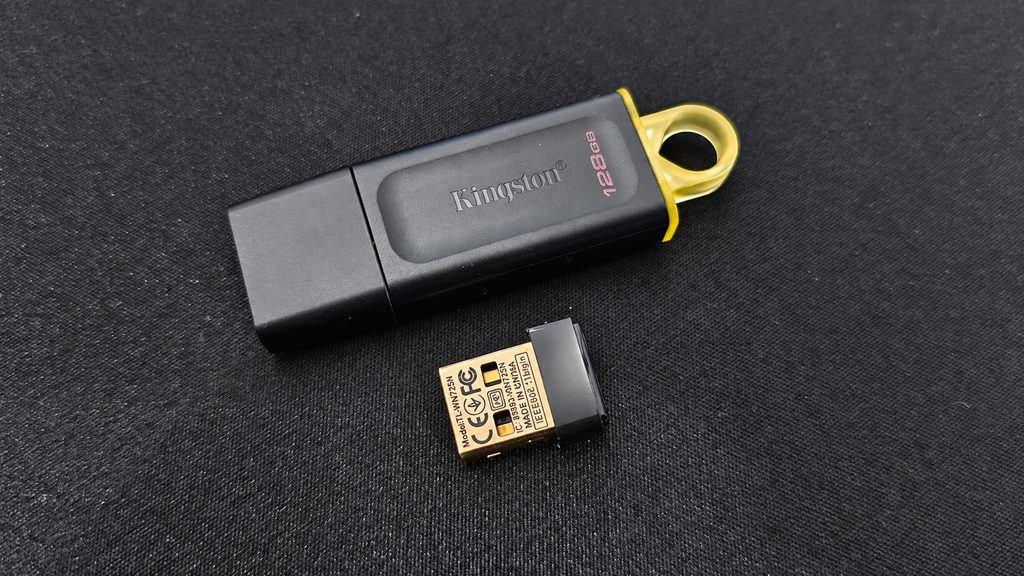
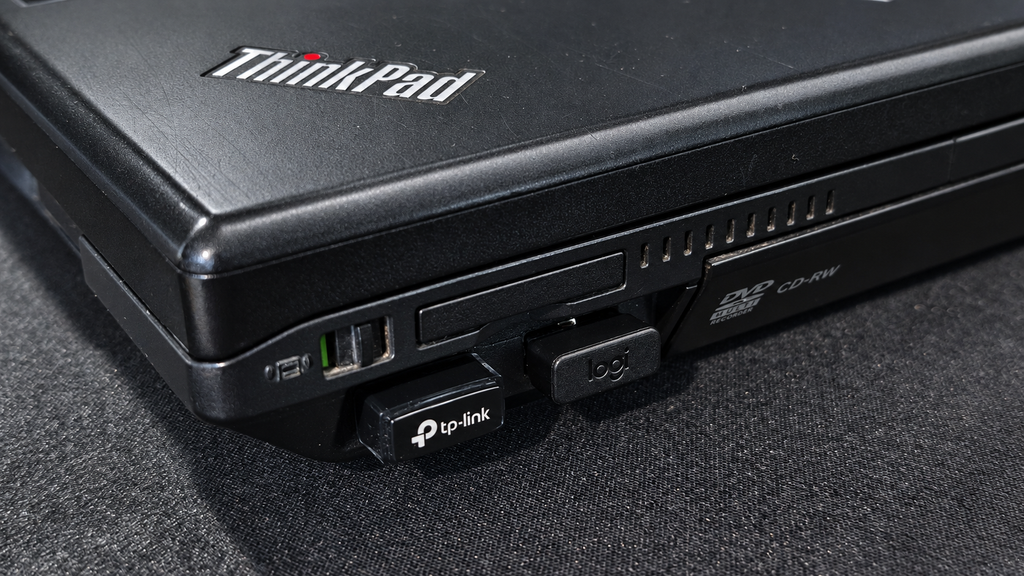
    The nano design is one of the TL-WN725N’s biggest advantages. Once inserted, only a small part of the adapter remains outside the USB port. It is noticeably smaller than a normal USB flash drive and is closer in size to the receiver supplied with a wireless mouse.

    This makes it particularly suitable for a laptop like my ThinkPad SL510. I can leave it connected while carrying the laptop around, without having a large adapter protruding from its side. It still occupies one USB port, but its compact body does not block the neighbouring connections.

    A larger adapter with an external antenna would likely provide better range, but the purpose of the TL-WN725N is convenience. It is designed to be inserted once and left in place, which is exactly what I wanted for the ThinkPad.


    I tested the dongle on the ThinkPad SL510 running Linux Mint 22.3.

    After inserting it into a free USB port, the wireless networks appeared in the network menu. I selected my home network, entered the password and connected normally.

    This is exactly the experience I wanted. Instead of troubleshooting the ThinkPad’s internal wireless adapter again, I could insert the dongle and get back online.

    For anyone considering a similar adapter specifically for Linux, chipset support is more important than the name printed on the packaging. Two visually identical nano adapters can sometimes use different internal chipsets, so it is worth checking the exact model before buying.


    A nano Wi-Fi adapter does not need to break speed records to be useful in an older laptop. It needs to provide a stable connection that is fast enough for web browsing, updates, video playback and writing.

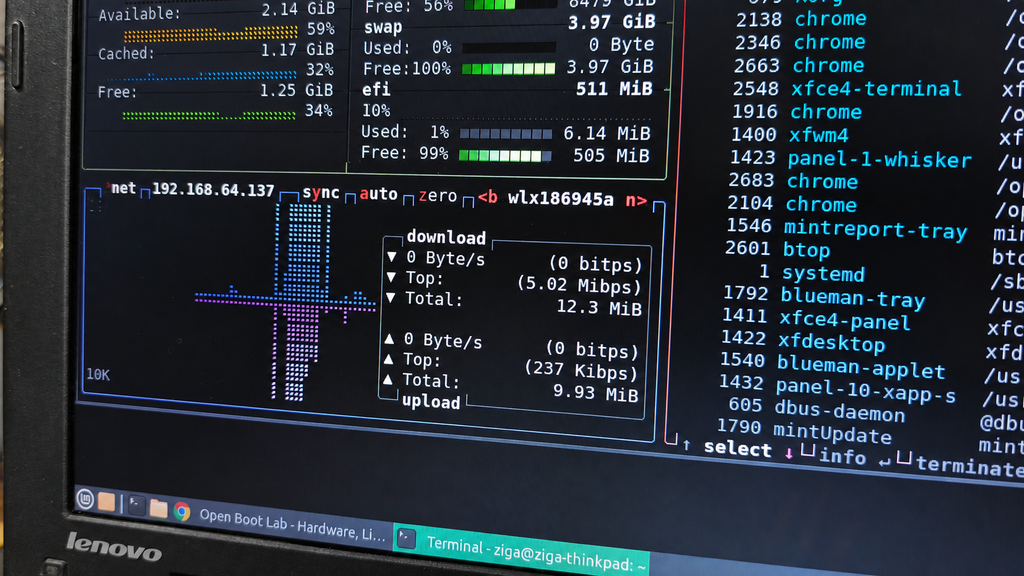
    In my initial test, this adapter reached approximately 30 Mbps. That is more than enough for how I use the ThinkPad SL510.

    Test results:

    Test locationSignal strengthDownloadUploadPing
    Close to the routerFull signalApproximately 30 MbpsApproximately 35 Mbps5 ms
    Garage Half of the signalApproximately 3.5 Mbps4.5 Mbps8 ms

    It is important to treat these results as a test of the complete setup, rather than the absolute maximum performance of the TL-WN725N. The ThinkPad SL510 is an older laptop, and its USB controller, processor, operating system, browser and other hardware limitations may all influence the final measured speed. USB 2.0 itself should provide more than enough bandwidth for this adapter, but the age of the overall platform can still affect real-world performance.

    The location also presents a difficult Wi-Fi environment. My garage is situated in the lower part of the house, with the wireless signal travelling through several concrete walls before reaching the laptop. This can significantly reduce both signal strength and throughput. Considering the age of the ThinkPad and the challenging location, the result is still perfectly adequate for browsing, writing and downloading updates.


    The greatest compliment I can give this adapter is that I barely notice it.

    It remains inserted in the ThinkPad and provides the wireless connection whenever I start the laptop. Its small size means I do not have to remove it when moving the computer between rooms, and it does not make the side of the laptop look cluttered.

    During everyday browsing and writing, the approximately 50 Mbps connection feels completely adequate. The ThinkPad itself is far more likely to become the limiting factor than the Wi-Fi dongle.

    A nano adapter may not be the best solution for maximum range, very fast local file transfers or competitive online gaming. For restoring dependable wireless connectivity to an older Linux laptop, however, it makes a lot of sense.


    This tiny USB Wi-Fi dongle solved a real problem with minimal effort.

    Instead of continuing to troubleshoot the ThinkPad SL510’s internal Wi-Fi adapter, I now have a compact and affordable solution that works for my everyday Linux use. It is small enough to remain permanently installed and its approximately 50 Mbps real-world speed is sufficient for browsing, writing, software downloads and online video.

    What I liked:

    • Very compact nano design
    • Simple Linux setup
    • Fast enough for everyday use
    • Can remain permanently connected
    • Affordable solution for an older laptop

    What could be better

    • Less range than adapters with external antennas
    • Occupies one of the ThinkPad’s USB ports
    • Exact Linux compatibility may depend on the internal chipset
    • Not intended for maximum wireless performance

    If you have an older laptop with an unsupported or unreliable internal Wi-Fi adapter, a compatible nano USB dongle can be one of the easiest ways to bring it back online.

    It may not be the most exciting upgrade inside the OpenBootLab, but it turned my ThinkPad from an offline project into a useful Linux writing machine, and sometimes the smallest upgrades make the biggest difference.


    // END OF THE REVIEW 005

  • Logitech M190 Wireless Mouse – Unboxing & Quick Review

    Logitech M190 Wireless Mouse – Unboxing & Quick Review

    A simple full-size wireless mouse for around €15. But is there really anything more you need?


    I’ve recently been putting several older laptops back into use for OpenBootLab, and that created a very simple problem: I needed a wireless mouse.

    I wasn’t looking for RGB lighting, gaming features or software with twenty different settings. I wanted something inexpensive, reliable and comfortable enough to throw into a laptop bag and use without thinking about it. That led me to the Logitech M190.

    Logitech has been making inexpensive mice like this for years, and the M190 is about as straightforward as they come: a full-size wireless mouse, a tiny USB receiver and not much else. So I bought one to see whether a basic mouse like this is really all you need for an everyday laptop.


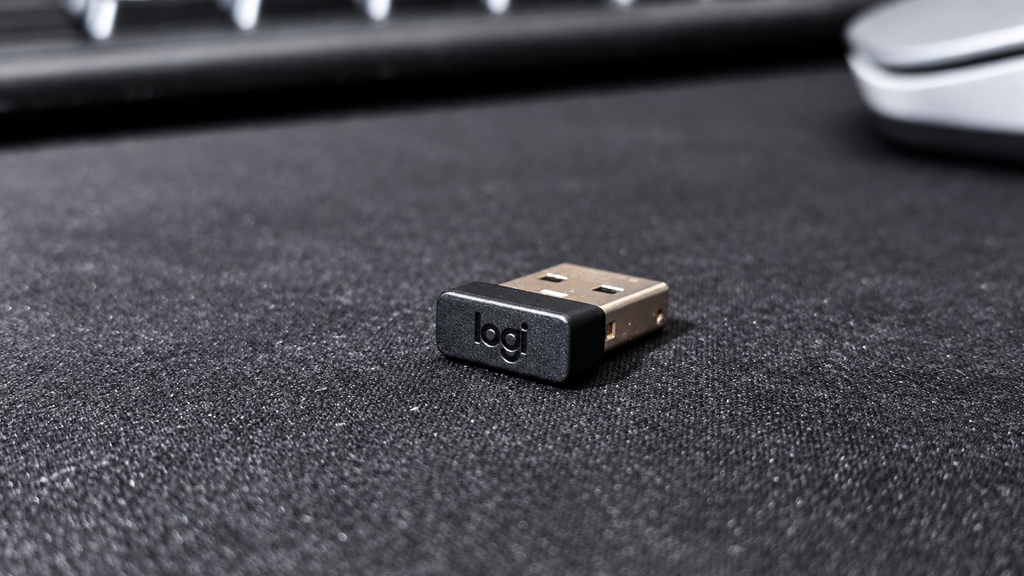
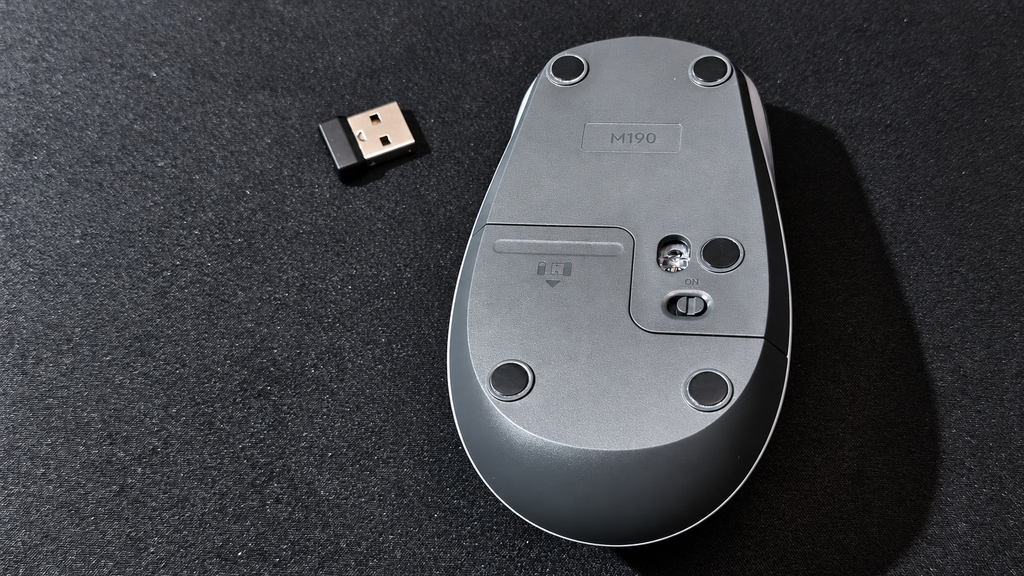
    There really isn’t much ceremony here. Inside the packaging you get the Logitech M190, its small USB receiver and the included AA battery. The receiver can be stored inside the mouse when you’re not using it, which is particularly useful if the M190 spends most of its time travelling inside a laptop bag.

    Setup is exactly what you’d expect. Plug the receiver into a free USB port, switch on the mouse and start using it. No account. No pairing process. No additional software required for basic operation.


    The M190 is a full-size mouse, which is one of the main reasons I chose it over some of Logitech’s smaller portable models.

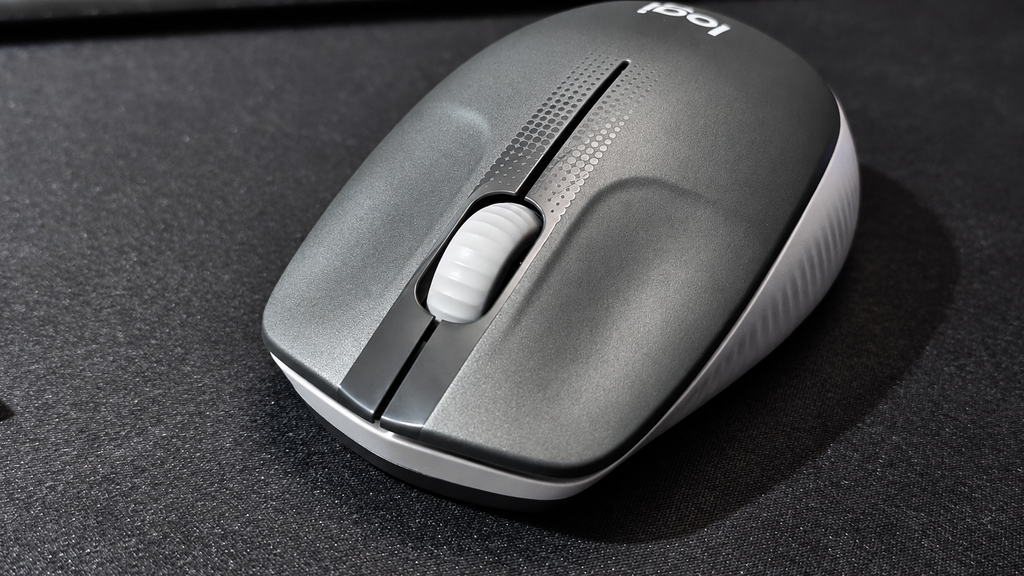
    The shape is simple and fairly conventional, with a curved body and textured sides that provide some additional grip.

    Build quality feels appropriate for an inexpensive Logitech mouse. It’s almost entirely plastic and doesn’t pretend to be a premium peripheral, but nothing immediately feels particularly fragile either. There are only the essentials: left and right buttons, a clickable scroll wheel and an on/off switch underneath.

    And honestly, that’s part of the appeal.


    I’ve been using the M190 with both my ThinkPad SL510 and the HP Mini 110 that I recently brought back to life with antiX Linux.

    The ThinkPad has recently become my main writing laptop for OpenBootLab, while the HP Mini is more of a lightweight Linux and home-lab machine. The M190 worked without any problems with both. Plug in the USB receiver and it is ready to go, including under antiX on the Mini.

    For writing articles, browsing WordPress, working with files, using the terminal and normal desktop work, the M190 does exactly what I wanted it to do. Tracking feels perfectly adequate, the wireless connection has been trouble-free so far, and I haven’t found myself thinking about the mouse while using it.

    That’s probably one of the better compliments you can give a basic peripheral.

    For gaming, however, the M190 wouldn’t be my first choice. It is perfectly fine for an occasional casual game, but this isn’t a gaming mouse. There are no additional buttons, adjustable DPI settings or other gaming-focused features, and the overall feel is clearly designed around everyday productivity rather than fast or competitive gameplay. That’s not really a criticism of the M190, it simply isn’t what this mouse was designed for.

    For web browsing, writing, office work, terminal use and general laptop use, however, I haven’t felt like I’m missing anything.


    One disadvantage compared with Bluetooth mice is that the M190 requires its dedicated USB receiver. On an older laptop like my ThinkPad, that’s not much of a problem. There are traditional USB-A ports available, so I can simply leave the receiver connected.

    The receiver itself is also tiny enough that it barely protrudes from the laptop. For newer ultrabooks with very few USB ports, or machines equipped only with USB-C, this approach is obviously less convenient. For the old hardware I’m using it with, however, it’s almost ideal.


    After using the Logitech M190 regularly for about five days, I’ve had enough time to get a good feel for how comfortable it is during everyday use.

    The first thing worth mentioning is the size. The M190 is a full-size mouse and seems better suited to larger hands. For me, that works well and I find it comfortable even during longer sessions. If you have smaller hands, however, the M190 might feel a little too large, especially compared with more compact laptop mice.

    The main buttons feel good and have a satisfying click without being excessively loud. The sound is restrained enough that I would have no problem using the M190 in an office or other quiet environment.

    The scroll wheel is similarly straightforward. It doesn’t feel particularly premium, but for web browsing, scrolling through documents and working in WordPress, it does exactly what I need it to do. After several days of using it with both the ThinkPad SL510 and HP Mini 110, comfort hasn’t been an issue. It’s not trying to reinvent the mouse—it simply provides a comfortable, predictable experience for normal everyday work.

    For the kind of inexpensive everyday mouse the M190 is supposed to be, that’s more than adequate.


    The Logitech M190 isn’t an exciting mouse, and after using it for several days, I think that’s actually one of its strengths.

    There is no RGB lighting, no software to configure, no adjustable DPI and no collection of extra buttons. You plug the tiny USB receiver into your computer, switch the mouse on and start using it. For gaming, I would definitely look elsewhere. But for the job I bought it for—writing, browsing, working on OpenBootLab and general everyday computer use—I don’t really need anything more.

    I’ve used it with both my ThinkPad SL510 and HP Mini 110, and it has worked exactly as expected with both machines. The full-size body fits my hands well, the buttons feel good, the clicks are quiet enough for office use and the scroll wheel is perfectly adequate for browsing and documents.

    It’s also exactly the kind of peripheral that makes sense with older hardware. There’s no software dependency or complicated setup to worry about. Just a USB receiver and a mouse. The M190 isn’t going to make an old laptop more exciting. It just makes it easier to use.

    And for a simple everyday wireless mouse, that’s really all I wanted.


  • Xiaomi Redmi 15C 5G – Unboxing & First Impressions

    Xiaomi Redmi 15C 5G – Unboxing & First Impressions

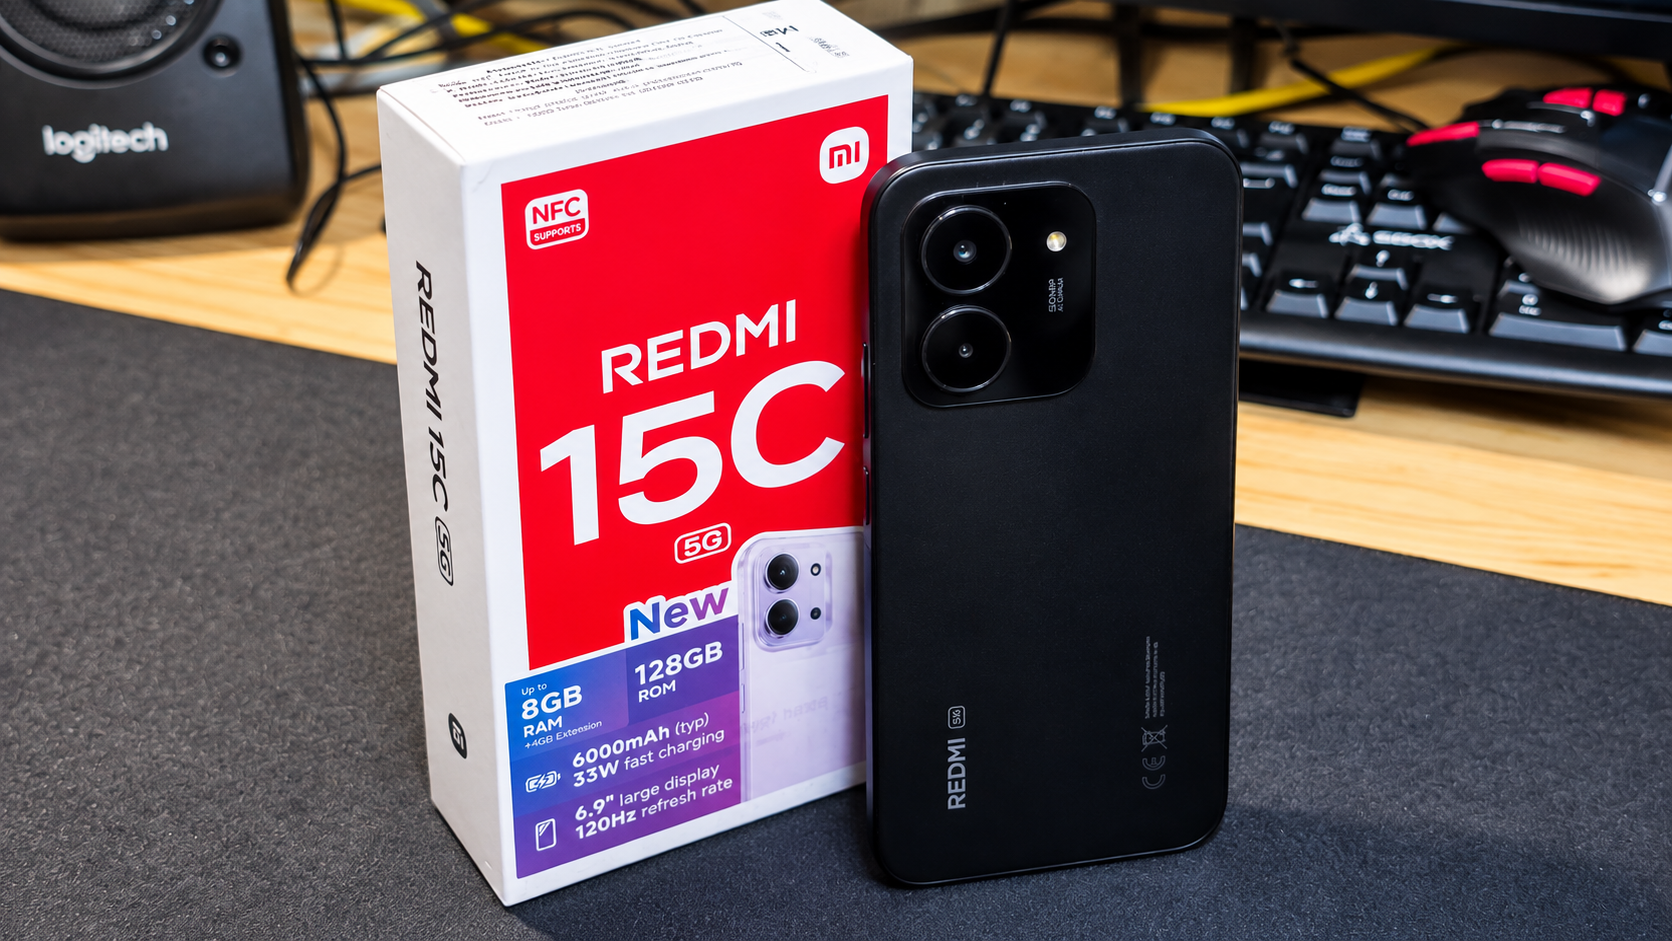
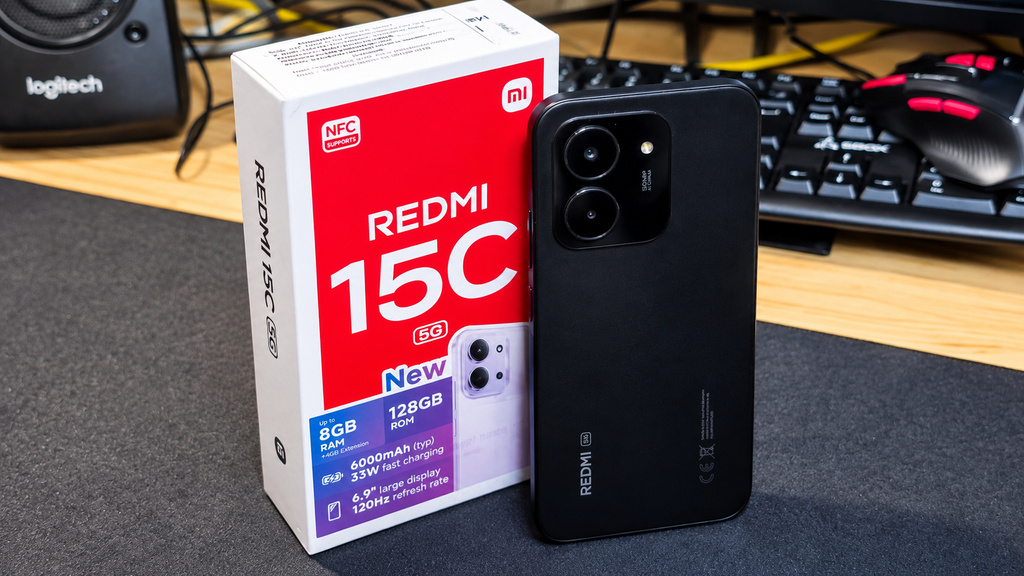
    The Redmi 15C 5G is an affordable Android phone with a large display, 5G connectivity and a massive battery. I picked one up not only to see what Xiaomi offers at the budget end in 2026, but also with a future OpenBootLab project in mind.

    Before the experiments begin, let’s unbox it and take a first look.


    The interesting part here is that this wasn’t originally supposed to be a normal smartphone purchase.

    After experimenting with running Linux on my Redmi A3, I decided that I wanted to take the idea further and build a phone-powered cyberdeck. The A3 proved that the basic concept worked, but for the final project I wanted something newer and more capable.

    The Redmi 15C 5G looked like an interesting candidate: it’s still a relatively inexpensive Android phone, but gives me a more modern platform to experiment with.

    And before I start doing strange things to it, I thought it deserved a proper unboxing.


    The unboxing experience is pretty straightforward. For the European market, there is no power adapter included in the box. You do get a USB-A to USB-C charging cable, documentation and the usual SIM eject tool.

    One nice addition is the included clear TPU case. It feels surprisingly good quality for a case bundled with a budget phone and fits the device well. It’s nothing fancy, but it means the phone is protected straight out of the box without needing to buy a case separately.

    In the video below, you can see the full unboxing, first boot and a quick look around Xiaomi HyperOS.


    The Redmi 15C 5G is a large phone, and you notice that immediately when you pick it up. Despite its budget price, though, it doesn’t feel particularly cheap in the hand. The plastic construction feels solid, and the overall design is clean and modern.

    The camera module on the back gives the phone a slightly more premium appearance than I expected at this price point. Xiaomi has kept the rest of the design fairly simple, which I actually like.

    Another welcome feature is the 3.5 mm headphone jack. It’s becoming increasingly uncommon on modern smartphones, so it’s nice to see Xiaomi keeping it on an affordable device like this. You can simply plug in a pair of wired headphones without needing an adapter or USB-C headphones.

    Of course, the size won’t be for everyone. This is definitely not a compact smartphone, but the large body also makes sense considering the big display and battery inside.

    Overall, my first impression of the build quality is positive. It still feels like a budget device, but not an unnecessarily cheap one.


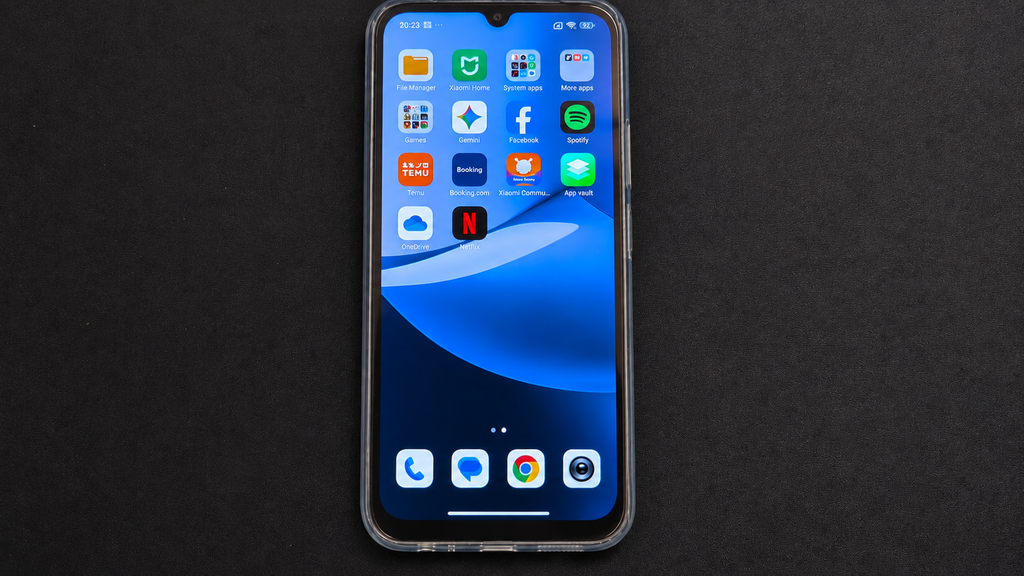
    The Redmi 15C 5G comes with a large 6.9-inch display with a refresh rate of up to 120 Hz. The size is immediately noticeable, and for browsing, watching videos or simply navigating around Android, there’s plenty of screen space to work with. The bezels are still quite large, especially compared to more expensive modern smartphones, and there’s a noticeable chin at the bottom. At this price point, though, that’s difficult to complain about too much — some compromises have to be made to keep the price down.

    The display itself isn’t anything particularly premium, but for normal everyday use my first impression is that it does the job well. The higher refresh rate also helps make navigating through the interface feel smoother.

    The phone runs Xiaomi HyperOS, which felt responsive enough during my initial setup and short time navigating through the menus.

    One thing I wasn’t particularly impressed by was the amount of pre-installed software. There are already quite a few additional apps and games on the phone out of the box. Even during the initial setup, you’re presented with an option to install more supposedly “essential” apps, many of which are basically games.

    Most of this can be removed or simply skipped during setup, but it does make the initial experience feel unnecessarily cluttered. It’s something I’ve come to expect to some degree from inexpensive Android phones, but I’d still prefer a much cleaner installation from the start.

    I’ll need considerably more time with HyperOS on this hardware before making any conclusions about performance. And considering what I actually bought the Redmi 15C 5G for, stock Android usage is only the beginning.


    Inside, the Redmi 15C 5G is powered by the MediaTek Dimensity 6300, which also brings 5G connectivity to the device. My version comes with 128 GB of storage, with the box advertising up to 8 GB of RAM using memory extension.

    So far, performance feels perfectly adequate for what this phone is supposed to be. Navigating through HyperOS, opening apps and going through the initial setup hasn’t shown any major issues, although this is obviously far from a proper performance test.

    One of the bigger highlights is the 6000 mAh battery, paired with support for 33 W fast charging. For an inexpensive phone, having such a large battery is definitely appealing, although I’ll need to actually use the phone for a while before commenting on real-world battery life.

    You also get 5G and NFC, which makes the 15C considerably more interesting as an inexpensive everyday device — and also gives me a better platform for the experiments I have planned.

    I’m not going to run benchmarks or make any serious performance claims yet. This is only a first look, and there will be plenty of opportunities to push the hardware harder later.


    The Redmi 15C 5G features a 50 MP main camera, but I haven’t spent enough time with it yet to give it a proper evaluation.

    During my first look, I only briefly opened the camera and explored the interface. I haven’t taken enough photos in different conditions to make any meaningful conclusions about image quality.

    For now, I’ll leave the camera testing for a future post after I’ve actually spent some time using the phone.


    My first impressions of the Redmi 15C 5G are mostly positive. It’s obviously a budget phone and there are compromises, such as the large display bezels and the amount of pre-installed software, but the phone itself feels solid, HyperOS runs smoothly enough so far, and features such as 5G, NFC, a 6000 mAh battery and the 3.5 mm headphone jack make it an interesting package for the price.

    But simply using it as a normal Android phone isn’t really why I bought it.

    The Redmi 15C 5G will become part of several upcoming OpenBootLab experiments. First, I want to pair it with the Rii Bluetooth mini keyboard I’ve recently picked up and see how practical the combination actually is.

    After that, things get more interesting. I’ll be experimenting with running Linux on the Redmi 15C 5G, building on what I previously tried with the Redmi A3.

    Eventually, the phone is planned to become the heart of my Android Cyberdeck project, where the goal is to turn an inexpensive smartphone into something closer to a tiny portable computer.

    So this isn’t really the conclusion for the Redmi 15C 5G.

    It’s just the first boot.


  • SBOX K-14 Unboxing: Is This €6 Keyboard Any Good?

    SBOX K-14 Unboxing: Is This €6 Keyboard Any Good?

    Can a €6 Keyboard Be Any Good? SBOX K-14 Unboxing and First Impressions.


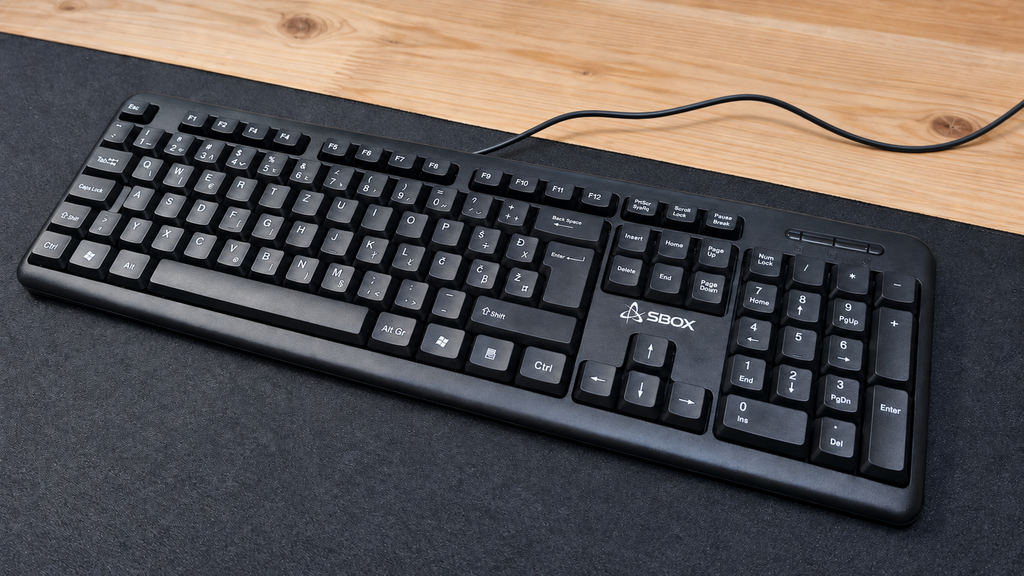
    The SBOX K-14 is one of the cheapest new keyboards I could find. I purchased it from TechTrade for only €6.71, which made me curious about what such a low-cost keyboard could actually offer.

    I wanted to find out whether it could be used for gaming, writing OpenBootLab posts and basic everyday tasks, or whether its extremely low price would make it frustrating to use.

    My immediate reaction after removing it from the box was simple: this keyboard is unbelievably light. The plastic feels very cheap, and the entire body flexes significantly with little pressure. That was not completely unexpected for €6.70, but the amount of flex still surprised me.

    Build quality is only one part of the experience, however. The real question is whether the SBOX K-14 can still function as a usable keyboard despite feeling so inexpensive.

    Watch the complete SBOX K-14 unboxing below:


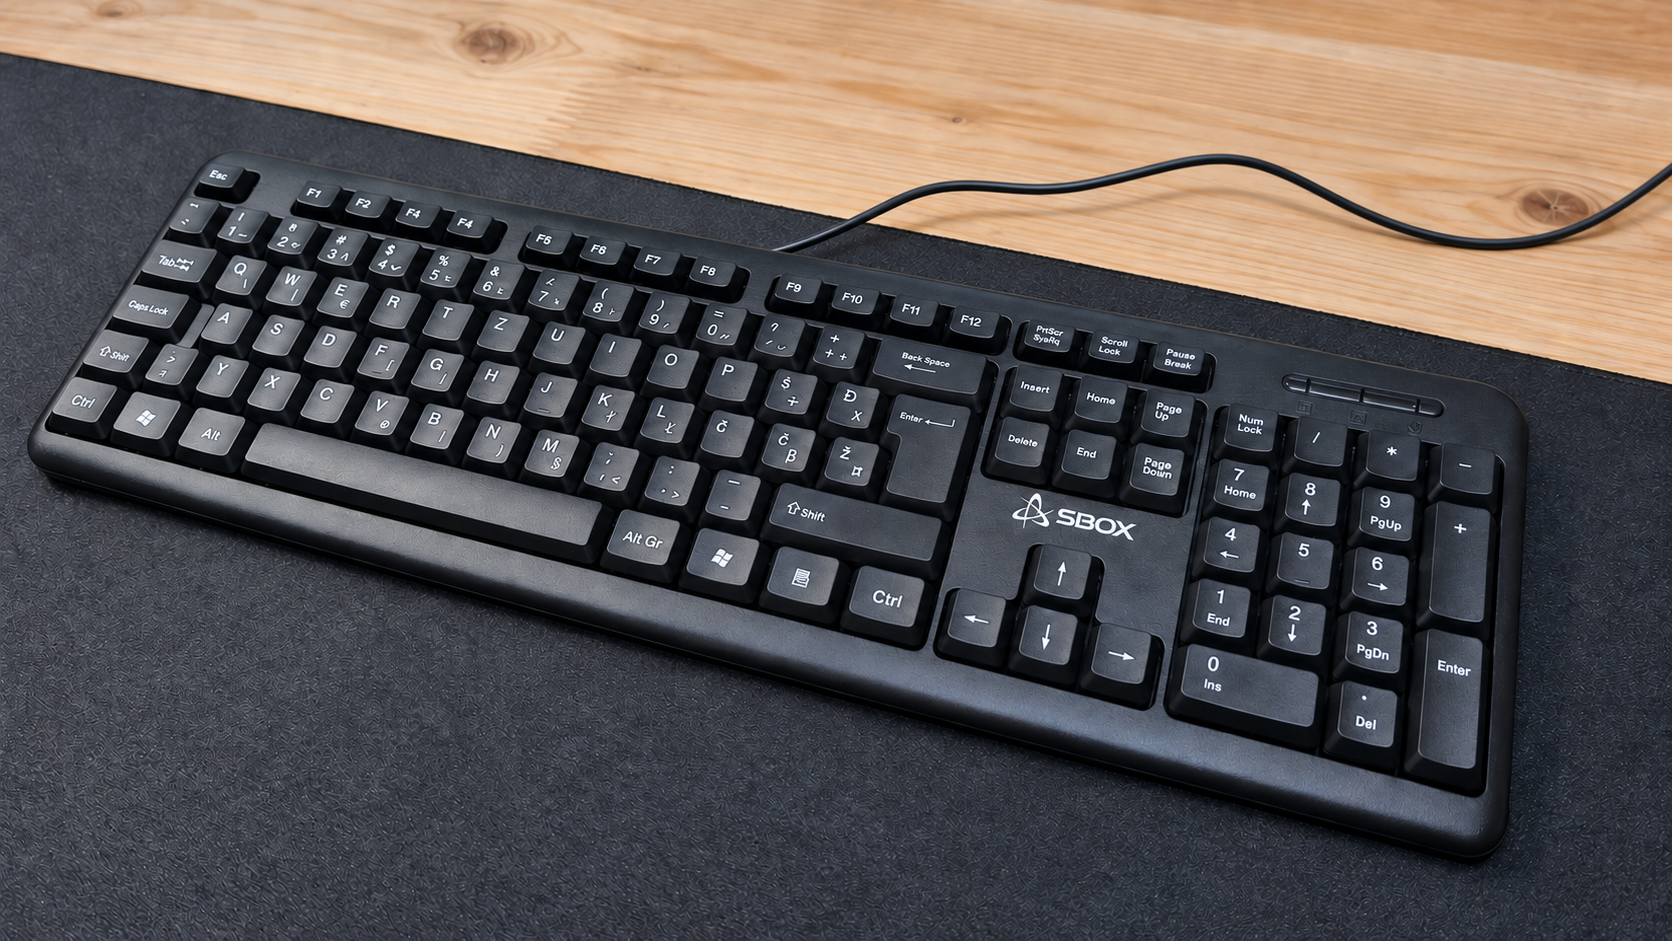
    The SBOX K-14 is a basic full-size wired keyboard designed for everyday computer use. According to the specifications listed by TechTrade, it offers:

    • 105-key full-size layout
    • Slovenian/Croatian key layout
    • Membrane switches
    • Rated lifetime of three million presses per key
    • USB 2.0 connection
    • 1.35-metre fixed cable
    • 5 V / 100 mA USB power
    • Dimensions of 445 × 156 × 22 mm
    • Weight of approximately 530 g
    • Official compatibility with Windows XP, Vista, 7, 8 and 10
    • 12-month warranty

    The official compatibility list appears dated and does not mention Windows 11 or Linux. However, as a standard USB keyboard, it should work as a plug-and-play input device on most modern operating systems. I tested it on Arch Linux and will cover the results later in the post.

    There is no backlighting, wireless connectivity, software suite or gaming-focused feature set. This is a conventional membrane keyboard focused on providing the most basic functionality at the lowest possible price.


    he SBOX K-14 has a traditional full-size layout with a function-key row, navigation keys, arrow keys and a numeric keypad. One positive aspect is its relatively compact outer frame. There is very little unnecessary plastic surrounding the keys, so it does not occupy more desk space than a full-size keyboard actually needs.

    Its construction immediately reveals where the low price comes from. The plastic feels very cheap, the keyboard is extremely light, and the chassis flexes significantly with little pressure. It does not feel particularly sturdy, although that is not entirely surprising for a keyboard costing only €6.70.

    There are fold-out legs underneath, allowing the keyboard to be raised to a more comfortable typing angle. However, it has no rubber feet to grip the desk. Combined with its low weight, this means the keyboard slides around with very little force. The underside also includes several drainage holes. These should allow small amounts of spilled liquid to pass through the keyboard instead of remaining trapped inside, although I did not deliberately test this feature.

    The permanently attached 1.35-metre USB cable also feels thin and inexpensive. It should be long enough for a typical desktop setup, but its durability will only become clear after longer use.

    Overall, the K-14 offers a sensible and space-efficient full-size form factor, but its materials, flex and lack of grip make it obvious that keeping the price as low as possible was the main priority.


    The SBOX K-14 uses membrane switches, and the keys feel very mushy when pressed. Despite that, they are reasonably responsive for normal typing, and the keyboard is more comfortable to use than its extremely cheap construction initially suggested.

    The plastic does not feel pleasant beneath the fingers and constantly reminds you that this is a €6.70 keyboard. The larger keys, including Space and Enter, feel and sound fairly average. They are not particularly good, but they also do not stand out as a major problem.

    I made a few typing mistakes while testing it, although the number of missed or incorrect presses was not bad enough to make the keyboard frustrating. With more time, I would probably become more accustomed to its feel.

    One of its strongest qualities is how quiet it is. The K-14 produces very little noise during normal typing, which could make it suitable for a shared room, a quiet office or late-night use.

    If this were the only keyboard I had, I could comfortably use it to write multiple OpenBootLab posts and complete everyday tasks. However, if I had more money available, I would choose something with better materials and a more precise typing feel.

    The video below demonstrates how the SBOX K-14 sounds during normal typing and when pressing several individual keys. No background music was added, allowing the keyboard itself to be heard clearly.


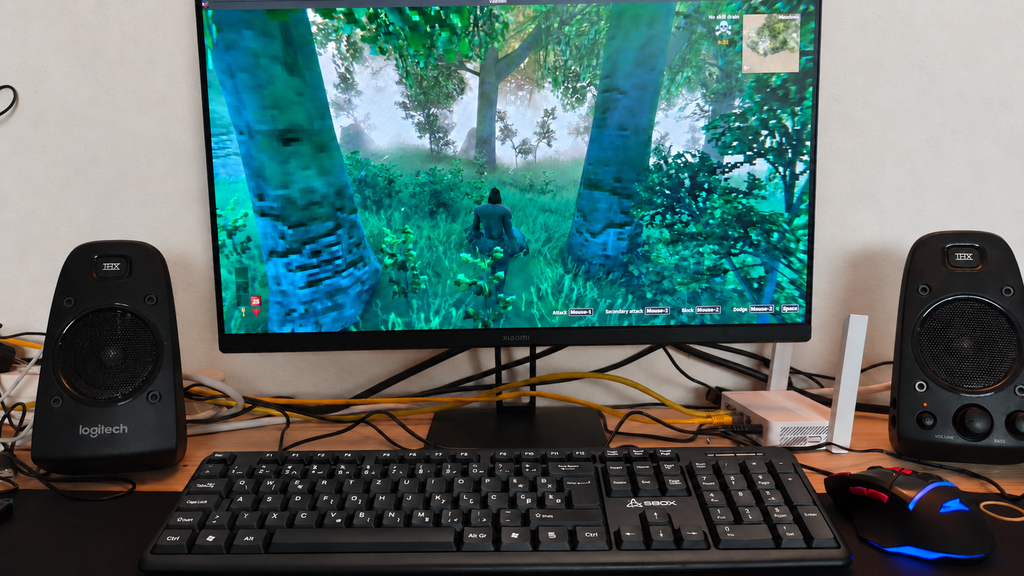
    I tested the SBOX K-14 with my main desktop running Arch Linux and with my laptop running Windows 11 Pro.

    The keyboard was recognised immediately on both systems. I only had to connect the USB cable, and it was ready to use within seconds. No drivers, additional software or manual configuration were required—which is exactly what I expected from a standard wired USB keyboard.

    All the keys I tested worked correctly, including the Slovenian and Croatian characters Č, Š, Ž and Đ. The numeric keypad and the rest of the full-size layout also worked without any problems.

    Although the product information only officially lists older Windows versions, the K-14 worked normally with Windows 11 Pro and Arch Linux during my testing. Its simple plug-and-play compatibility is one of the areas where this inexpensive keyboard delivers exactly what it should.


    I mainly play single-player games rather than competitive multiplayer titles, and for that kind of gaming, the SBOX K-14 is good enough.

    Basic movement and normal controls work without any major problems. However, when moving and pressing several keys very quickly, the keyboard can occasionally fail to register an input. This is unlikely to be a serious issue in slower single-player games, but it could become frustrating in fast or competitive titles where every keypress matters.

    The lack of rubber feet is also more noticeable while gaming. Because the keyboard is extremely light, it can slide across the desk during more intense moments.

    This is clearly not a gaming keyboard, and anyone who needs reliable multi-key input should look for something better. However, if the SBOX K-14 is the only new keyboard you can afford, it is still sufficient for casual gaming and everyday computer use.

    I am also writing this post on the K-14, which proves that it is usable beyond a short test. And if a particularly frustrating game ever causes it to meet an unfortunate end, at least replacing a €6.70 keyboard will not be too painful.


    So, can a €6.70 keyboard actually be any good? The answer depends entirely on what you expect from it.

    The SBOX K-14 feels extremely cheap. Its plastic is unpleasant, the chassis flexes considerably, the cable is thin, and the lack of rubber feet allows it to slide around the desk. The keys are also very mushy, and fast combinations are not always registered correctly.

    Despite those weaknesses, the keyboard is still functional. It is comfortable enough for writing, extremely quiet, compatible with both Arch Linux and Windows 11 Pro, and usable for basic tasks and casual single-player gaming. I even wrote this post using it.

    I would not choose the K-14 if I had enough money for a better keyboard. However, for someone who needs the cheapest possible new keyboard, a temporary replacement, or a spare for troubleshooting computers, it does the job.

    For €6.70, I cannot call it impressive—but I also cannot call it useless. It is exactly what it promises to be: an extremely cheap keyboard that works.

    Would you use a keyboard this inexpensive as your main keyboard, or would you keep it only as a spare?


  • Xiaomi Redmi A3 Unboxing & First Impressions

    Xiaomi Redmi A3 Unboxing & First Impressions

    The Xiaomi Redmi A3 is one of the cheapest Android smartphones you can buy, which made it an interesting device for OpenBootLab. After unboxing it, I used the phone for around two months to see what it was actually like to live with before eventually experimenting with Linux and turning it into something a little less ordinary.


    I bought the Redmi A3 around a year ago because I was curious about just how usable an extremely cheap smartphone could be. At the time, I paid around €59 per phone, which made me wonder whether you could actually live with a device this inexpensive as a normal daily phone. To make the experiment a bit more interesting, I actually bought two Redmi A3s, one for me and one for my wife. The idea was to use them normally and see how both of us would get along with such a cheap phone in everyday use.

    Rather than judging the Redmi A3 only from its specifications, I wanted to find out where the compromises would actually start to show after living with it for a while.


    The unboxing experience itself is pretty basic, which is exactly what I expected from a phone at this price. There is no premium presentation or anything unnecessary — you open the box, take out the phone, and get the essentials needed to start using it.

    You can watch the full Redmi A3 unboxing on the OpenBootLab YouTube channel below:

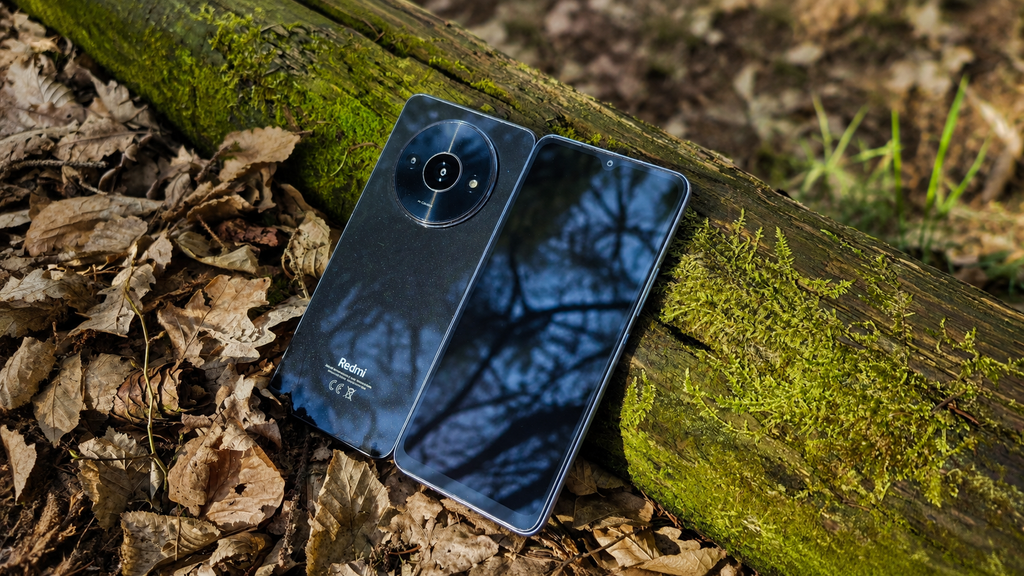
    What stood out more than the packaging was the phone itself. The Redmi A3 looked surprisingly good for something that cost around €59. The large circular camera module gives it a much more distinctive design than I expected from an entry-level device, and at first glance it really does not look like one of the cheapest smartphones on the market.

    That first impression became even stronger once I picked it up, but I’ll get into that in the next section.


    The first thing that surprised me about the Redmi A3 was how good it actually felt for the price. I already had a Samsung Galaxy A14 to compare it with, and despite the Redmi being the cheaper device, the A3 somehow felt more premium in the hand. A big part of that comes from the design. The large circular camera module gives the phone a much more distinctive look than most entry-level devices, and the overall build does not immediately scream “€59 phone.”

    Once you start using it, though, one of the first things you notice is just how large the screen bezels are. They make the phone look noticeably more budget-oriented from the front, especially compared with more expensive modern smartphones.

    The display, performance and cameras are also fairly basic, but during those first few hours the Redmi A3 still made a much better impression than I expected.

    That was what made me curious enough to use it for a longer period and find out whether the good first impression would survive everyday use.


    After the initial impressions, I used the Redmi A3 as my normal phone for around two months. For light everyday tasks, it genuinely surprised me. Messaging, browsing, watching videos and using simple apps all worked well, and it often felt more responsive than my Samsung Galaxy A16. I also liked having a 3.5 mm headphone jack. It is a small feature, but one I still appreciate.

    The limitations show up once you ask more from the phone. Using it for work, opening multiple documents, checking emails and switching between apps quickly slows it down. It works best when you keep things simple and focus on one task at a time. The camera is usable for basic photos, but not much more. It can record in Full HD, but the overall video quality is still quite basic.

    One downside is the occasional promotional notification for random apps and games. They can be disabled, but you have to dig through a few settings to get rid of them. It is annoying, but it is also one of the ways Xiaomi can keep phones like this so cheap.

    After two months, I was still more impressed than disappointed. For around €59, the Redmi A3 proved to be surprisingly capable as a basic everyday smartphone.


    The Redmi A3 is not a phone for heavy users, but for the price it does a lot better than I expected. For basic everyday use, it is responsive, the battery lasts well, the design feels more premium than the price suggests, and you still get useful features like the 3.5 mm headphone jack. The compromises are mostly where you would expect them: multitasking, camera quality and some annoying software promotions.

    Phones like the Redmi A3 also make a lot of sense in markets where more expensive smartphones can represent a much bigger part of someone’s income. In those places, a very cheap phone that still covers the basics can be far more important than flagship-level performance. It can also be a great choice as a first phone for a child. For watching YouTube, playing simple kids’ games and basic communication, it does the job without spending a lot of money on a device that may get dropped or damaged.

    Would I use it as my main phone long term? Probably not. But as a basic phone, backup device, first phone for a child or cheap platform for experiments, it makes a lot of sense.

    And that is exactly why this Redmi A3 did not end up sitting in a drawer. I later started experimenting with running Linux on it using Termux, Debian and Proot. You can check out that Lab Note here.


    Display: 6.71-inch IPS LCD, 90 Hz Resolution: 720 × 1650
    Chipset: MediaTek Helio G36 CPU: Octa-core
    RAM: 3 GB / 4 GB
    Storage: 64 GB / 128 GB
    Expandable Storage: microSD support
    Rear Camera: 8 MP Front Camera: 5 MP
    Video: Up to 1080p
    Battery: 5000 mAh
    Charging: 10 W Headphone
    Jack: 3.5 mm
    Connectivity: 4G LTE, Wi-Fi, Bluetooth
    Operating System: Android with Xiaomi software
    Fingerprint Sensor: Side-mounted
    USB: USB-C

    Specifications may vary slightly depending on the region and configuration.