Tag: OpenBootLab

  • Baracuda Manta Gaming Mouse

    Baracuda Manta Gaming Mouse

    Gaming mice can get expensive very quickly. But what happens when you go completely in the opposite direction?

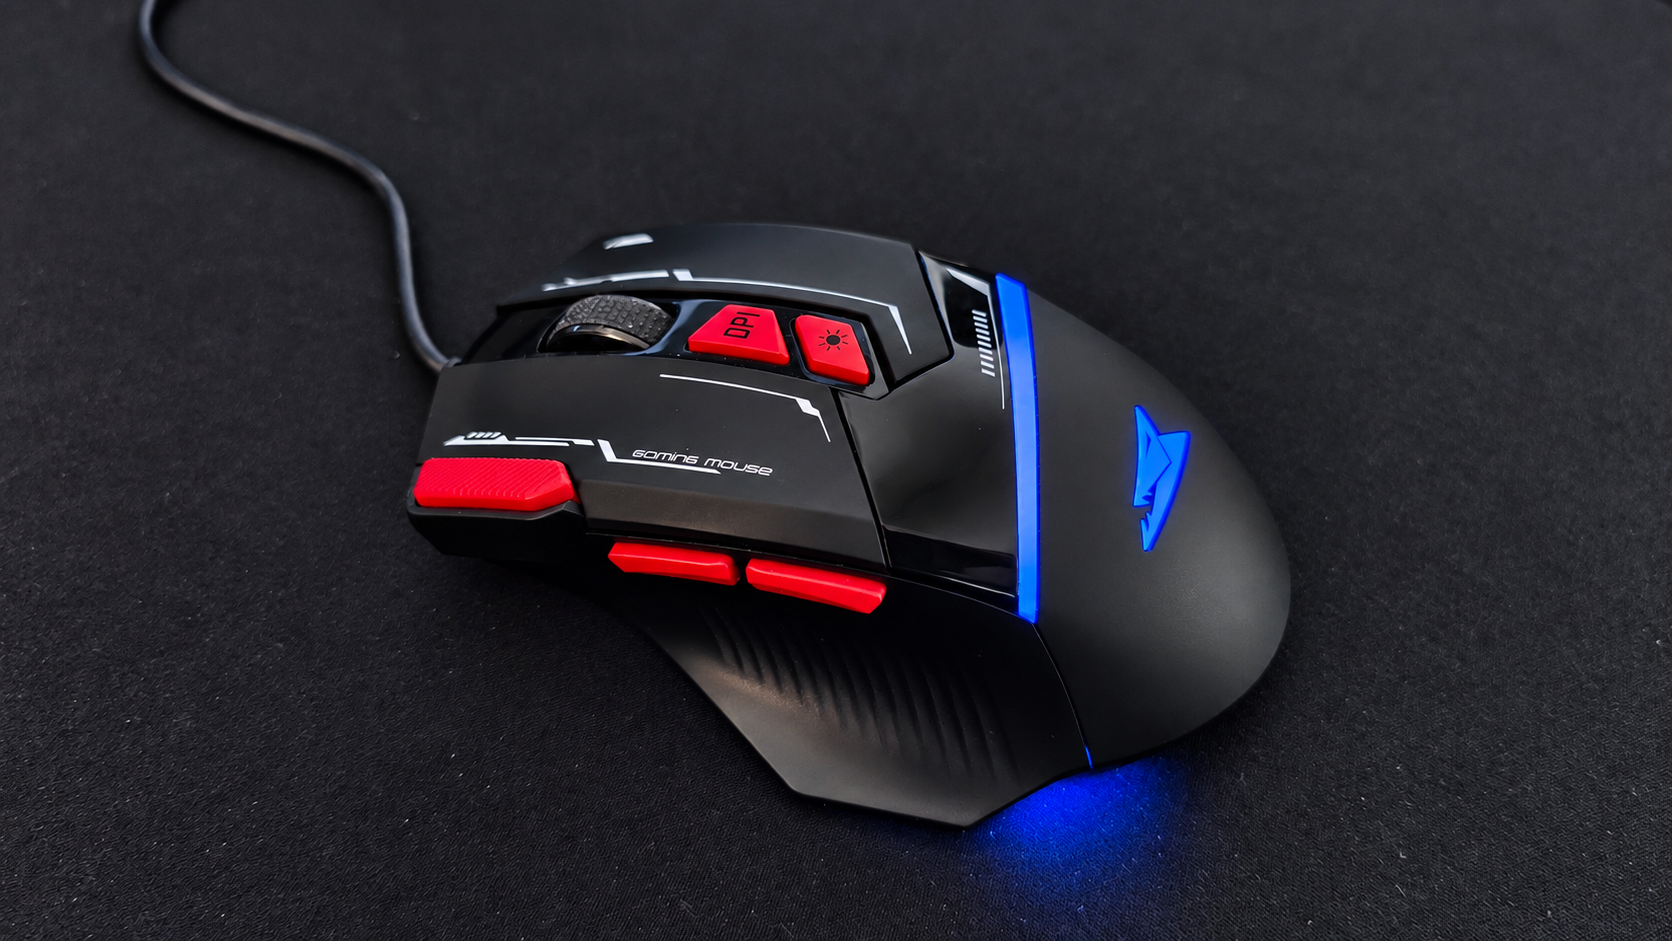
    The Baracuda Manta is a wired RGB gaming mouse that sits firmly in the budget category, but on paper it comes with features normally associated with much more expensive gaming mice. You get an optical sensor capable of up to 12,800 DPI, 8 buttons, 1000 Hz polling, RGB lighting and software support, all packed into an 81 g mouse.

    I’ve now been using the Manta for around three weeks, not only for gaming but also as my everyday mouse for work and writing. And surprisingly, I actually like it.
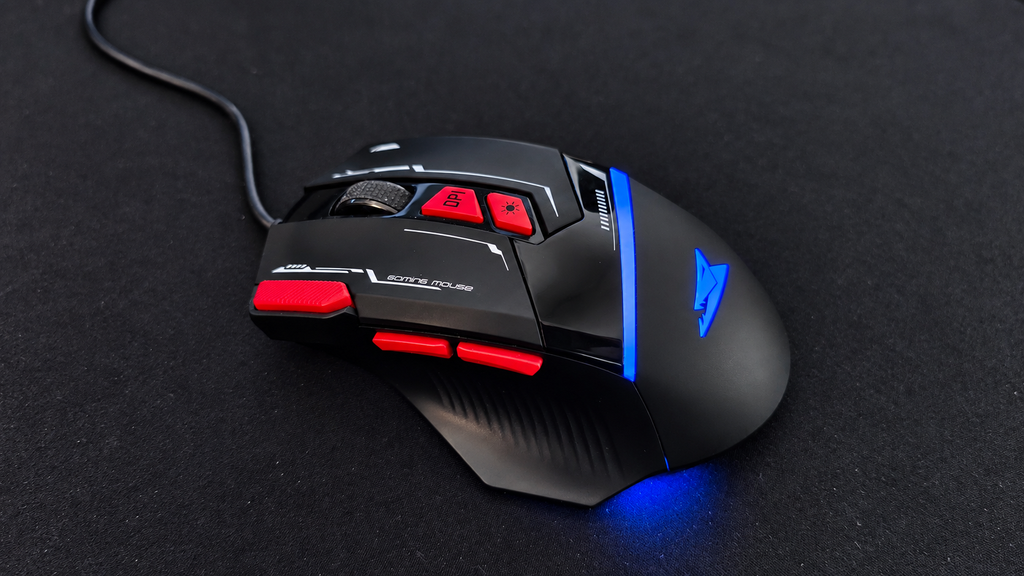

    The Manta is very clearly trying to be a gaming mouse. It has the aggressive shape, plenty of buttons, adjustable DPI and, of course, a healthy amount of RGB lighting. But I’ve actually ended up using it much more as an everyday mouse than purely as a gaming peripheral.

    That’s probably the more interesting test anyway.

    It’s easy to make a cheap mouse look good on a specification sheet. The question is whether you still want to use it after a few weeks.


    For something this inexpensive, the specification list is surprisingly long.

    • Optical Instant 825 sensor
    • Up to 12,800 DPI
    • 8 buttons
    • 1000 Hz polling rate
    • Up to 20 G acceleration
    • RGB lighting with 16.8 million colours
    • Software support
    • USB 2.0 wired connection
    • 1.5 m cable
    • 81 g
    • 126 × 82 × 42 mm
    • Rated for more than 5 million clicks
    • Windows and macOS support

    As always, numbers don’t tell you everything.

    After three weeks, the shape and button placement have mattered much more to me than the maximum DPI number.
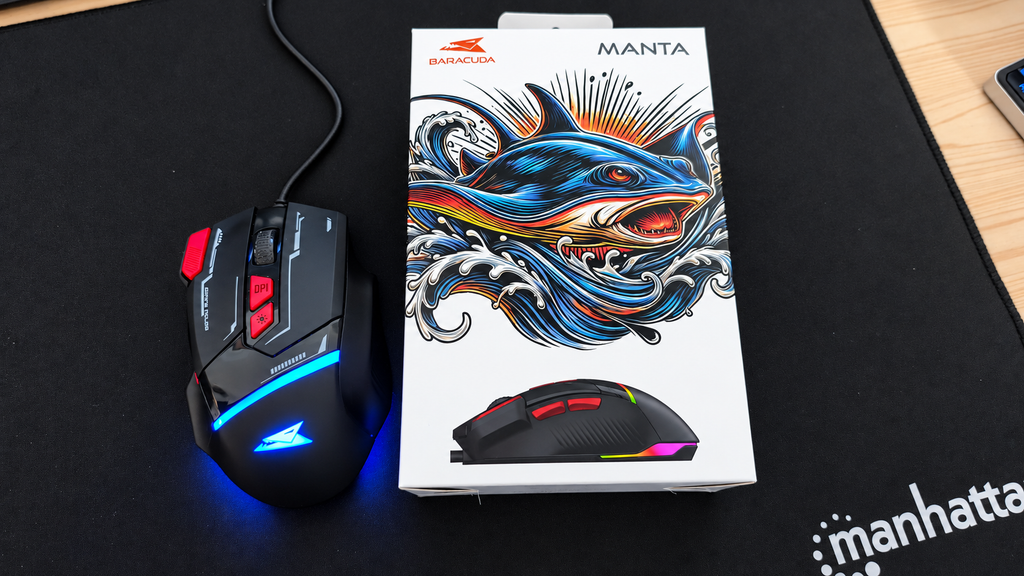

    The packaging is straightforward. Take the mouse out, connect the USB cable and you’re basically ready to go. That’s still one thing I like about simple wired peripherals. There is no battery to charge. No Bluetooth pairing. No wireless receiver to lose.

    Plug it in, the RGB comes alive, and start using it.


    This is probably one of the most important things to know about the Manta:

    It’s quite a large mouse. For me, that works well. I find the shape comfortable and after several weeks of use I haven’t had any problems using it for longer periods. But if you have smaller hands, I could definitely see the Manta feeling too big.

    So this isn’t necessarily a mouse I would recommend buying purely from the specification sheet without considering its size. The overall design is also something I genuinely like. It has that unmistakable gaming-mouse appearance without going completely overboard.
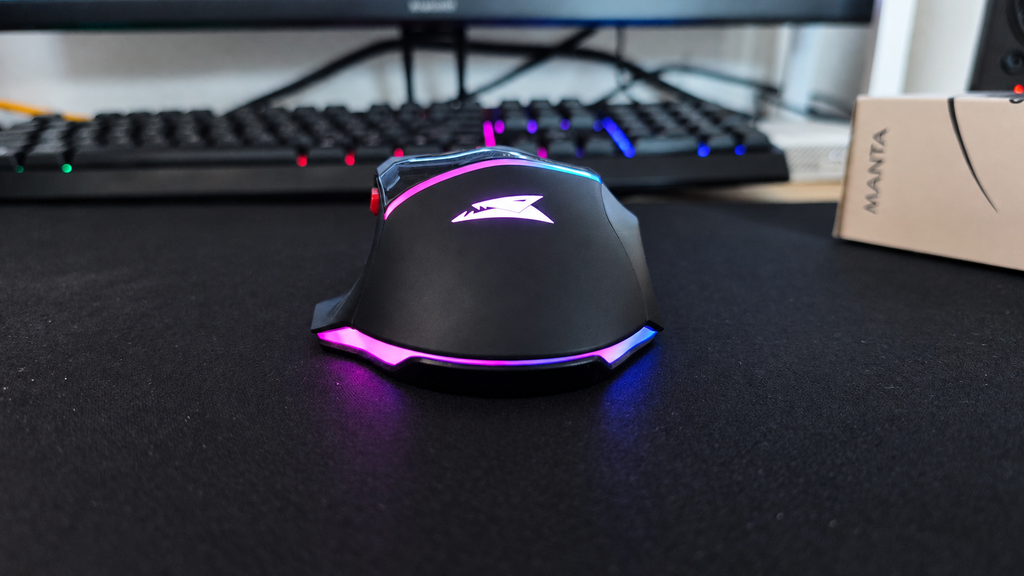
    And then there is the RGB. The lighting is easily one of my favourite parts of the Manta. It looks much better in person than I expected from such an inexpensive mouse and gives it considerably more personality when sitting on the desk.

    The cable is also perfectly acceptable for the price. It doesn’t feel especially premium and it isn’t something I would point to as a standout feature, but it also hasn’t given me any problems during normal use.

    In other words: it’s fine, but nothing to brag about.


    At around 81 grams, the Manta isn’t particularly heavy. At the same time, I wouldn’t describe it as an ultra-light gaming mouse either. It sits somewhere in the middle.For normal desktop use and the kind of games I play, that has been perfectly fine.

    If you’re heavily into competitive multiplayer games and specifically want the lightest mouse possible, you’ll probably be looking at a completely different category of product anyway.

    For my use, the weight hasn’t bothered me.


    This is where the Manta has actually surprised me the most.

    The two side buttons are positioned well and I’ve ended up using them a lot while working. They’re easy to reach without having to awkwardly change my grip, and after a few weeks they’ve become part of my normal workflow. There’s also an additional button next to the main left mouse button. I initially thought of it mostly as another gaming feature, but I’ve found it surprisingly useful when I’m doing a lot of text work and repeatedly working with copied text.

    These extra buttons have probably been more useful to me while working than while gaming.
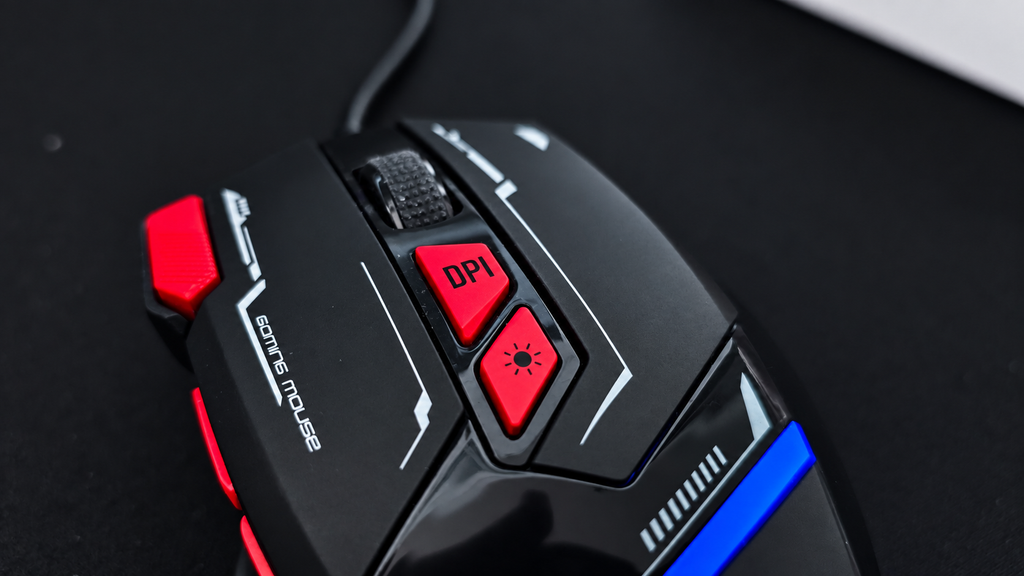
    The DPI button is also conveniently positioned and lets you quickly switch sensitivity. If you play a lot of competitive or multiplayer games, being able to change DPI quickly could be genuinely useful. For me personally, it isn’t particularly important because I don’t really play multiplayer games.

    Still, it’s nice to have.


    The buttons themselves feel good enough for everyday use.

    After several weeks I haven’t noticed anything that would make me want to stop using the mouse. The scroll wheel, on the other hand, is probably one of the least exciting parts of the Manta. It’s fine. It works. But that’s about it.

    I would describe it as average rather than particularly good or bad.

    Considering the price of the mouse, though, that’s not exactly a major complaint.


    Baracuda also provides software for the Manta, which should allow additional configuration of the mouse. Unfortunately, this is one part I haven’t been able to properly test yet. On most of my LAB computers I run Linux, but software is only supported for Windows.

    So I’m not going to judge the software without any test,beacuse for this review, I’ve mainly been using the mouse as it works out of the box.

    And honestly, even without touching the software, I’ve been perfectly happy using it.


    This is where the Manta has done better than I originally expected. I’ve been using it for roughly three weeks now for normal desktop work, writing and some gaming, and I haven’t felt the need to replace it. That’s probably one of the best things I can say about a cheap peripheral.

    The large shape works well for my hands. The side buttons are genuinely useful. The extra button has found its place in my normal work routine. The RGB looks great. The cable is good enough for normal use. And despite clearly being a budget product, nothing about it has made me want to immediately go back to another mouse.

    There are better mice. There are lighter mice. There are certainly more premium mice.

    But the Manta has been completely usable as an everyday mouse.


    After around three weeks with the Baracuda Manta, I like it more than I expected to. Its biggest consideration is probably its size. If you have larger hands, the shape can be very comfortable. If your hands are smaller, I would be a little more careful because this is definitely not a compact mouse.

    The RGB looks great, the button placement is genuinely useful and the mouse has worked just as well for everyday productivity as it has for casual gaming. The scroll wheel is average, the cable is nothing special and I haven’t been able to test the software yet.

    But that’s also missing the point. This is a very inexpensive gaming mouse. And after three weeks, I’m still happily using it every day.

    For a budget peripheral, that’s a pretty successful result.
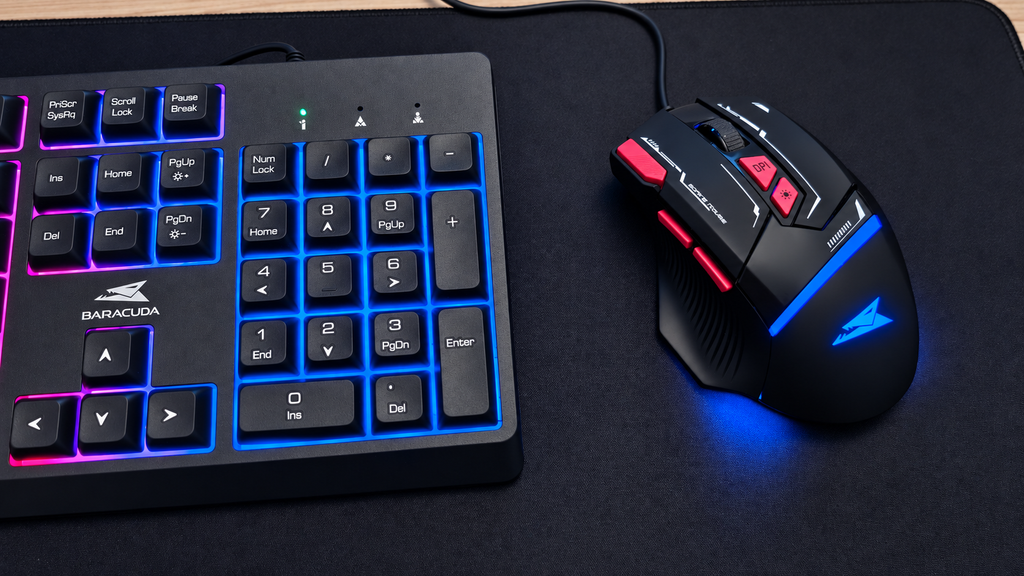
    Spoiler: the keyboard isn’t here by accident.


  • Free Software in the Mail – FSFE Sticker Pack

    Free Software in the Mail – FSFE Sticker Pack

    Sometimes the best upgrades don’t need more RAM, a faster SSD or a new CPU.

    Sometimes they just arrive in an envelope.

    A few days ago, I got in touch with the Free Software Foundation Europe (FSFE). Today, an envelope from Berlin arrived at OpenBootLab, filled with stickers, Free Software material and a few other surprises.

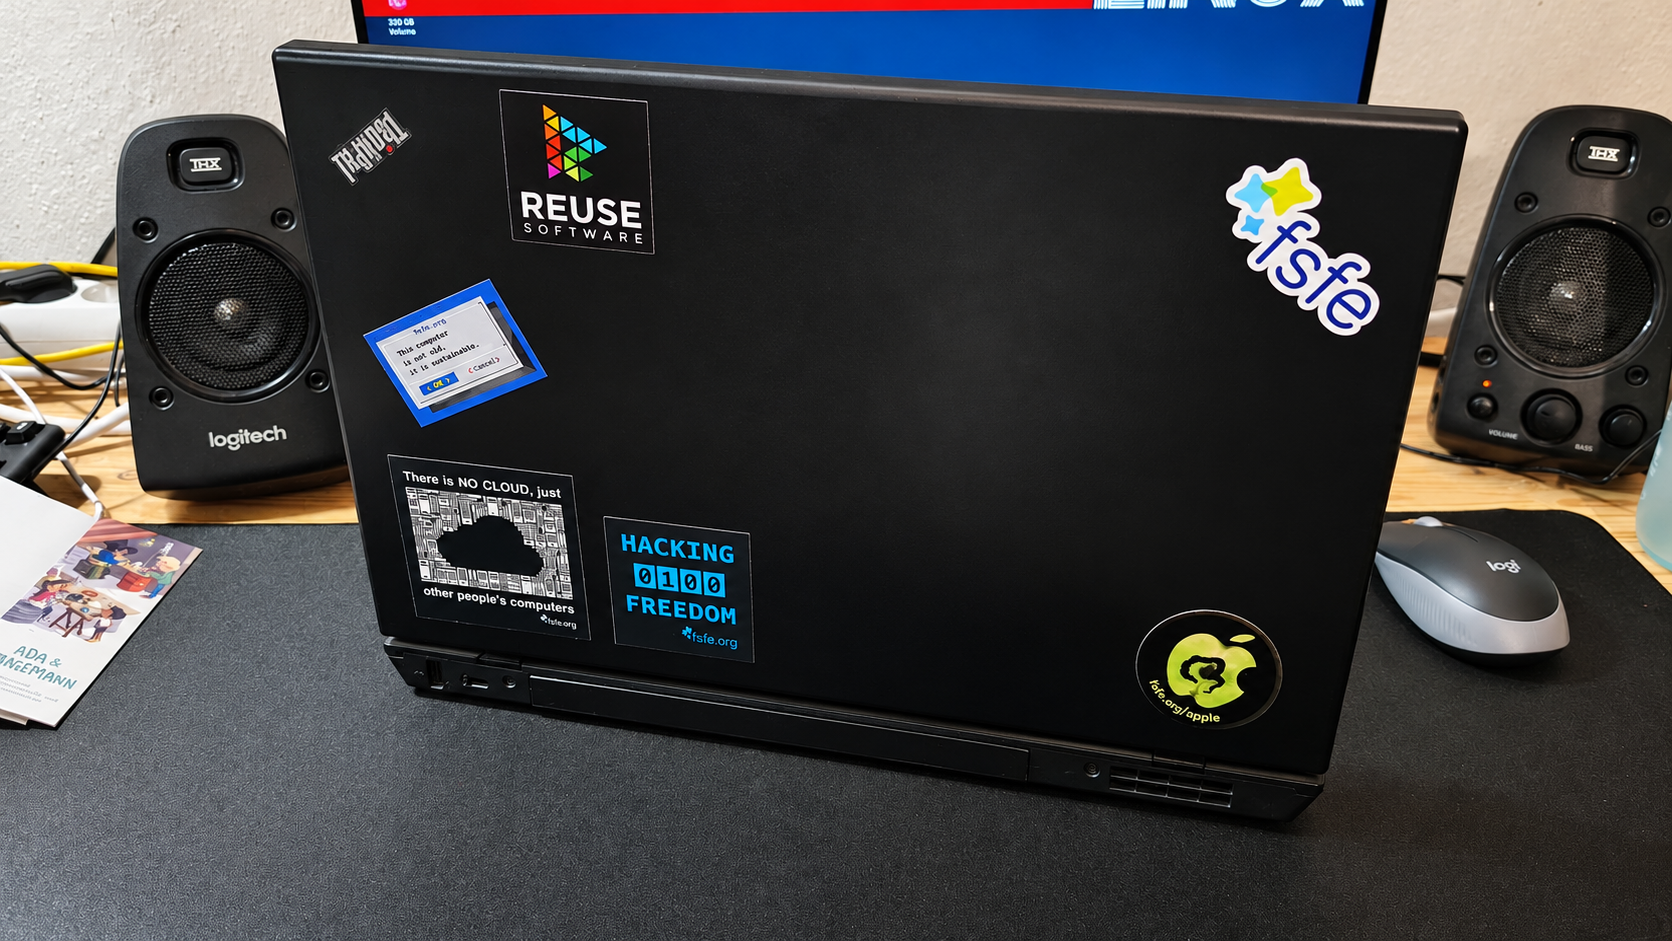
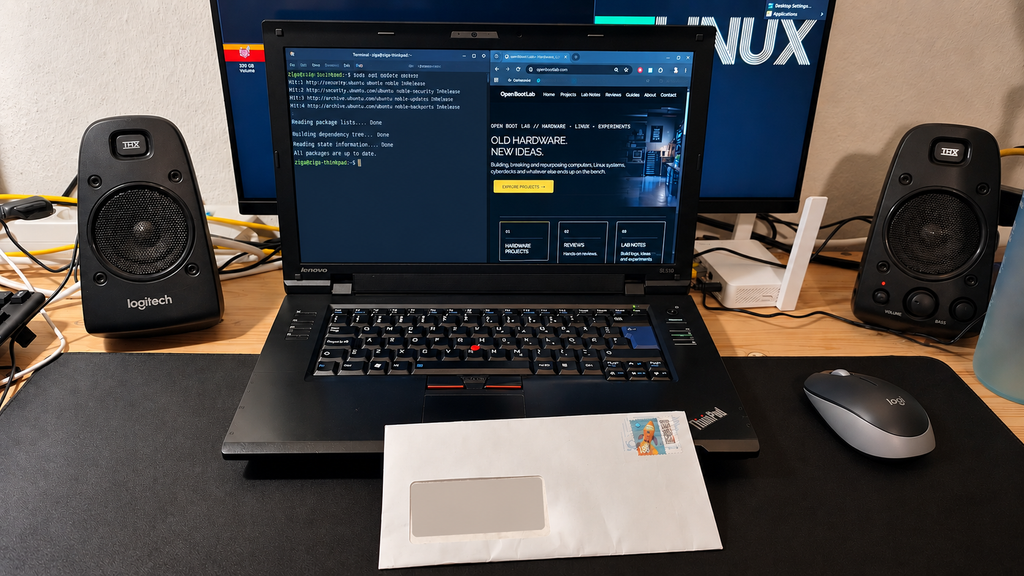
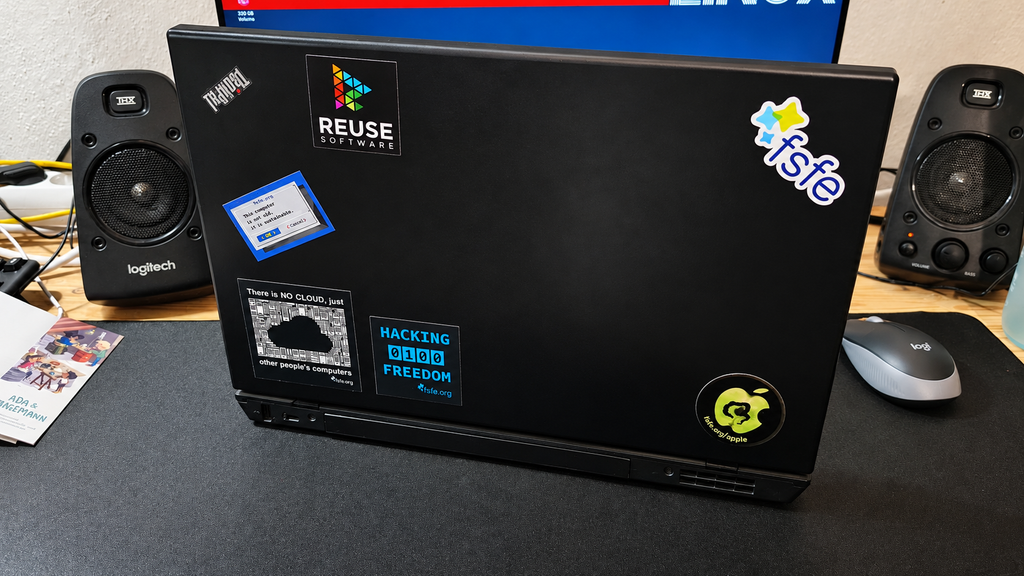
    Naturally, it didn’t take long before some of them found their way onto a ThinkPad.


    The Free Software Foundation Europe, usually shortened to FSFE, is a charitable organisation that has been working to promote software freedom in Europe since 2001.

    Their goal is to empower people to control the technology they use. When we talk about Free Software, the important part isn’t necessarily the price. It’s about freedom, having the ability to use, study, share and improve software. FSFE works on this from several directions, including public awareness, policy, legal support, education and campaigns surrounding digital freedom.

    Learn more about the Free Software Foundation Europe

    And that philosophy fits OpenBootLab rather nicely.

    A lot of what happens here involves taking older hardware and finding new ways to use it. Linux and Free Software can often keep machines useful long after their original operating systems and manufacturers have moved on.

    Sometimes a computer doesn’t need replacing. It just needs a different purpose.


    It was probably inevitable that at least a few of these stickers would end up on the ThinkPad. The machine has already become one of the regular OpenBootLab systems, and it somehow feels like the right place for a few Free Software stickers.

    The first ones I picked were some of the designs that fit the spirit of the project best:

    HACKING 0100 FREEDOM
    THERE IS NO CLOUD, JUST OTHER PEOPLE’S COMPUTERS
    REUSE SOFTWARE,
    THIS COMPUTER IS NOT OLD, IT IS SUSTAINABLE
    FSFE LOGO

    They work surprisingly well on an old ThinkPad that is still being used for Linux, writing, testing and whatever else ends up happening on the bench. I’m not planning to cover the whole machine though. A few stickers are enough to give it some character, and the rest can wait for other hardware. There are definitely enough machines around here that they’ll eventually find a home.

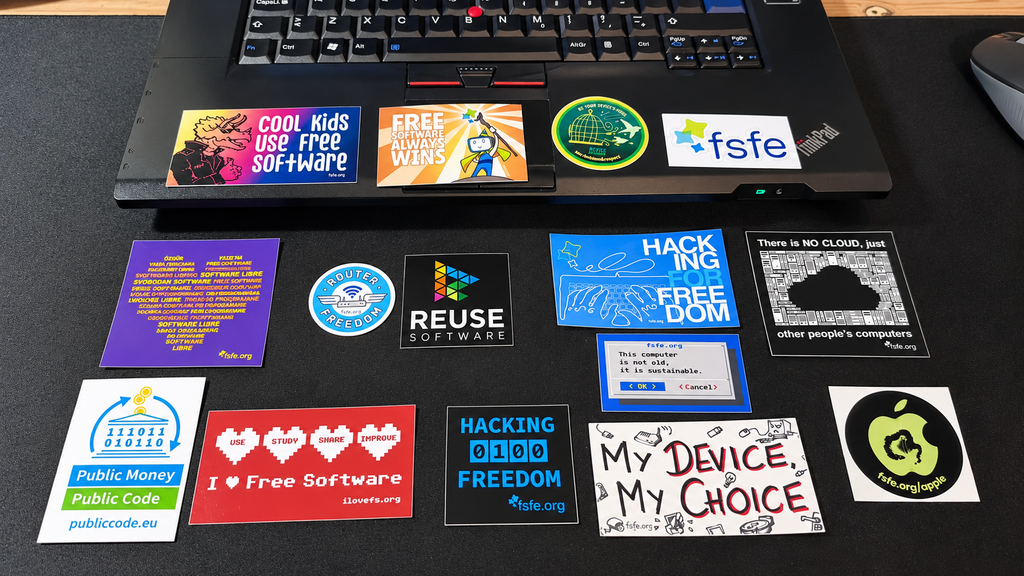
    And before the rest disappear onto laptops, cases and other hardware, here is the full set that arrived from FSFE together with the letter included in the package.


    If you want to learn more about FSFE, their campaigns or the work they’re doing around Free Software in Europe, their website is the best place to start.

    Free Software Foundation Europe

    FSFE also maintains several ways for people to get involved with the community, including local groups, mailing lists and online communication channels.

    FSFE — Get Involved

    For general enquiries, FSFE can also be contacted through the details provided on their official contact page.

    FSFE — Contact


    Finally, a big thank you to the FSFE team for sending all of this over.

    It’s a small thing, but it’s genuinely cool seeing organisations supporting the Free Software community with material like this — and several of these stickers already look very much at home in the lab.

    The ThinkPad has claimed a few.

    The rest?

    They’ll have to wait and see which machine comes across the bench next.

    // FREE SOFTWARE // OLD HARDWARE // KEEP EXPERIMENTING


  • My €90 Used Laptop Haul

    My €90 Used Laptop Haul

    I was only looking for one cheap laptop, but somehow I ended up buying a bundle of four older machines for €95.

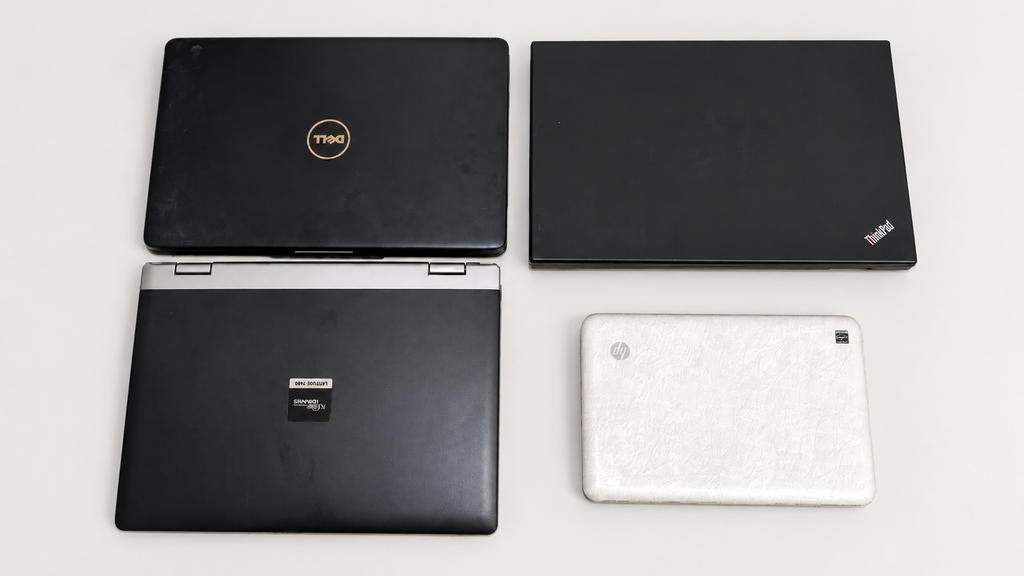
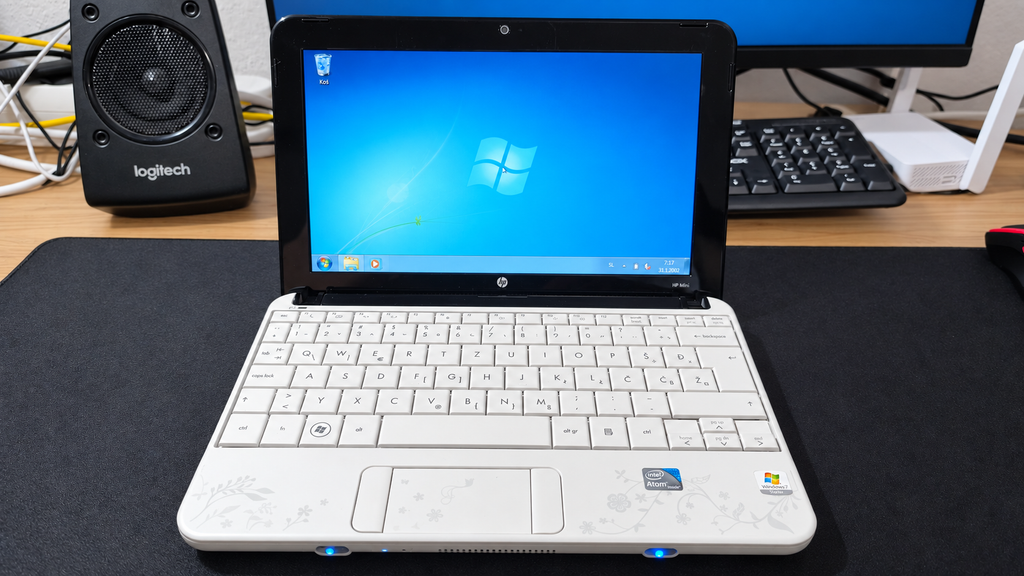
    The haul included a Lenovo ThinkPad SL510, Dell Inspiron 1545, Fujitsu Siemens Amilo Pro V3545, and a tiny HP Mini 110. Even better, all four turned out to be working.


    I originally started looking for a cheap laptop that I could use mainly for writing OpenBootLab posts, browsing, and some light Linux testing.

    My budget was around €100, and at first I was looking at inexpensive refurbished Chromebooks and other low-cost used laptops. One of the options I was seriously considering was a refurbished Dell Chromebook.

    Instead, I contacted a seller I had bought hardware from before and asked if he had any older laptops available. You may already recognize the seller from the Mainframe project, where I previously bought a €30 bundle of old PC hardware from him. He usually has quite a bit of interesting older hardware around, so I have a feeling this probably will not be the last time something from him ends up in OpenBootLab.

    He had several laptops available, and after going through the options I ended up choosing four of them: a Lenovo ThinkPad SL510, Dell Inspiron 1545, Fujitsu Siemens Amilo Pro V3545, and a tiny HP Mini 110.

    The total price for all four was €90.

    What made the deal especially interesting was that I paid less for these four machines combined than I would have paid for the single refurbished Dell Chromebook I had been considering. At that price, I expected at least one of them to be completely dead or to need quite a bit of work.

    Instead, all four powered on and worked.

    So what started as a search for one inexpensive writing laptop somehow turned into four different machines, four potential OpenBootLab projects, and plenty more content for both me to make and you to enjoy.


    Now that the story behind the haul is out of the way, it is time to look at the four machines themselves.

    The four laptops are all from slightly different parts of the same era, but they are also very different from each other. There is a business-oriented ThinkPad, a mainstream Dell, an older Fujitsu Siemens machine, and a tiny HP netbook.

    The lineup looks like this:

    • Lenovo ThinkPad SL510
    • Dell Inspiron 1545
    • Fujitsu Siemens Amilo Pro V3545
    • HP Mini 110

    All four came with their power adapters, and all four were able to power on. Some of them also already had useful upgrades such as SSDs or additional RAM, which made the deal even more interesting.

    Of course, they are far from perfect. The cases show their age, there are scratches and signs of use, and the batteries on the larger machines are basically finished. But that is also part of the reason I wanted them.

    These are not collector pieces or restored machines. They are old laptops that have clearly been used, and now they get another chance to do something useful.

    From here, I will take a closer look at each one individually.


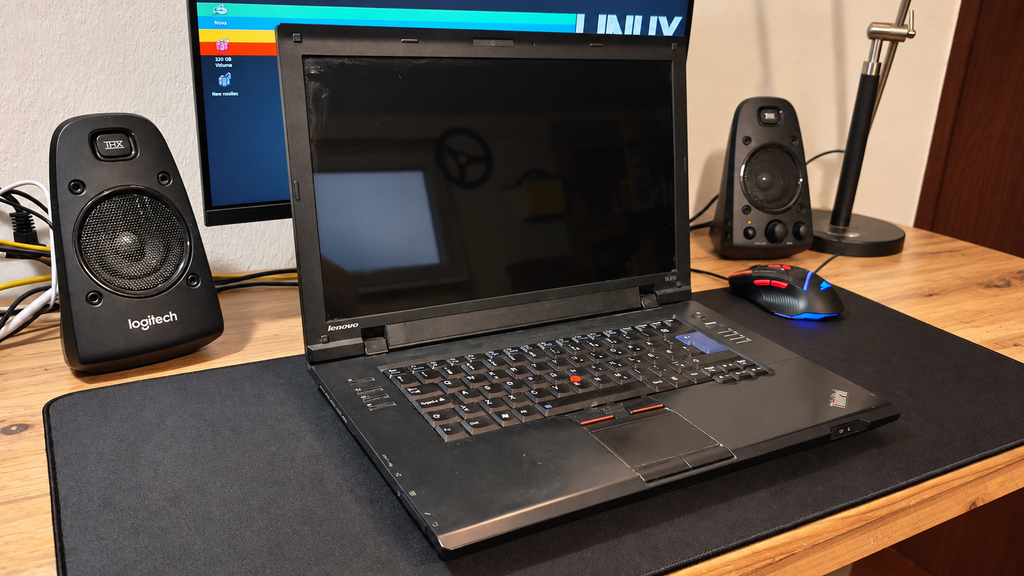
    The Lenovo ThinkPad SL510 was probably the machine I was most interested in when choosing the four laptops.

    I have always liked the more practical design of older ThinkPads, and this one still has a lot of the features people usually associate with them: a solid keyboard, the red TrackPoint in the middle, a fairly simple black chassis, and a design that is more functional than flashy.

    Cosmetically, it definitely shows its age. The lid has plenty of scratches and marks from years of use, but I actually prefer leaving that visible instead of trying to make it look brand new. This is a used machine, and the wear is part of its history.

    The good news is that the laptop itself works. The main downside is the battery, which is basically dead, so for now it needs to stay connected to the charger.

    My current plan is to turn the SL510 into a simple Linux laptop that I can use for writing OpenBootLab posts, browsing, terminal work, and some light testing. I am also considering replacing the battery later if I can find one at a reasonable price.

    Out of the four laptops, this is probably the one with the best chance of becoming an actual everyday-use machine rather than just another experiment.


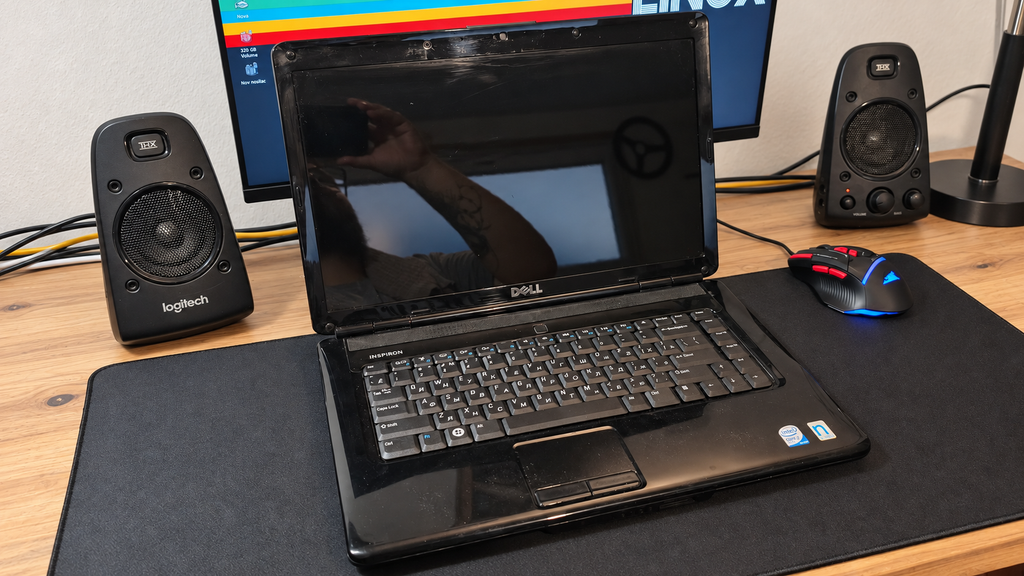
    The Dell Inspiron 1545 feels quite different from the ThinkPad. It is more of a mainstream consumer laptop from its era, with a simpler design and a glossy finish that definitely shows fingerprints, scratches, and years of use.

    Like the SL510, the important part is that it works.

    One thing I noticed immediately during the first boot was the charger situation. The seller had already mentioned that if I wanted the battery to charge properly, I would probably need to get an original Dell charger. He did not have one available, so he included a compatible HP power adapter instead. It powers the laptop without a problem, but the Inspiron does not recognize it as a proper Dell charger because it is missing Dell’s identification chip. Because of that, the laptop can run from the adapter, but battery charging is limited or unavailable.

    The battery itself is already in poor condition anyway, so this is not a major problem for what I currently want to do with the machine. If I eventually decide to replace the battery, I will probably also look for a proper Dell charger.

    Unlike the ThinkPad, I already have a fairly clear idea for the Inspiron. This will probably become one of my main Linux distribution testing machines, especially for lightweight distributions designed for older hardware. Instead of only testing them inside a virtual machine, I want to see how they actually behave on real hardware from this era.

    That should make the Inspiron useful for future OpenBootLab posts where I can compare different lightweight Linux distributions, installation experiences, hardware support, performance, and how usable they still are on an older laptop.

    So while it may not become my everyday writing machine, it could end up being one of the most frequently experimented-on laptops from the entire haul.


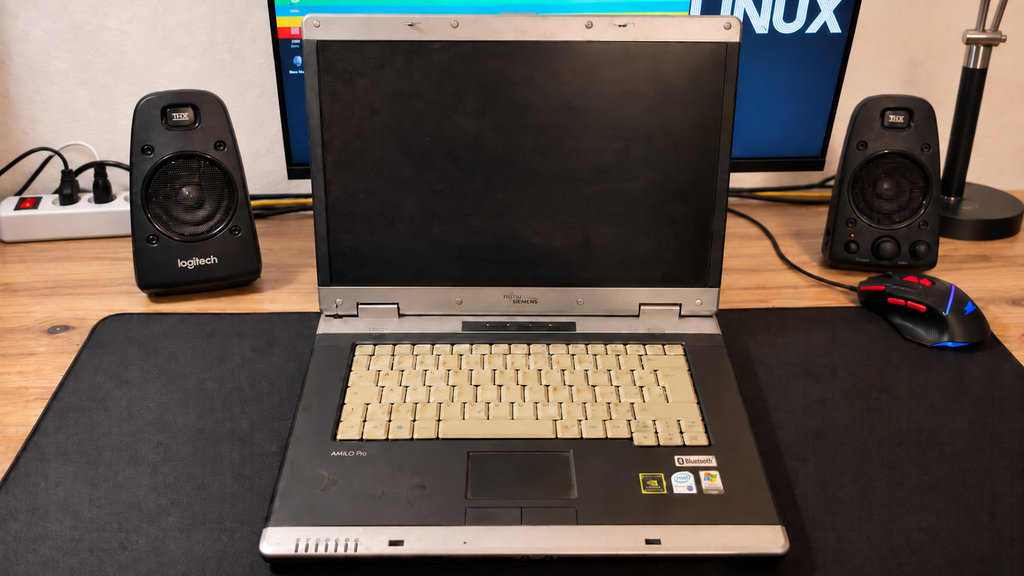
    The Fujitsu Siemens Amilo Pro V3545 is probably the most unusual laptop in the group, at least compared with the Dell and ThinkPad. Its design feels noticeably older, with a chunkier chassis, silver trim, and a much more early-2000s business-laptop look. It also stands out visually because of the light-colored keyboard and the large silver hinge area.

    Like the others, it is far from perfect cosmetically. There are scratches, marks, and signs of long-term use, but the machine itself still works, which is what matters most here.

    This one also came with Windows XP already installed, and I have decided to keep it that way.

    Because the laptop has a dedicated NVIDIA graphics card, my plan is to turn the Amilo Pro into an XP gaming laptop for older PC games and software from that era. Instead of trying to modernize it too much, I think it makes more sense to keep it close to the period it originally came from. That should make it useful for testing older games, software, drivers, and other Windows XP-era experiments without needing to set up a virtual machine every time.

    So unlike the Dell, which will mainly become a Linux testing machine, the Amilo already has a much clearer role in the lab: a dedicated Windows XP gaming and retro software machine.


    The HP Mini 110 is easily the most different machine in the whole haul.

    Compared with the other three laptops, it is tiny. The small screen, compact keyboard, and lightweight chassis make it feel more like a little portable experiment than a normal laptop, which is exactly why I like it. This particular one is also a special edition model, which makes it even more interesting. Instead of the usual plain finish, it has the distinctive white floral-patterned lid, giving it a very different look from the typical black and silver laptops from the same era.

    It also surprised me in another way: the battery still works.

    That already makes it more practical than the larger laptops, especially for something I can actually carry around and use away from the desk. Performance is obviously limited by the Atom platform, but that is also what makes it interesting.

    I have already started experimenting with antiX Linux on it, and the goal is to see how usable such a low-powered machine can still be today with lightweight software. I want to try things like lightweight web browsing, IRC, terminal-based tools, music playback, writing, simple file transfers, and other low-resource Linux applications.

    The HP Mini will probably become my dedicated ultra-lightweight Linux experiment.

    It is definitely not the fastest machine in the group, but because of its size, working battery, special-edition design, and limitations, it may end up producing some of the most interesting Lab Notes from the entire haul.


    What started as a search for one cheap laptop turned into four different machines, each with its own role.

    The ThinkPad SL510 will probably become a regular appearance on OpenBootLab. It is the machine I can see myself using most often for writing, Linux, browsing, and general testing. The Dell Inspiron 1545 will mainly be used for experimenting with different lightweight Linux distributions on real hardware. The Fujitsu Siemens Amilo Pro V3545 is staying on Windows XP and will become my retro gaming and older software machine. And the tiny HP Mini 110 will continue as my low-power Linux experiment.

    For €90, I am more than happy with how this turned out.

    This post was only the introduction to the haul. I also plan to make a separate post for each laptop, where I can go into much more detail about the hardware, specifications, condition, upgrades, operating systems, performance, and what I eventually decide to use each machine for.

    None of these laptops are perfect. They are scratched, worn, old, and limited in different ways, but that is exactly what makes them interesting. They are not going onto a shelf. They are going back to work.

    And this definitely will not be the last time you see them on OpenBootLab.


  • Xiaomi Redmi A3 Unboxing & First Impressions

    Xiaomi Redmi A3 Unboxing & First Impressions

    The Xiaomi Redmi A3 is one of the cheapest Android smartphones you can buy, which made it an interesting device for OpenBootLab. After unboxing it, I used the phone for around two months to see what it was actually like to live with before eventually experimenting with Linux and turning it into something a little less ordinary.


    I bought the Redmi A3 around a year ago because I was curious about just how usable an extremely cheap smartphone could be. At the time, I paid around €59 per phone, which made me wonder whether you could actually live with a device this inexpensive as a normal daily phone. To make the experiment a bit more interesting, I actually bought two Redmi A3s, one for me and one for my wife. The idea was to use them normally and see how both of us would get along with such a cheap phone in everyday use.

    Rather than judging the Redmi A3 only from its specifications, I wanted to find out where the compromises would actually start to show after living with it for a while.


    The unboxing experience itself is pretty basic, which is exactly what I expected from a phone at this price. There is no premium presentation or anything unnecessary — you open the box, take out the phone, and get the essentials needed to start using it.

    You can watch the full Redmi A3 unboxing on the OpenBootLab YouTube channel below:

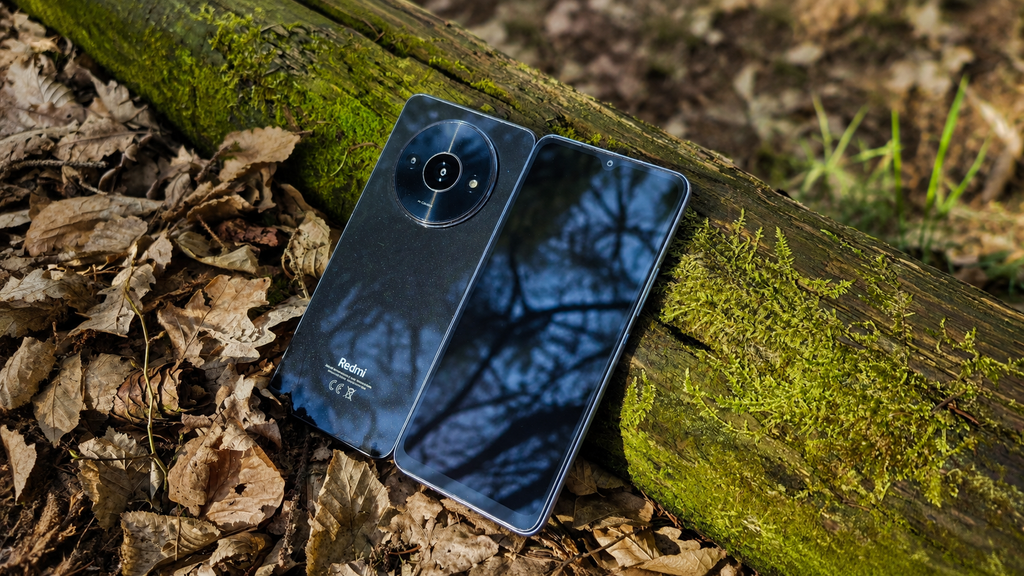
    What stood out more than the packaging was the phone itself. The Redmi A3 looked surprisingly good for something that cost around €59. The large circular camera module gives it a much more distinctive design than I expected from an entry-level device, and at first glance it really does not look like one of the cheapest smartphones on the market.

    That first impression became even stronger once I picked it up, but I’ll get into that in the next section.


    The first thing that surprised me about the Redmi A3 was how good it actually felt for the price. I already had a Samsung Galaxy A14 to compare it with, and despite the Redmi being the cheaper device, the A3 somehow felt more premium in the hand. A big part of that comes from the design. The large circular camera module gives the phone a much more distinctive look than most entry-level devices, and the overall build does not immediately scream “€59 phone.”

    Once you start using it, though, one of the first things you notice is just how large the screen bezels are. They make the phone look noticeably more budget-oriented from the front, especially compared with more expensive modern smartphones.

    The display, performance and cameras are also fairly basic, but during those first few hours the Redmi A3 still made a much better impression than I expected.

    That was what made me curious enough to use it for a longer period and find out whether the good first impression would survive everyday use.


    After the initial impressions, I used the Redmi A3 as my normal phone for around two months. For light everyday tasks, it genuinely surprised me. Messaging, browsing, watching videos and using simple apps all worked well, and it often felt more responsive than my Samsung Galaxy A16. I also liked having a 3.5 mm headphone jack. It is a small feature, but one I still appreciate.

    The limitations show up once you ask more from the phone. Using it for work, opening multiple documents, checking emails and switching between apps quickly slows it down. It works best when you keep things simple and focus on one task at a time. The camera is usable for basic photos, but not much more. It can record in Full HD, but the overall video quality is still quite basic.

    One downside is the occasional promotional notification for random apps and games. They can be disabled, but you have to dig through a few settings to get rid of them. It is annoying, but it is also one of the ways Xiaomi can keep phones like this so cheap.

    After two months, I was still more impressed than disappointed. For around €59, the Redmi A3 proved to be surprisingly capable as a basic everyday smartphone.


    The Redmi A3 is not a phone for heavy users, but for the price it does a lot better than I expected. For basic everyday use, it is responsive, the battery lasts well, the design feels more premium than the price suggests, and you still get useful features like the 3.5 mm headphone jack. The compromises are mostly where you would expect them: multitasking, camera quality and some annoying software promotions.

    Phones like the Redmi A3 also make a lot of sense in markets where more expensive smartphones can represent a much bigger part of someone’s income. In those places, a very cheap phone that still covers the basics can be far more important than flagship-level performance. It can also be a great choice as a first phone for a child. For watching YouTube, playing simple kids’ games and basic communication, it does the job without spending a lot of money on a device that may get dropped or damaged.

    Would I use it as my main phone long term? Probably not. But as a basic phone, backup device, first phone for a child or cheap platform for experiments, it makes a lot of sense.

    And that is exactly why this Redmi A3 did not end up sitting in a drawer. I later started experimenting with running Linux on it using Termux, Debian and Proot. You can check out that Lab Note here.


    Display: 6.71-inch IPS LCD, 90 Hz Resolution: 720 × 1650
    Chipset: MediaTek Helio G36 CPU: Octa-core
    RAM: 3 GB / 4 GB
    Storage: 64 GB / 128 GB
    Expandable Storage: microSD support
    Rear Camera: 8 MP Front Camera: 5 MP
    Video: Up to 1080p
    Battery: 5000 mAh
    Charging: 10 W Headphone
    Jack: 3.5 mm
    Connectivity: 4G LTE, Wi-Fi, Bluetooth
    Operating System: Android with Xiaomi software
    Fingerprint Sensor: Side-mounted
    USB: USB-C

    Specifications may vary slightly depending on the region and configuration.


  • Can the Xiaomi Redmi A3 Run Linux?

    Can the Xiaomi Redmi A3 Run Linux?

    I had a spare Xiaomi Redmi A3 sitting around and started wondering if it could be turned into something more useful. The idea was simple: can this cheap Android phone run a Linux environment, and could it eventually become the heart of my Android Cyberdeck project?


    This experiment started when I began looking into cyberdecks and different ways of building one myself. Most of the builds I found were based around single-board computers such as the Raspberry Pi, but that got me thinking about hardware I already had available.

    One device that immediately came to mind was the Xiaomi Redmi A3. It’s an inexpensive Android phone that I had already had it laying in my drawer. featured in an unboxing and first impressions post, and rather than leaving it sitting unused, I started wondering whether it could become the foundation of a cyberdeck.

    Before turning the Redmi A3 into a Linux experiment, I had already used the phone for around two months as a normal daily device. You can check out the unboxing and first impressions here.

    A smartphone already includes most of the hardware needed for a small portable computer: a display, battery, storage, Wi-Fi, Bluetooth and an ARM-based system. Reusing one would also fit perfectly with the idea behind Open Boot Lab — experimenting with hardware I already own instead of immediately buying something new.

    Before thinking seriously about the enclosure, keyboard and the rest of the hardware, there was one important question I needed to answer:

    Can the Xiaomi Redmi A3 actually run a usable Linux environment?

    The first goal was simple: use Termux to try running Debian inside Android and see how far I could get.

    If it worked, the Redmi A3 could become the foundation of the first Android Cyberdeck prototype. If it didn’t, I’d have to find another way forward.


    With the idea in place, it was time to see what the Redmi A3 could actually do.

    I didn’t want to unlock the bootloader, replace Android or make any permanent changes to the phone. For this first test, I wanted something simple that would let me experiment with Linux while keeping Android intact.

    I decided to use Termux, which provides a Linux-like terminal environment directly inside Android. From there, the plan was to use proot-distro to install Debian and run it alongside Android without requiring root access.

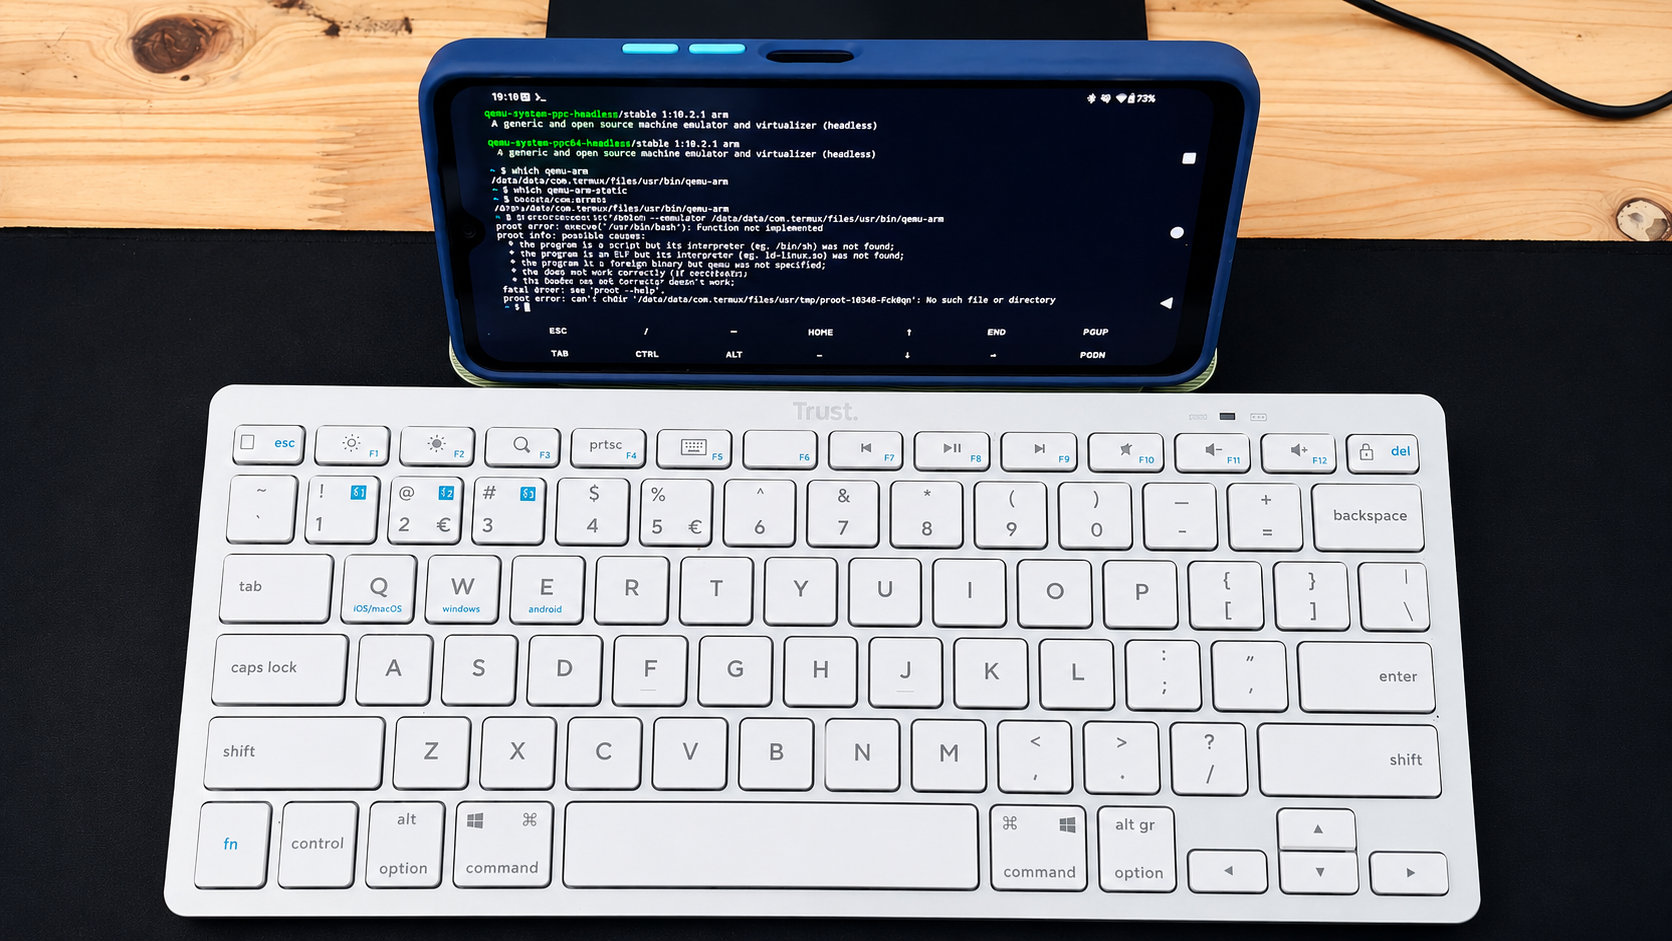
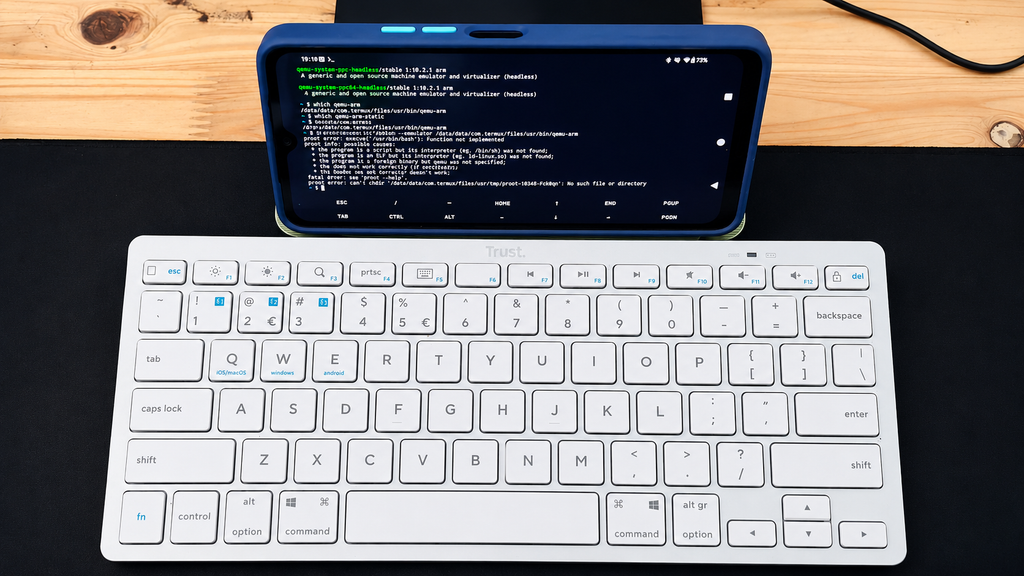
    To make testing easier, I also connected a Bluetooth keyboard to the Redmi A3. Typing commands directly on the phone’s touchscreen quickly becomes awkward, and using a physical keyboard made the setup feel much closer to the kind of portable computer I eventually want the Cyberdeck to become. For now, the keyboard was only there to make testing easier, but it was also the first small glimpse of what the finished setup could eventually look like.

    After installing Termux, I installed proot-distro and used it to set up a Debian environment.

    At this point, everything looked promising. Debian downloaded and installed, and it seemed like I was only a command away from having a usable Linux environment running on the Redmi A3.

    Then I tried to start Debian.

    Instead of opening a Debian shell, I got:


    The Exec format error was the first sign that this wasn’t going to be as straightforward as I expected.

    Debian appeared to install correctly, but the Redmi A3 couldn’t start the Bash executable inside the Debian environment. Rather than immediately giving up, I started checking what architecture Android and Termux were actually running on.

    First, I checked the architecture reported by the system:

    The result was:

    That was already interesting. I expected to be dealing with a modern 64-bit ARM environment, but the system was reporting simply arm. I then checked which architecture Termux itself was using:

    Again, the result was:

    Finally, I checked which CPU ABIs Android was exposing:

    The result made the situation much clearer:

    Android was exposing only 32-bit ARM ABIs to applications. This gave me the clearest indication yet of why the Linux experiment wasn’t behaving the way I initially expected and became the main clue for the next part of the troubleshooting.

    The Redmi A3 might still have enough hardware to make an interesting little computer, but the software environment was becoming the real obstacle.


    At this point, I knew that simply reinstalling Debian wasn’t likely to solve the problem. The Redmi A3 was exposing a 32-bit ARM environment, and proot-distro was still unable to start Debian’s Bash executable.

    Before giving up on the A3, I wanted to see if QEMU could provide a way around the architecture problem.

    I checked the available packages and installed QEMU support in Termux. The installed package was:

    I then checked where the ARM emulator was located:

    Termux returned:

    With qemu-arm available, I tried telling proot-distro to use it when starting Debian:

    Unfortunately, this didn’t get Debian running either. The workaround still failed to give me a usable Debian shell.

    I could probably continue digging deeper into QEMU, different root filesystems and other workarounds, but by this point the experiment was starting to move away from the original goal. I wasn’t trying to prove that Linux could be forced to run on the Redmi A3 at any cost , I wanted to find out whether the phone would make a practical base for a Cyberdeck.

    So far, the answer wasn’t looking particularly promising.


    So, can the Xiaomi Redmi A3 run Linux?

    The answer from this experiment is: not in the simple way I was hoping for.

    Termux itself works on the phone, and proot-distro was able to download and install a Debian environment. The problem appeared when it was time to actually start Debian. The Exec format error, combined with Android exposing only armeabi-v7a and armeabi, pointed towards the Redmi A3’s 32-bit Android userspace becoming a major limitation for this particular setup.

    I also tried using QEMU as a possible workaround, but that still didn’t give me a usable Debian environment.

    That doesn’t necessarily mean running Linux on the Redmi A3 is impossible. There may be other approaches, different distributions or more complicated workarounds that could get further than I did. But that wasn’t really the point of this experiment.

    I wanted a phone that could become a practical base for the Android Cyberdeck, something I could run Linux on without spending more time fighting the platform than actually building the project.

    For that purpose, the Redmi A3 isn’t the right choice for me. But the Cyberdeck project isn’t stopping here. The next candidate is a Xiaomi Redmi 15C 5G. Before doing anything else with it, I’ll check whether Android exposes a proper 64-bit ARM environment and then repeat the Linux experiment.

    If that works, the 15C 5G could become the hardware at the center of the first Cyberdeck prototype.

    The experiment continues.